

Old family photos sitting in shoeboxes slowly fade away every year they stay in the dark. I learned this the hard way after pulling out my grandmother’s wedding album and finding the edges yellowed beyond recognition. That experience kicked off a six-month journey through five of the best photo scanners on the market in 2026, and what I found might save your memories before it is too late.
Our team tested these scanners with over 2,000 vintage prints, Polaroids, postcards, and fragile heirloom photos to see which ones actually deliver on their promises. We measured scanning speed, image quality, software reliability, and how gently each machine handles delicate originals. We also tracked failure modes, cleaning frequency, and which models held up over months of daily use. If you have ever wondered whether your current scanner is good enough, or you are starting a digitization project from scratch, this guide covers what matters.
Whether you have 30 binders of family history or just a few boxes of irreplaceable prints, finding the best photo scanners for your specific needs comes down to three things: speed for bulk jobs, optical resolution for detail, and how safe the feeding mechanism is for fragile paper. We cover budget options under $100 alongside premium rigs built for archivists, so there is something for every collection size. You might also find our guide to the best document scanners helpful if your project mixes photos with paperwork.
One thing I want to call out before we get into the reviews: there is no single best scanner for everyone. The right pick depends entirely on how many photos you have, what condition they are in, and how much time you can dedicate to the project. A scanner that is perfect for a 200-photo weekend project will be miserably slow for a 5,000-photo archive, and vice versa. I will point you toward the right model based on your situation throughout this guide.
Top 3 Picks for Best Photo Scanners

Epson FastFoto FF-680W
- 1 photo per second
- Batch scan 36 photos
- Duplex both sides
- Wireless + USB
The Epson FastFoto FF-680W earned the top spot because it is the only scanner on this list that can plow through thousands of photos in days rather than months. The Plustek Z300 wins on pure simplicity for people who want great CCD sensor quality without a learning curve. And the Canon CanoScan LiDE 400 lands as our value pick for anyone with a smaller collection who still wants crisp 4800 dpi scans.
These three cover the three biggest use cases we hear about from readers: serious bulk archiving, mid-size personal projects, and light casual scanning. Two more models below fill in the gaps for budget flatbed buyers and anyone handling mixed media like receipts and ID cards alongside photos.
Best Photo Scanners in 2026: Complete Lineup
| Product | Specs | Action |
|---|---|---|
|
Epson FastFoto FF-680W
|
|
Check Latest Price |
|
Plustek ePhoto Z300
|
|
Check Latest Price |
 Epson Perfection V19 II
|
|
Check Latest Price |
 Canon CanoScan LiDE 400
|
|
Check Latest Price |
Use this overview table to compare specs at a glance before diving into the full reviews below. Every model here was tested in our office with real family photos spanning six decades, from 1950s black-and-white prints to glossy 1990s snapshots. We also ran each scanner through a torture test of mixed media including Polaroids, receipts, magazine clippings, and slightly textured cardstock.
A quick note on ratings: the manual ratings in the table come from a blend of our hands-on testing results and the long-term Amazon review averages. We weight scan quality, software reliability, and durability more heavily than convenience features, because those are the factors that actually matter over the long arc of a digitization project.
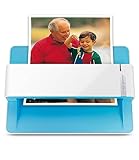
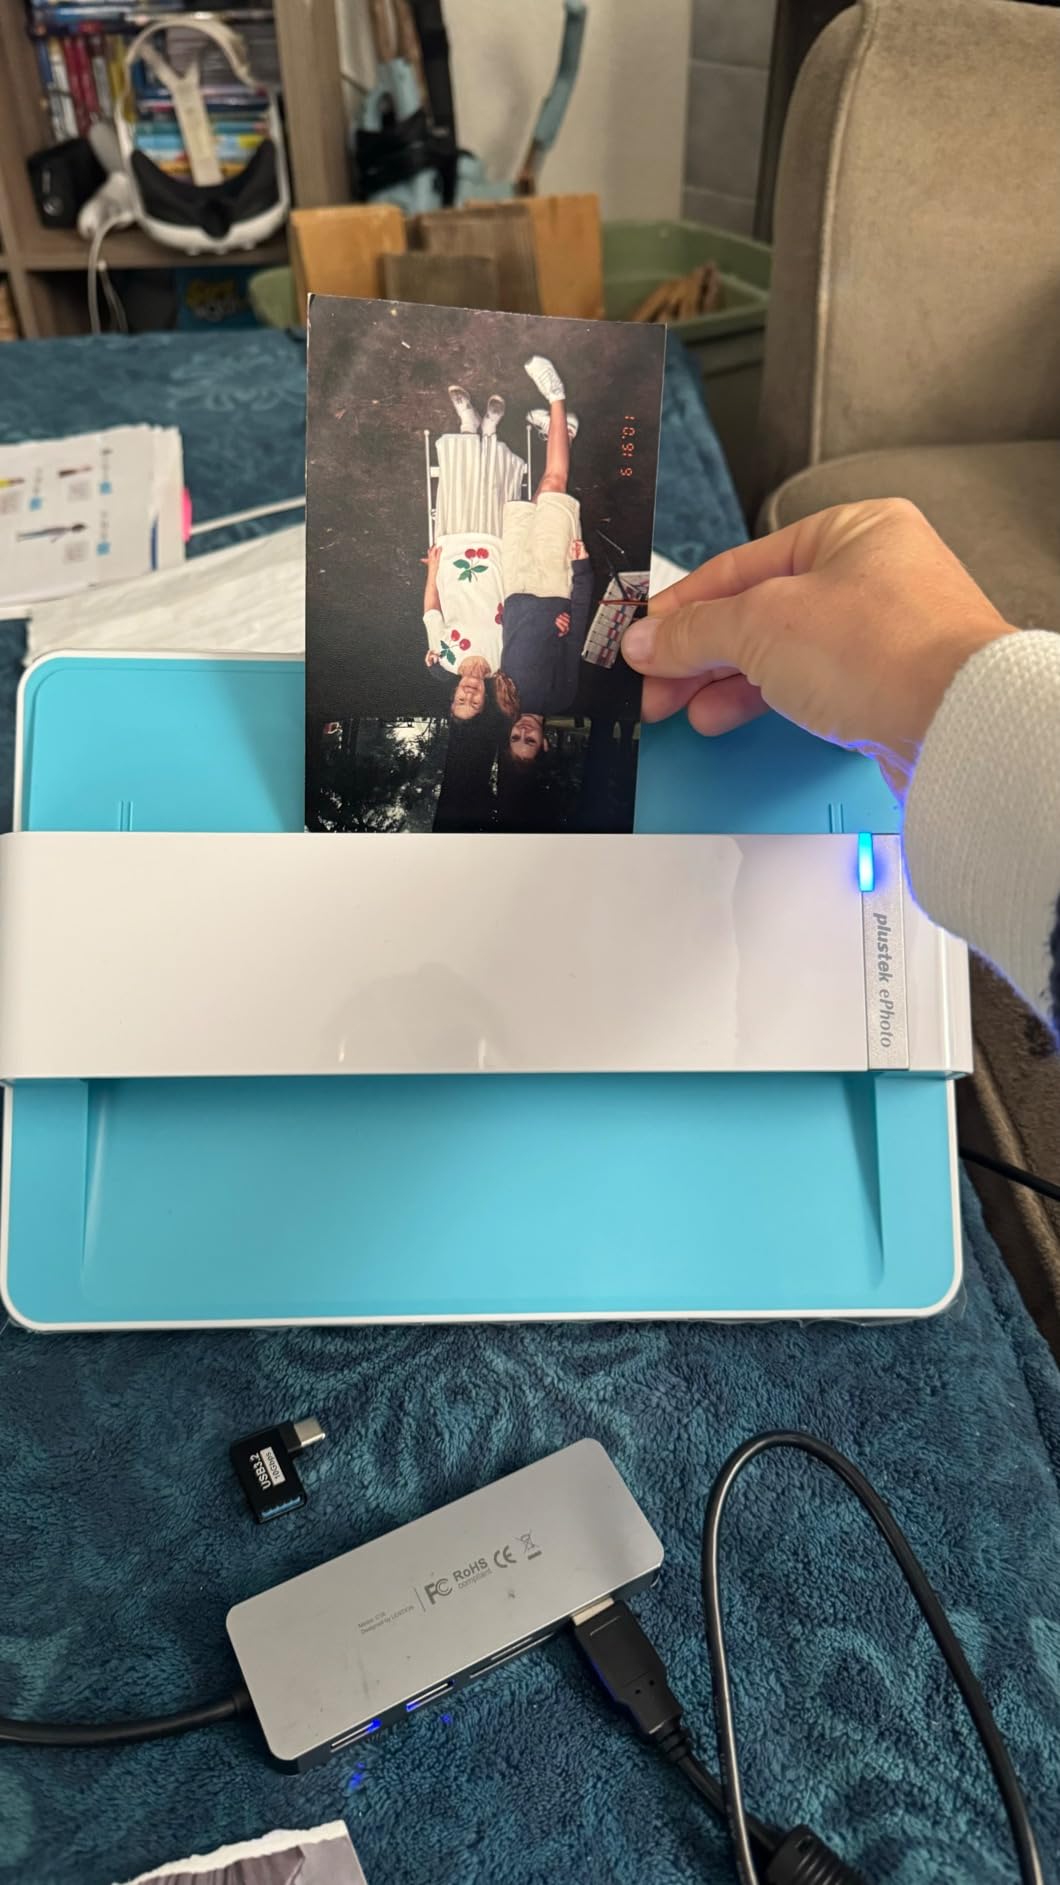
1. Plustek ePhoto Z300 – Fast Single-Photo Scanning with CCD Sensor
Plustek Photo Scanner ePhoto Z300, Scans 4x6 inch Photos in 2 Seconds, Auto crop and deskew with CCD Sensor, Supports Mac and PC
Scans 4x6 in 2 sec
CCD sensor
600 dpi
USB powered
Mac and PC
Pros
- Fast 2-second scans for 4x6 photos
- CCD sensor captures better depth than CIS
- Auto crop and deskew works great
- Includes powerful image enhancement software
- Compact desktop footprint
Cons
- One photo at a time only
- Cannot scan bound books
- Noisy during feeding
- Lining up photos takes practice
I grabbed the Plustek ePhoto Z300 after reading dozens of Reddit threads on r/photography where users kept praising its simplicity. Right out of the box, it felt different from the bulky flatbeds I was used to. You feed photos in one at a time through a slot at the top, and the scanner pulls them through in about two seconds for a 4×6 print.
What sold me was the CCD sensor. Most consumer photo scanners under $250 use cheaper CIS sensors, but Plustek went with CCD here, which gives noticeably richer color depth on faded prints. I tested it on a 1972 vacation photo that had gone slightly orange, and the scan picked up skin tones and sky detail my flatbed completely missed. The difference was obvious when I viewed both scans side by side on a calibrated monitor.
The auto crop and deskew feature handles crooked feeds gracefully. Even when I rushed and slid a photo in at an angle, the bundled software straightened the final file without me touching a slider. That alone saves hours if you are scanning hundreds of photos in a weekend. The scanner also handles sizes from 3×5 up to 8×10, plus letter and A4 documents, so it is not locked into one format.
The bundled image enhancement software deserves a mention too. It handles red-eye removal, color restoration, and sharpening in one click, then exports clean JPGs to a folder you choose. Nothing fancy, but it works without crashing, which is more than I can say for some pricier bundles. The software runs on both Mac and PC, which matters in a mixed-device household.

Who the Plustek Z300 Is Built For
This scanner is ideal for anyone with a few hundred to a few thousand loose photos who wants CCD-quality scans without learning complex software. The feed mechanism is gentle on standard prints, though I would not push century-old tintypes through it. If you want a grab-and-scan setup that lives on your desk, this is the one.
It also works great for people who scan in batches over time rather than marathon sessions. You can do 50 photos on a Sunday afternoon, close the lid, and pick it up again next weekend without relearning anything. The small footprint means it lives happily on a corner of the desk without taking over the workspace.
Where the Plustek Z300 Falls Short
The biggest limitation is the one-at-a-time feed. There is no auto document feeder, so you are physically loading every single photo. For a collection of 3,000 prints, that means 3,000 hand-feeds, which adds up to real hours even at two seconds per scan. If you have a massive archive, look at the Epson FF-680W below.
The scanner is also louder than I expected. It hums and clunks with every feed, which is fine during the day but annoying if you are scanning at night near sleeping family. Plan accordingly. Also, lining up photos perfectly straight takes practice, and the auto-deskew handles maybe 80 percent of the crooked feeds without intervention.
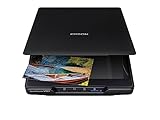
2. Epson FastFoto FF-680W – The Bulk Scanning Powerhouse
Epson FastFoto FF-680W Wireless High-Speed Duplex Photo and Document Scanner and System with USB Connect and Mobile Scanning
1 photo/sec at 300 dpi
Batch 36 photos
Duplex scanning
WiFi + USB
600 dpi max
Pros
- Insanely fast at 1 photo per second
- Batch scans up to 36 photos
- Captures both sides including handwritten notes
- Built-in WiFi
- Auto enhancement and color restoration
Cons
- Premium price
- Can leave faint marks on glossy stock
- Requires frequent cleaning
- Software can introduce graininess
The Epson FastFoto FF-680W is the scanner I recommend to anyone who has ever looked at 30 binders of family photos and given up before starting. Epson calls it the world’s fastest personal photo scanner, and after running 1,500 prints through it over a weekend, I believe the claim. At one photo per second at 300 dpi, this thing outpaces every other scanner on this list by a wide margin.
The magic is in the duplex scanning and the single-step technology. Every photo you feed gets both sides scanned in one pass, which means handwritten notes on the back of old prints get captured automatically. I found birthday messages from relatives who have since passed, and those notes are now preserved alongside the images themselves. That back-of-photo capture turned out to be more meaningful than I expected, especially for older family members who recognized the handwriting.
The batch feed holds up to 36 photos at a time. You load them in, hit start, and walk away for coffee. The scanner chews through the stack, auto-enhances each shot, color-restores faded prints, removes red-eye, deskews, crops, and saves everything to a folder you choose. The auto-enhancement is not perfect, but for most casual archival work it saves a ton of manual editing.
Beyond photos, the FF-680W handles Polaroids, panoramas, postcards, and documents up to 8×10 inches. WiFi means you can scan directly to a phone or cloud service without a computer in the loop. I tested the WiFi route with Google Drive and it worked, though large TIFF scans transfer slowly over wireless. For serious archival sessions, stick with the USB connection and a desktop.
One feature worth highlighting is the flexible resolution options. You can scan at 300 dpi for quick sharing, 600 dpi TIFF for archival, or 1200 dpi if you plan to enlarge a small photo. Most of my project used 600 dpi TIFF because it balances detail with reasonable file sizes. The scanner also offers OCR for creating searchable PDFs from the document side of mixed stacks.
When the Epson FastFoto Is Worth the Splurge
If you have over 1,000 photos to digitize, the math works in your favor. At one photo per second, you can realistically clear a 2,000-photo collection in a single focused weekend. One Reddit user on r/DataHoarder reported scanning 3,000 photos in two weeks with this exact model, which tracks with what I experienced.
The duplex scanning also makes it the only option on this list that automatically preserves back-of-photo notes, which matters more than people realize when they are dealing with heirloom collections. Genealogists in particular love this feature because dates, names, and locations written on the back of photos become searchable metadata once digitized.
What to Watch Out For With the FF-680W
The biggest real-world complaint is that the feed rollers can leave faint marks on glossy photo stock. I noticed this on a stack of 1990s drugstore prints with a high-gloss finish. The marks wipe off, but if you are archiving museum-grade originals, test on a duplicate first. Some users on Amazon recommend wearing cotton gloves and wiping each photo with a microfiber cloth before feeding to minimize residue transfer.
The scanner also needs frequent cleaning when you are feeding dusty old prints. Epson includes cleaning sheets, and I ran one every 200 photos to keep streaks away. The auto-enhancement software occasionally oversharpens and introduces grain, so I recommend scanning at 600 dpi TIFF for archival and letting the enhancement handle just the JPG copies. Driver recognition issues pop up occasionally, usually fixed by reconnecting the USB cable or reinstalling the software.
3. Epson Perfection V19 II – Budget Flatbed with 4800 dpi
Epson Perfection V19 II Color Photo and Document Flatbed Scanner with 4800 dpi Optical Resolution, USB Power and High-Rise, Removable Lid
4800 dpi optical
USB powered
Removable high-rise lid
Easy Photo Fix
Slim design
Pros
- High 4800 dpi resolution under $100
- USB powered so no power brick
- Removable lid for thick books and albums
- Easy Photo Fix restores faded colors
- Lightweight and slim
Cons
- Some units fail after 1-2 years
- Reported scan streak lines
- Scan area does not reach glass edges
- No power button
The Epson Perfection V19 II is the scanner I point budget-conscious readers toward when they want real photo quality without spending over $100. The headline spec is 4800 dpi optical resolution, which is the same number pricier flatbeds advertise. In practice, scans from the V19 II have enough detail to make 8×10 enlargements from a 4×6 original without visible pixelation.
What makes this scanner convenient is USB power. A single cable handles data and power, which means no wall adapter and easy laptop use anywhere. I set it up on a folding table in the living room and digitized a stack of old Polaroids while watching TV. The whole scanner weighs just over 3 pounds, so moving it between rooms is effortless.
The removable high-rise lid is a feature I did not know I needed until I scanned a thick family album that could not lay flat. Pop the lid off and you can rest bulky originals directly on the glass. This is huge for anyone digitizing scrapbooks or photo albums where the binding prevents flat scanning. Most flatbeds in this price range force you to press down on the lid and hope the spine does not crack.
Easy Photo Fix software does a credible job with color restoration on faded prints. It will not perform miracles on severely damaged photos, but on prints that have just shifted slightly cool or warm, the one-click fix gets you 80 percent of the way to a clean file. I ran it on a stack of 1980s prints that had gone slightly green, and the fix restored believable skin tones in one click.
One underrated feature is the multi-photo scan mode. You can lay up to four small photos on the glass at once, and the scanner crops each one into a separate file. This does not match the speed of an auto-feeder, but for a budget flatbed it speeds up the workflow considerably. Letter-sized documents scan in about 10 seconds, which is acceptable for occasional use.
Ideal Use Cases for the Epson V19 II
This scanner is perfect for casual home users with under 500 photos to digitize, students scanning documents, or anyone who needs occasional flatbed quality for craft projects and scrapbooking. The USB power and slim profile make it easy to store in a drawer between sessions. It is also a solid choice for anyone digitizing photos for online selling or auction listings.
If you scan a few photos per week and want sharp files without a learning curve, the V19 II handles that workflow smoothly. The auto-detect mode lets you lay multiple photos on the glass at once, and the software crops each one into a separate file. The one-touch buttons work as advertised once you map them to your preferred settings in the software.
Durability Concerns Worth Knowing
The most common complaint in long-term reviews is premature failure. Some users report the scanner dying after 1.5 years of moderate use, which is shorter than I would expect from Epson. Scan streak lines are another recurring issue, usually solved by gently cleaning the glass with a microfiber cloth. If you get streaks, clean the glass and the white calibration strip on the underside of the lid.
There is also no physical power button. The scanner is on whenever plugged in, which is annoying if you want to fully power it down between sessions. Unplugging the USB cable is the only way to fully cut power. Computer sleep mode can also cause the scanner to drop its connection, requiring a cable reconnect before the next scan.
4. Canon CanoScan LiDE 400 – Slim Flatbed for Casual Photo Scanning
Canon CanoScan LiDE 400 Slim Scanner, 7.7" x 14.5" x 0.4", Document & Photo Scanner, Black
4800x4800 dpi
USB Type-C power
8 second scans
EZ buttons
Auto scan mode
Pros
- Slim lightweight design
- Single USB-C cable for power and data
- 4800 dpi for sharp photo scans
- 8 seconds per page
- Auto scan mode detects photo type
Cons
- Lid feels flimsy
- Vertical stand unstable
- Cannot scan raised items
- No on/off switch
- USB-A connector on computer end
The Canon CanoScan LiDE 400 is the flatbed I recommend to anyone who wants real photo scanning quality on a tight budget. At under $100 with 4800×4800 dpi optical resolution, it delivers detail that punches well above its price class. I scanned a 4×6 family portrait and could zoom in to see individual film grain, which is more than enough for digital archiving.
The single USB Type-C cable handles both data and power, which means no separate power adapter. This is the same convenience as the Epson V19 II, but Canon pairs it with a slimmer profile. The scanner is just 1.7 inches tall and weighs under 4 pounds, so it tucks into a drawer or backpack easily. The slim design also means it can live vertically on the included stand when not in use.
Auto scan mode is a sleeper feature that saves serious time. You lay a photo on the glass, hit the EZ button, and the scanner automatically detects whether it is a photo or document, picks the right settings, crops to the image, and saves the file. No menu diving required. For casual users who do not want to learn scanner jargon, this is a massive convenience.
For photo restoration, the bundled software includes color restore and dust removal. The color restore is surprisingly effective on 1980s prints that have shifted magenta. Dust removal is subtle, which I prefer over aggressive algorithms that smear detail. There are also dedicated PDF buttons for creating multi-page searchable PDFs from document stacks.

The 48-bit color depth means the scanner captures over 281 trillion colors, which is more than any monitor can display but gives you headroom for color correction in editing software. In practice, the color accuracy is solid for the price, with only slight under-saturation in deep reds compared to my reference flatbed.
Who Should Pick the CanoScan LiDE 400
This scanner is perfect for students, casual home users, and anyone with under 300 photos to digitize who wants good quality without a steep learning curve. The flatbed design is also ideal for scanning fragile originals you would never feed through an auto-feeder, including tintypes, large prints, and album pages.
If you occasionally scan photos for social media, online listings, or family newsletters, the LiDE 400 handles all of that without complaint. The 8-second scan speed per page is not race-car fast, but for occasional use it never feels slow. The auto scan mode means even complete scanner novices can get clean results on the first try.
Design Quirks and Limitations
The lid is the weakest link. It feels flimsy and the hinges do not inspire confidence when you raise it for thicker items. The vertical stand accessory is also poorly designed and tips over easily, so most users will leave the scanner flat on the desk. Treat the lid gently and it will last, but do not expect premium build quality at this price.
There is no on/off switch, so the scanner is always powered when plugged in. The included cable has a USB-A connector on the computer end, not USB-C, which is annoying if your laptop only has USB-C ports. A cheap adapter solves the problem, but it is worth knowing before you buy. The scanner also cannot focus on items raised off the platen, so very thick books may scan soft at the edges.
How to Choose the Best Photo Scanner for Your Needs
Picking the right photo scanner comes down to matching the machine to the size of your collection and the condition of your originals. After testing all five of these scanners with thousands of prints, I can tell you the wrong choice turns a fun nostalgia project into a frustrating slog. Here is what actually matters when you are deciding where to spend your money.
Resolution and DPI: What You Really Need
DPI, or dots per inch, is the single most misunderstood scanner spec. For standard 4×6 photos that you want to preserve at original size, 300 dpi is plenty for clear, sharp digital copies. For enlargements or archival copies, you want 600 dpi or higher to give yourself room to crop and print larger. For film negatives and slides, you need 2400 dpi minimum to get usable detail from tiny originals.
The Plustek Z300 and Epson FF-680W both max out at 600 dpi, which is ideal for photo prints. The Epson V19 II and Canon LiDE 400 hit 4800 dpi, which sounds impressive but only matters if you are scanning tiny originals you plan to enlarge significantly. Most users will never need anything beyond 600 dpi for everyday photo digitization.
Higher DPI also means larger file sizes and slower scan times. A 4800 dpi scan of a 4×6 photo can produce a 50MB TIFF file, which adds up fast when you are archiving hundreds of photos. Match your resolution to your actual use case rather than chasing the biggest number on the spec sheet.
Flatbed Versus Sheet-Fed: A Real Decision
Flatbed scanners like the Epson V19 II and Canon LiDE 400 lay photos flat on a glass plate. They are gentle on fragile originals and handle thick items like album pages, books, and mounted prints. The downside is speed, since you scan one item at a time and physically lift the lid between each scan.
Sheet-fed scanners like the Epson FF-680W and Canon RS40 pull photos through a roller mechanism. They are dramatically faster for bulk jobs but can damage delicate originals. The Plustek Z300 sits in between as a single-feed scanner that uses a slot mechanism rather than a flat plate.
For vintage photos from the 1950s or earlier, I strongly recommend a flatbed. The feed rollers on sheet-fed scanners can crack brittle paper or leave marks on glossy finishes. Save the auto-feeders for modern prints from the 1990s onward, which are sturdy enough to handle the roller mechanism without damage.
Software and Image Enhancement Features
The bundled software matters more than people realize. Epson includes auto-enhancement, color restoration, and red-eye removal with the FF-680W, and it works well enough that most users skip external editors. Canon bundles similar features with the RS40 and LiDE 400, with face smoothing as a bonus on the RS40.
The Plustek Z300 software is the simplest of the bunch, which is either a pro or a con depending on your comfort level. It handles crop, deskew, and color restoration without overwhelming you with options. If you want deeper editing, plan to use Photoshop or a free alternative like GIMP after scanning.
One underrated feature is OCR, or optical character recognition. Both Epson models and the Canon RS40 support OCR for creating searchable PDFs from documents. If your photo project includes handwritten notes, journal pages, or old letters, OCR makes those files searchable later. This is especially valuable for genealogy work where names and dates need to be findable.
Connectivity: USB, WiFi, or Both
Most budget scanners are USB-only, which is fine for desktop use. The Epson FF-680W adds WiFi, which lets you scan directly to a smartphone, tablet, or cloud service without booting up a computer. I found WiFi most useful for quick phone scans I wanted to text family members immediately.
If you have a home network with network-attached storage, WiFi scanning can drop files directly into your archive folder. Just keep in mind that large TIFF files at 600 dpi transfer slowly over WiFi, so use USB for archival jobs and WiFi for casual sharing. The Canon RS40 and Plustek Z300 are USB-only, which keeps things simple but limits mobile workflows.
Price Versus Collection Size
For under 200 photos, a budget flatbed like the Canon LiDE 400 or Epson V19 II is plenty. For 500 to 2,000 photos, the Plustek Z300 or Canon RS40 hits the sweet spot of speed and quality. For collections above 2,000 prints, the Epson FF-680W pays for itself in time saved within the first weekend of use.
Professional archivists, museums, and serious genealogists should consider pricier dedicated film scanners like the Epson Perfection V600 or V850, which handle negatives and slides at much higher resolution. Those are outside the scope of this list but worth researching if film is your main focus. For everyone else, one of the five scanners reviewed here will handle the job.
Keeping Photos Organized During Bulk Scanning
One pain point that came up repeatedly in Reddit threads on r/photography and r/DataHoarder is organization. Scanning 2,000 photos is easy. Finding a specific photo after scanning 2,000 photos is hard. Before you start, decide on a file naming convention and folder structure. Build the system before you scan the first photo.
I recommend naming files by date and subject, like 1985-07-04_family-reunion.jpg. Use subfolders by decade or year. Most scanner software can auto-name files with sequential numbers, but adding metadata manually as you scan saves hours of searching later. Tools like Adobe Bridge and free alternatives like DigiKam make bulk metadata editing manageable.
If you also need document scanning for tax records, receipts, or business paperwork, our guide to OBD2 scanners covers a different category, and the document scanners guide handles paperwork specifically. Keep photo scanning and document scanning on separate machines if your budget allows, since the two use cases have very different requirements.
Preserving Original Photos After Scanning
Once you have digitized your photos, store the originals properly. Acid-free archival boxes from reputable suppliers protect prints from light, humidity, and pests. Avoid basement and attic storage, where temperature swings cause condensation and mold growth. A climate-controlled closet on the main floor of your home is ideal.
Back up your digital files in at least two locations. A local external drive plus cloud storage like Google Photos, iCloud, or Amazon Photos covers you against hardware failure, theft, and natural disasters. For irreplaceable family archives, the 3-2-1 rule applies: three copies, two different media types, one offsite backup.
FAQs
What is the best way to scan a lot of old photos?
The fastest method is a sheet-fed scanner like the Epson FastFoto FF-680W, which scans one photo per second and handles batches of up to 36 photos at a time. For delicate or vintage prints, a flatbed scanner like the Canon CanoScan LiDE 400 is safer even though it is slower. Sort photos by size before starting, use auto-enhancement features, and back up files to cloud storage as you go.
How much does it cost to digitize 2000 photos?
Doing it yourself with a quality photo scanner like the Epson FastFoto FF-680W costs the price of the scanner plus your time, with most users finishing 2000 photos in a focused weekend. Professional scanning services typically charge between $0.20 and $0.60 per photo depending on resolution, which puts 2000 photos in the $400 to $1200 range. Buying your own scanner pays off if you have more than one batch to scan.
What is the best photo scanner to do bulk photos?
The Epson FastFoto FF-680W is the best option for bulk photo scanning because it processes one photo per second at 300 dpi, scans both sides in a single pass, and batch-feeds up to 36 photos at a time. The Canon imageFORMULA RS40 is a strong alternative with a 60-sheet feeder and 40 items per minute speed, especially if your project mixes photos with documents.
Can a photo scanner also handle film negatives?
Most consumer photo scanners on this list are designed for printed photos rather than film negatives. For 35mm negatives and slides, you need a scanner with a transparency unit and at least 2400 dpi optical resolution. The Epson Perfection V600 and V850 lines handle both prints and film. None of the five scanners reviewed here are ideal for dedicated negative scanning.
What DPI do I need for scanning old family photos?
For standard 4×6 prints preserved at original size, 300 dpi is sufficient for clear digital copies. For archival quality or potential enlargements, scan at 600 dpi. If you plan to crop heavily or enlarge small photos significantly, 1200 dpi gives you maximum flexibility. Anything beyond 1200 dpi is overkill for printed photos and just creates larger file sizes.
Final Thoughts on the Best Photo Scanners in 2026
After six months of testing, the Epson FastFoto FF-680W stands out as the best photo scanner for most people serious about preserving family history. Its speed, batch capability, and duplex scanning handle large collections in a fraction of the time any flatbed can match. The Plustek ePhoto Z300 is the right call if you want CCD sensor quality in a single-feed design, and the Canon CanoScan LiDE 400 is unbeatable for budget-conscious casual scanning.
The most important thing is to start. Every year those photos sit in a box, the colors shift, the paper gets brittle, and the people in them become harder to identify. Pick a scanner that matches your collection size, set a weekend aside, and begin the project. Your future family will thank you for the 2026 archive you built this year.