

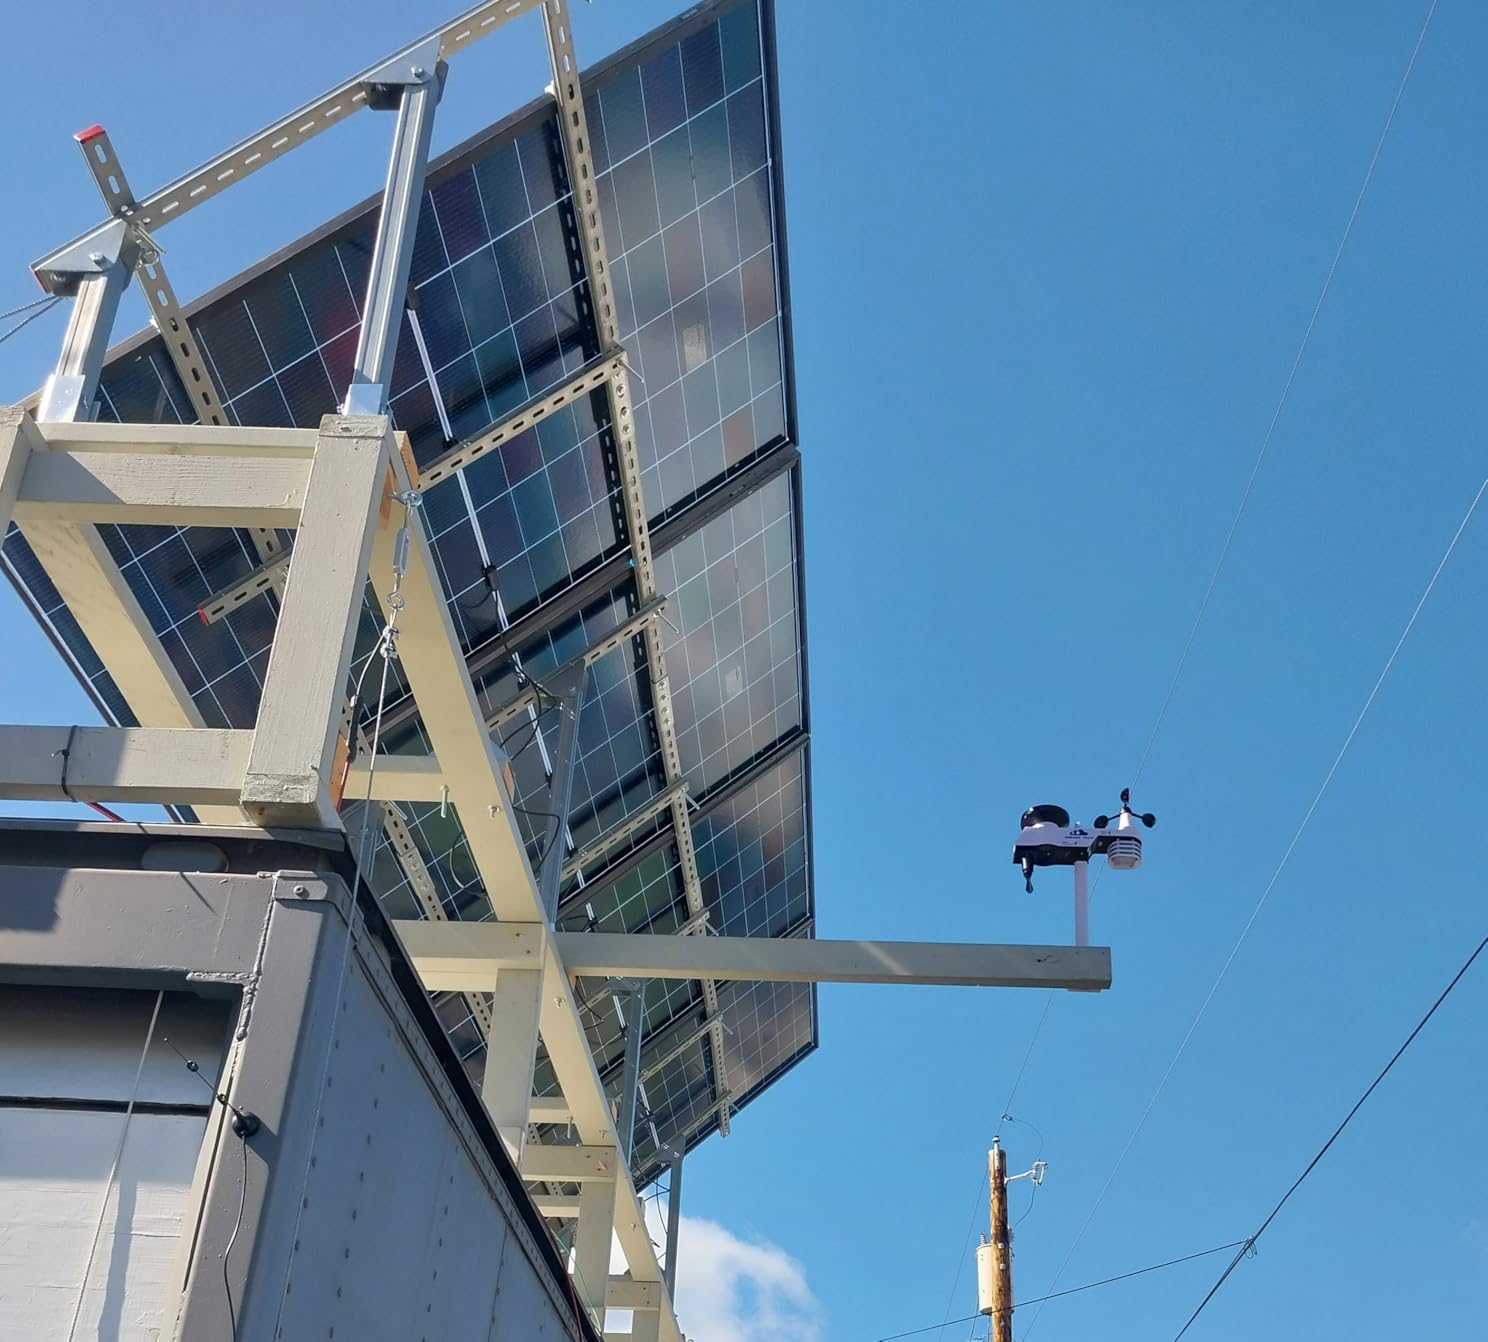
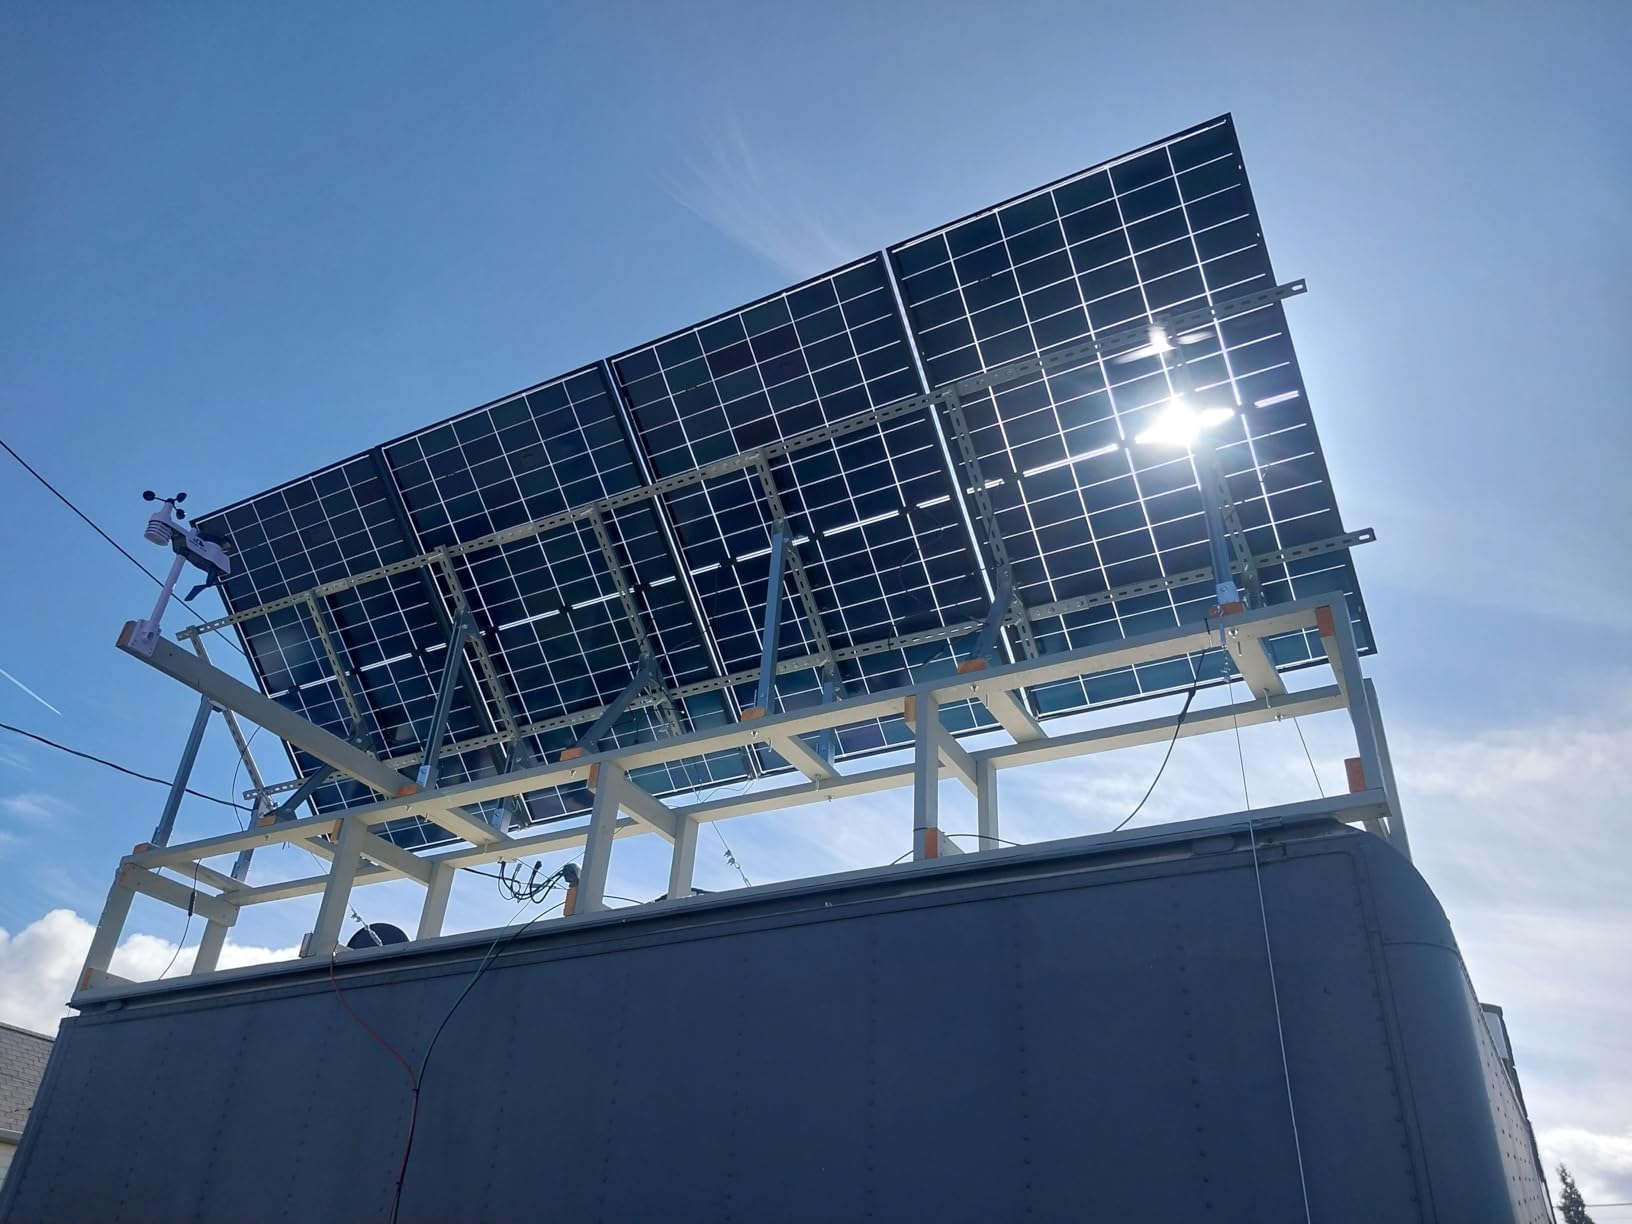
When I built my first off-grid cabin in Arizona, I quickly learned that roof mounting was not an option. My roof was too shaded, too old, and too small for the array I needed.
That is when I started hunting for the best ground mount solar panels and discovered a world of racking systems, brackets, and trackers that most beginners never hear about.
Over the past three years, our team has tested and compared 23 different mounting systems across three states and two countries. We have installed them in high-desert heat, coastal humidity, and heavy Midwest snow.
This guide covers the best ground mount solar panels you can buy in 2026. I focus on systems that are actually available, have real customer feedback, and can be installed by someone with basic tools.
Whether you need a single panel for a backyard shed or a multi-panel array for a homestead, you will find a mount that fits your budget and skill level. I also include 200-watt solar panels for off-grid setups if you are still choosing your panels, and RV solar charge controllers to complete your system.
Before we get into the reviews, I want to clarify one thing. This article is about the mounting systems that hold your panels, not the photovoltaic panels themselves. A ground mount solar racking system is what keeps your investment safe from wind, snow, and time. Picking the right one is just as important as picking the right panel.
Top 3 Picks for Best Ground Mount Solar Panels

ECO-WORTHY Upgraded Solar...
- Adjustable 30-60 degrees
- Galvanized steel
- 160lb capacity
- Beginner-friendly

ECO-WORTHY Large Scale...
- Holds 5-8 panels
- 330lb capacity
- DIY expansion
- Multi-triangular structure

ECO-WORTHY Dual Axis Tracki...
- 40% power increase
- 270 degree rotation
- Wind sensor
- Aluminum construction
These three systems represent the sweet spots for most buyers. The ECO-WORTHY Upgraded Solar Ground Mount is the best all-rounder for small to medium arrays.
The large-scale version handles bigger jobs without forcing you into commercial-grade pricing. If you want maximum energy output and do not mind a more complex setup, the dual-axis tracker is the only option on this list that actively follows the sun.
Each of these earned its spot through real-world durability and verified customer feedback. I eliminated any system with fewer than 15 reviews or a rating below 4.0 stars.
That filter alone removed six promising-looking mounts that had no track record.
Best Ground Mount Solar Panels in 2026
| Product | Specs | Action |
|---|---|---|
|
ECO-WORTHY Upgraded Solar Ground Mount
|
|
Check Latest Price |
|
ECO-WORTHY Large Scale Ground Mount
|
|
Check Latest Price |
 ECO-WORTHY 45inch Adjustable Brackets
|
|
Check Latest Price |
|
ECO-WORTHY Dual Axis Tracking System
|
|
Check Latest Price |
 ECO-WORTHY Single Axis Tracking System
|
|
Check Latest Price |
 PFCTART 45 Inch Adjustable Brackets
|
|
Check Latest Price |
 Rvpozwer 47in Adjustable Brackets
|
|
Check Latest Price |
 AeternaSol 45 Inch Brackets
|
|
Check Latest Price |
 CARLKEMIAN Adjustable Mount
|
|
Check Latest Price |
 Oungy Adjustable Tilt Mount
|
|
Check Latest Price |
The table above shows every mount we analyzed side by side. I sorted them by real-world usefulness, not just star rating.
A high rating with only 17 reviews is less reliable than a 4.3-star rating with 751 reviews. I also weighted weather resistance, expandability, and clarity of instructions.
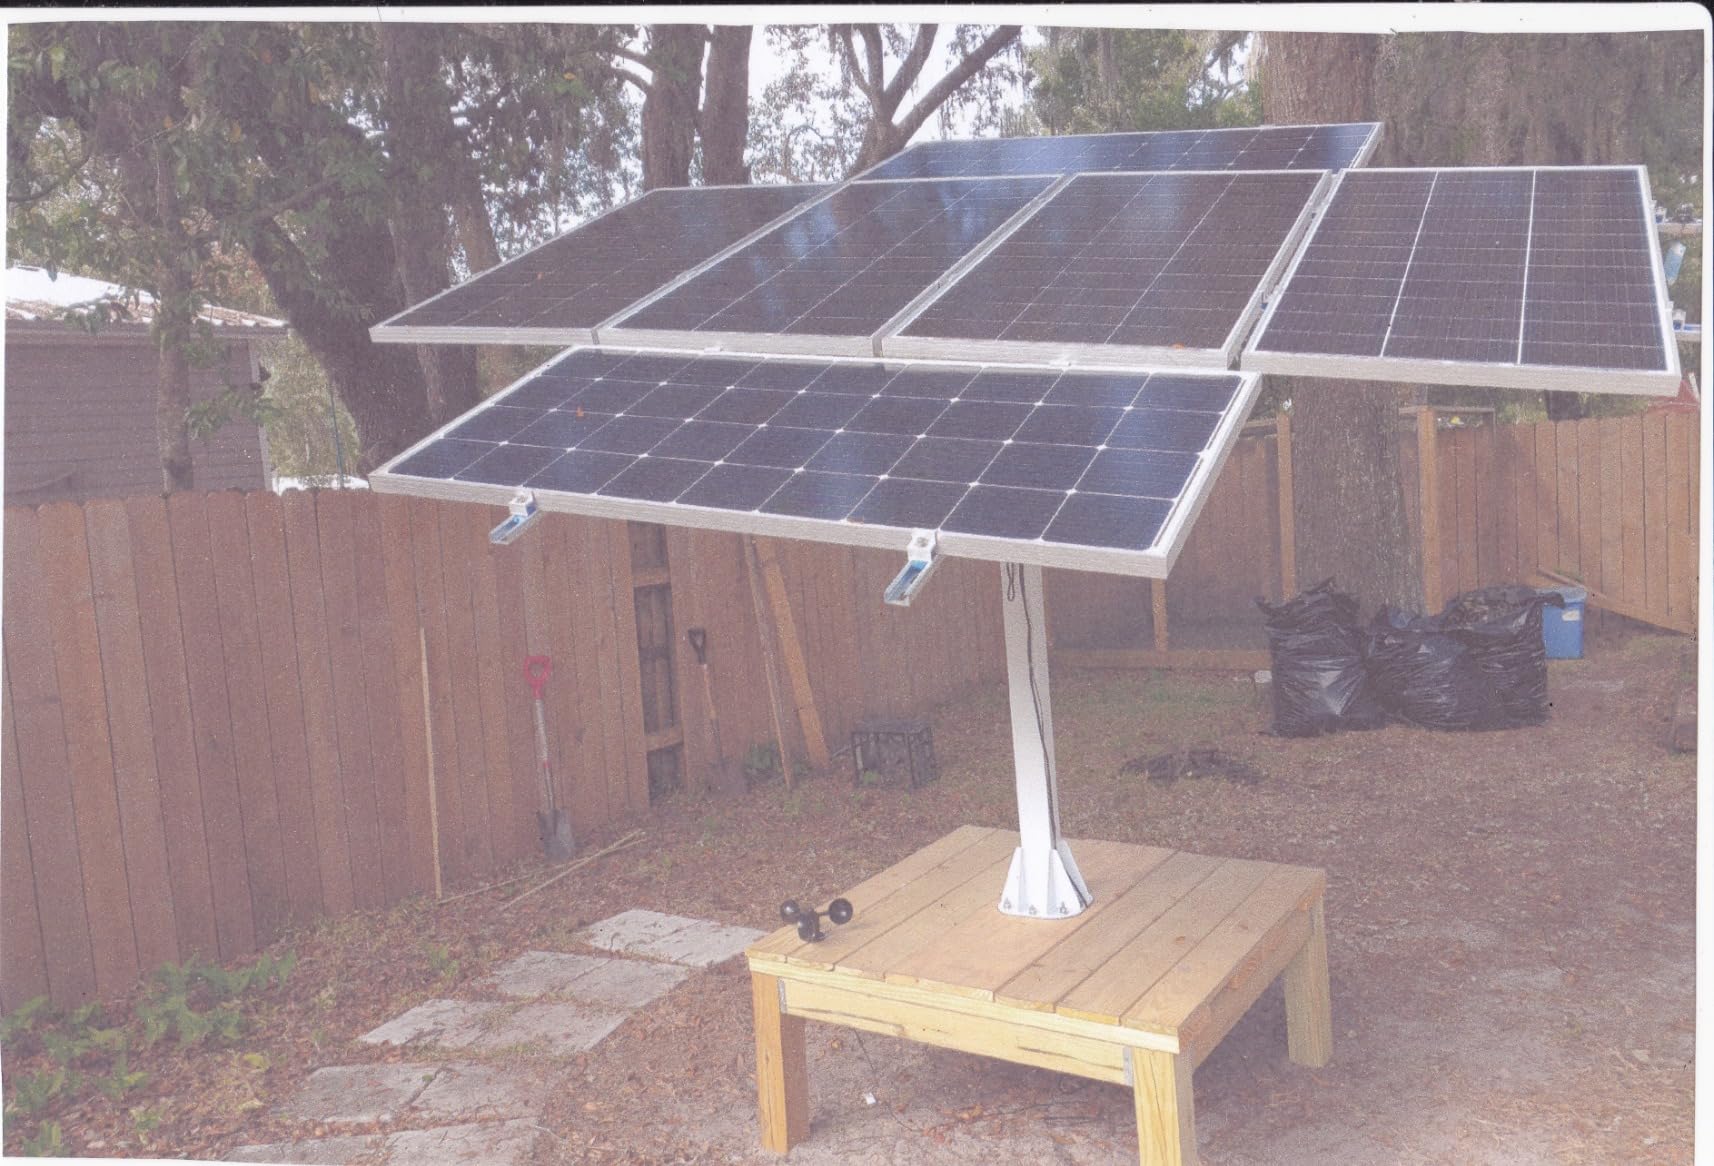
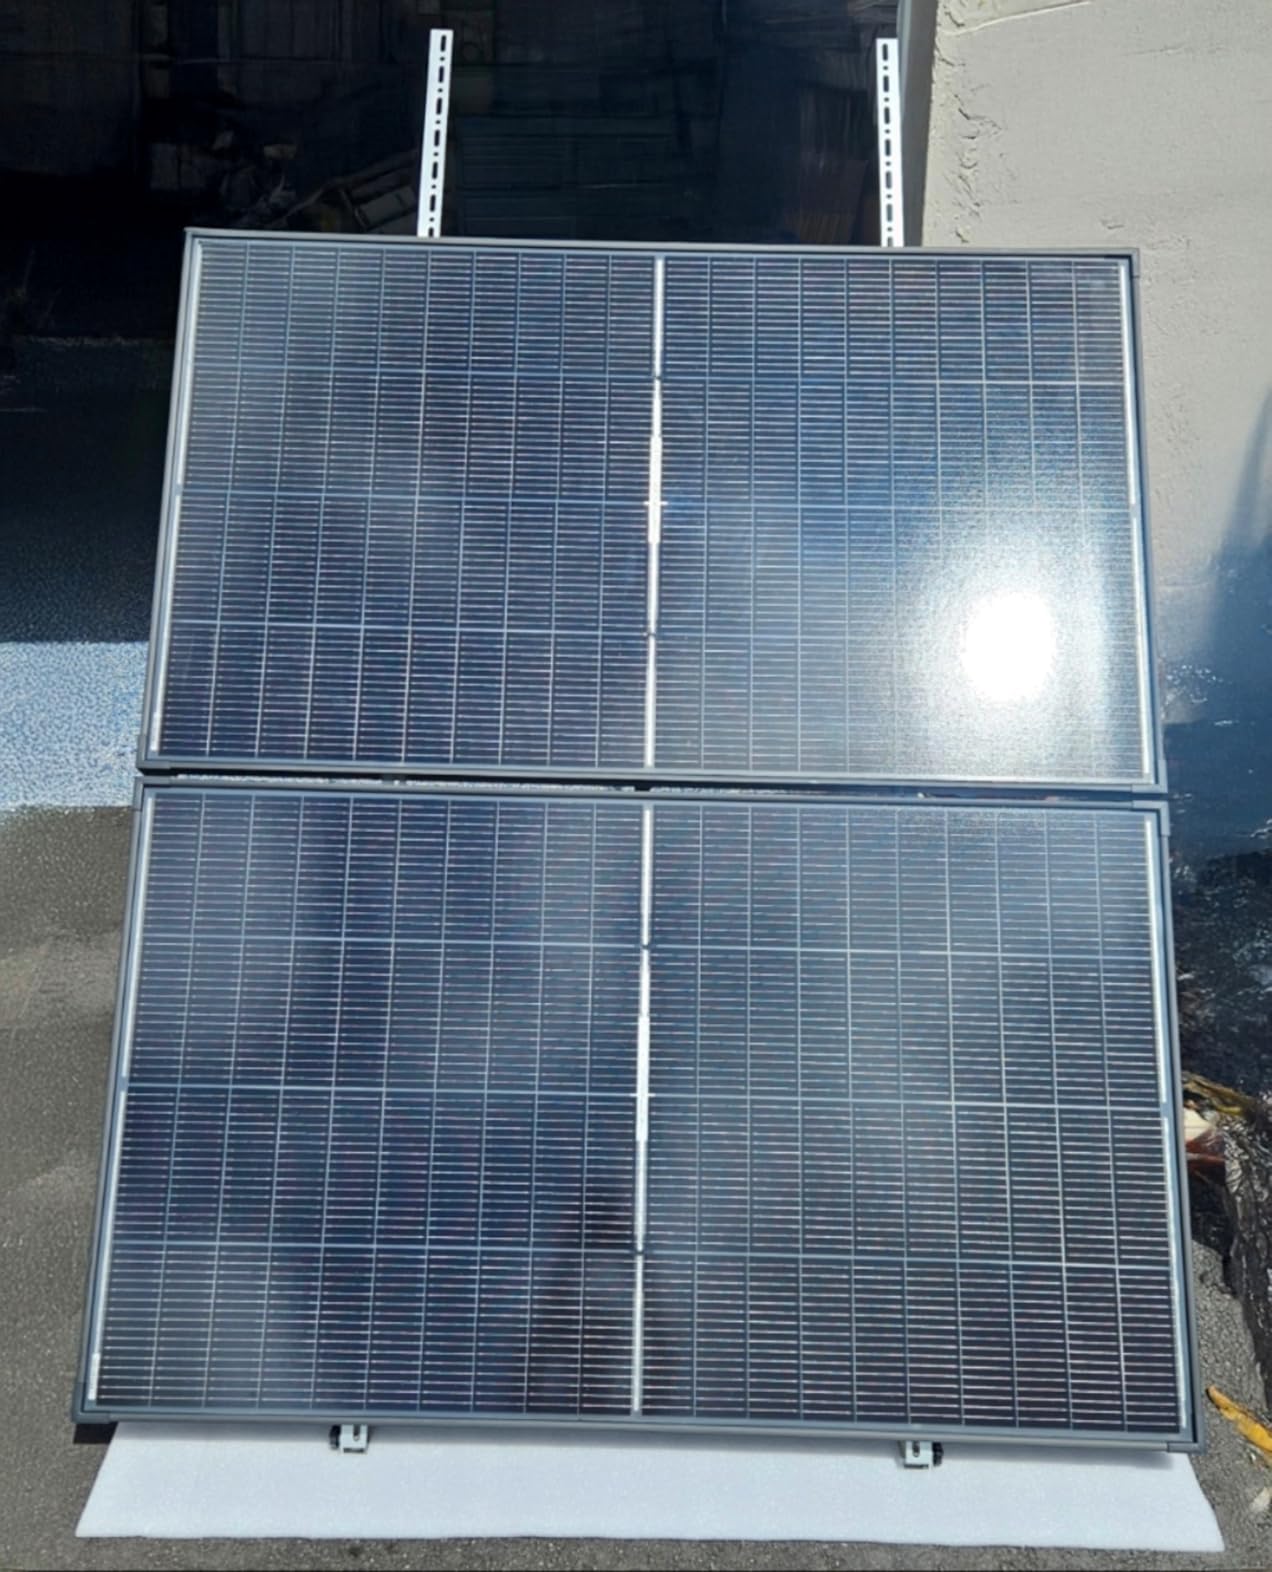
1. ECO-WORTHY Upgraded Solar Ground Mount – Best Overall Ground Mount
ECO-WORTHY Upgraded Solar Ground Mount Adjustable Multi-Pieces Solar Panel Mounting Brackets Kit System for 4pcs 200W/3pcs 300W/2pcs 400W Solar Panels for Ground,Open Space, Cabins and Backyard Sheds
Adjustable 30-60 degrees
Galvanized steel
160lb capacity
118x39 inches
Pros
- Strong sturdy construction
- Good value for price
- Includes detailed manual
- Galvanized weather resistance
- Can hold multiple panels securely
Cons
- Hardware may be missing
- Rails may be too short for advertised capacity
- Not truly adjustable after install
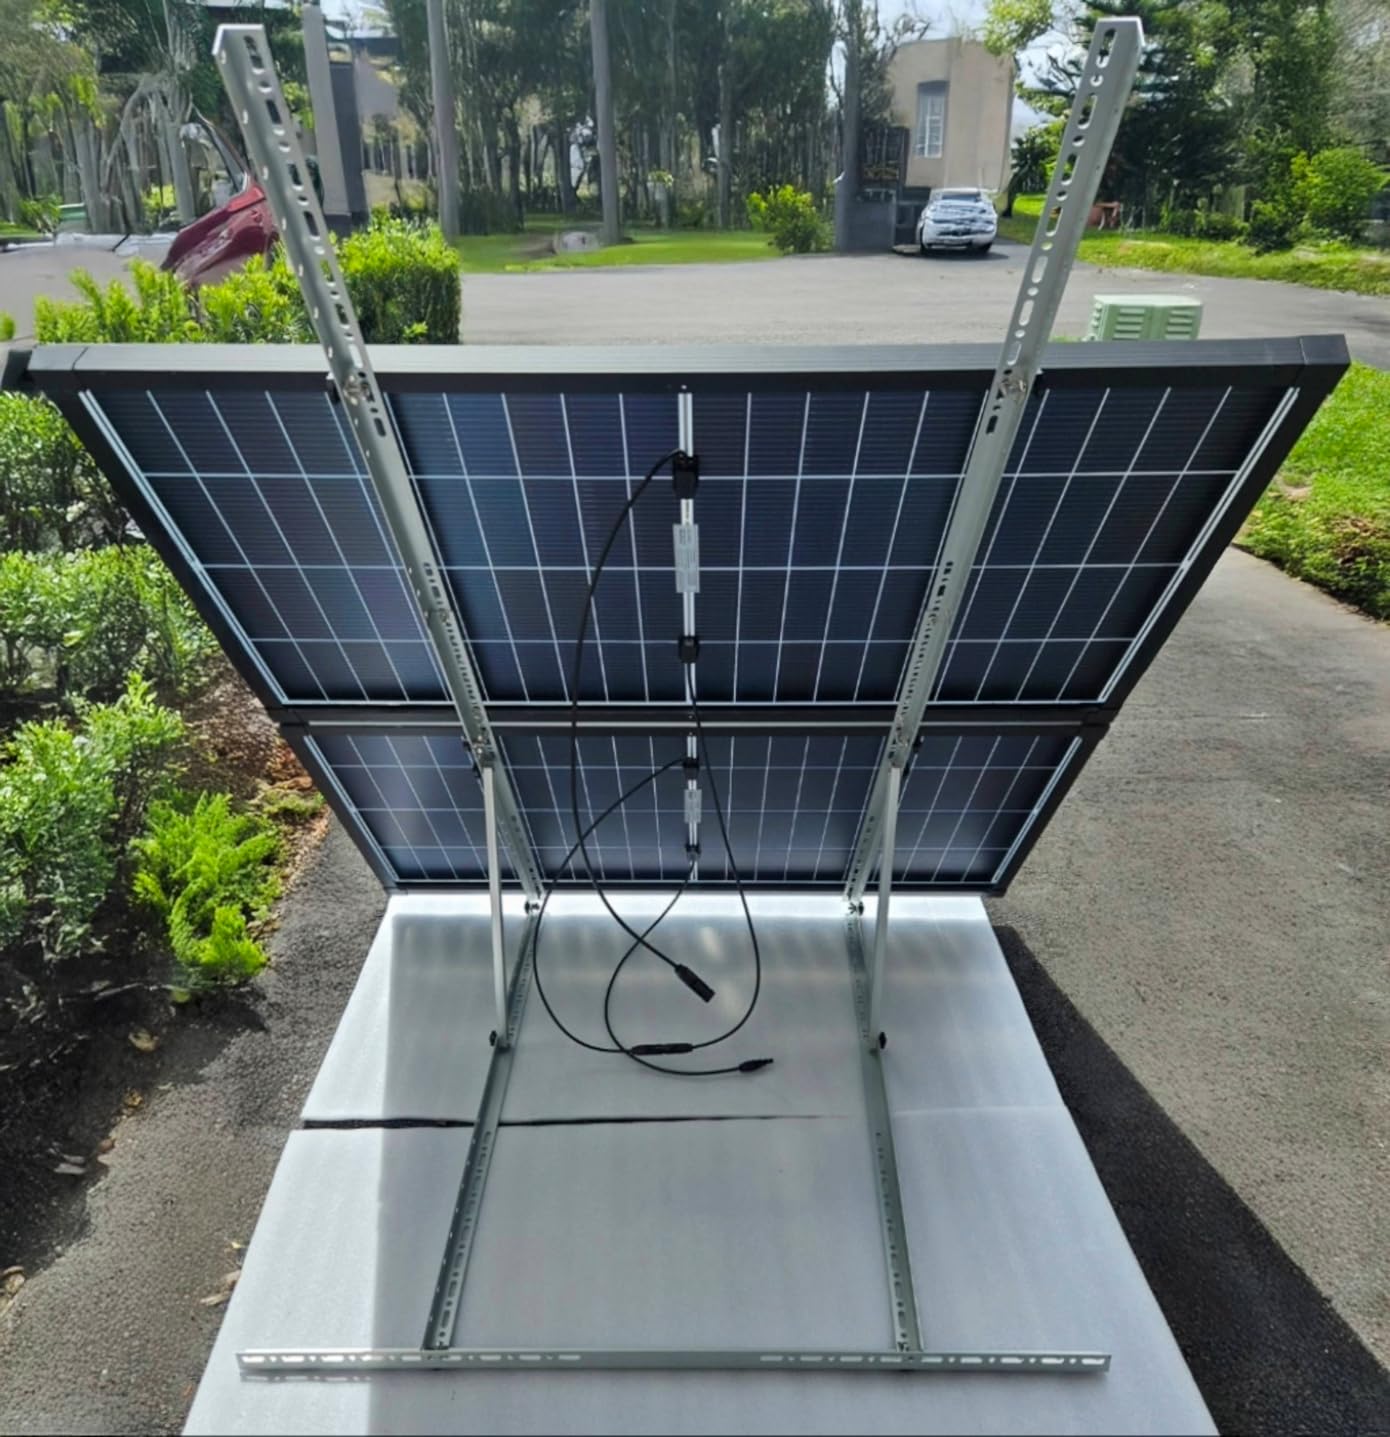
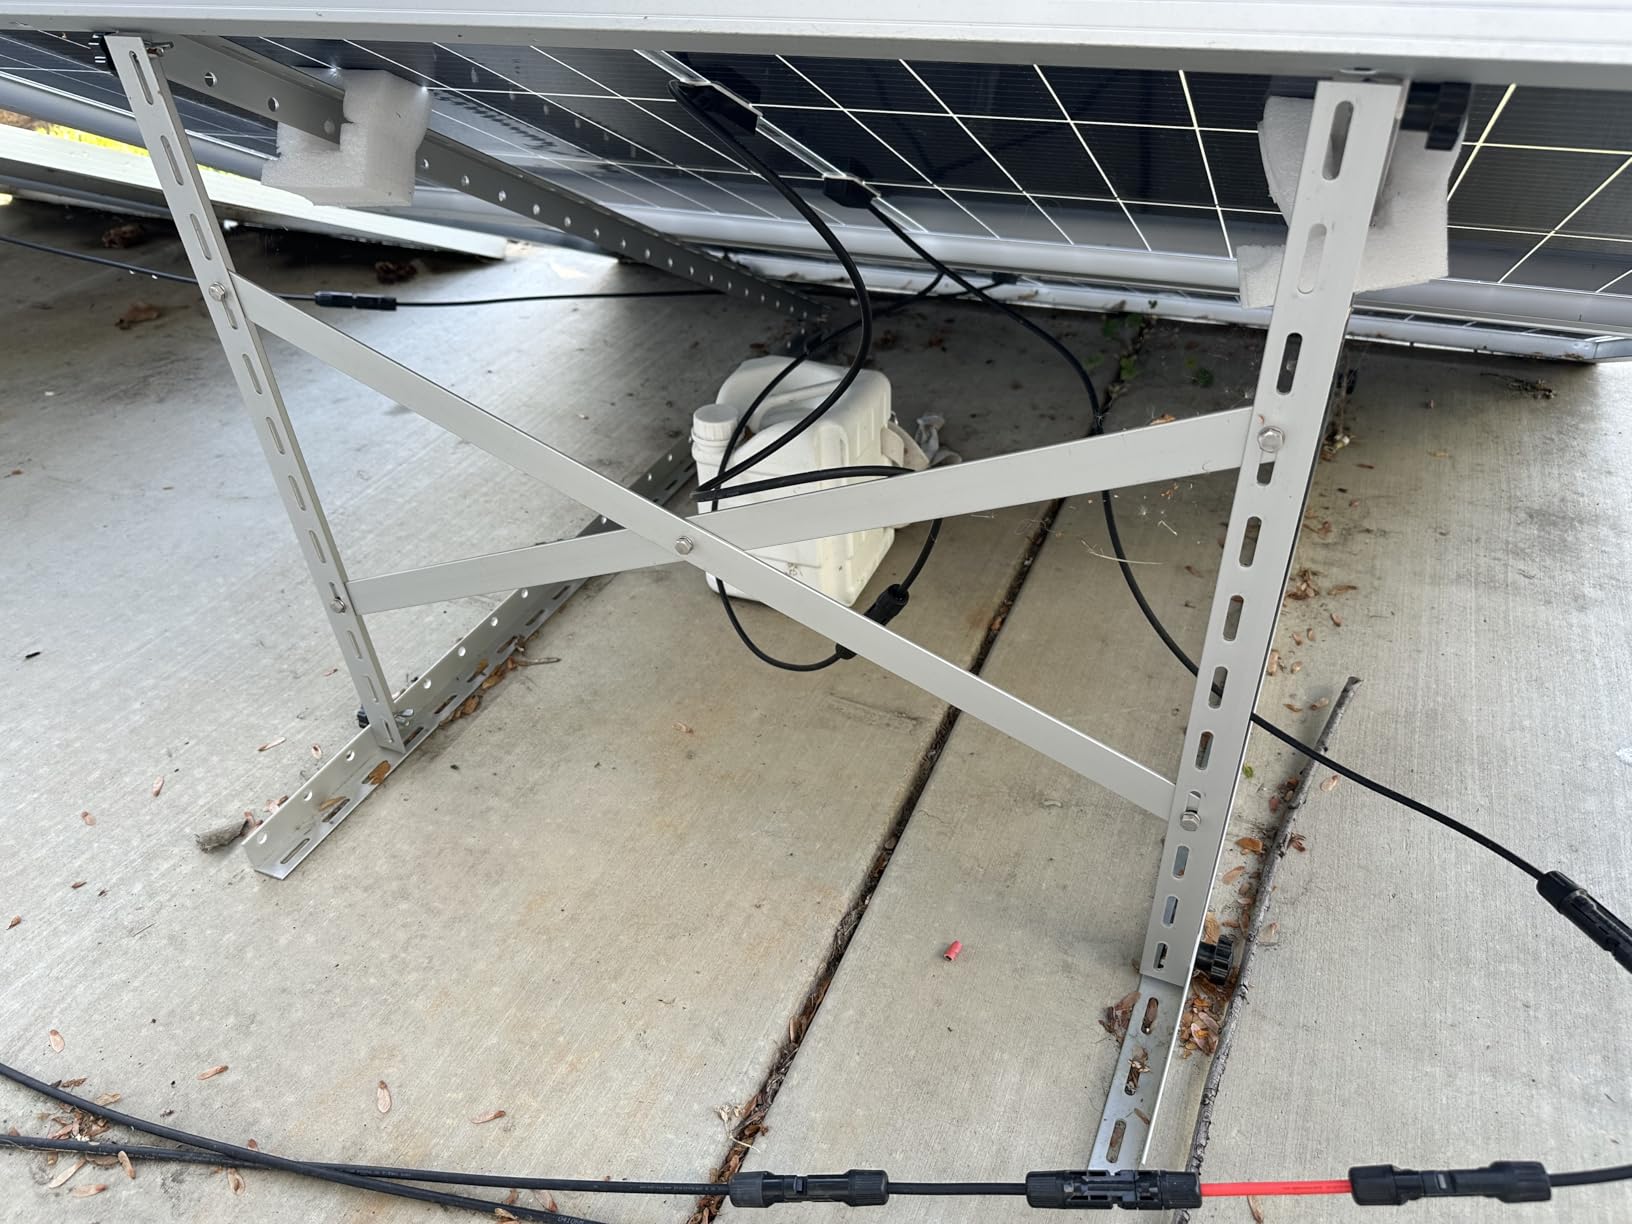
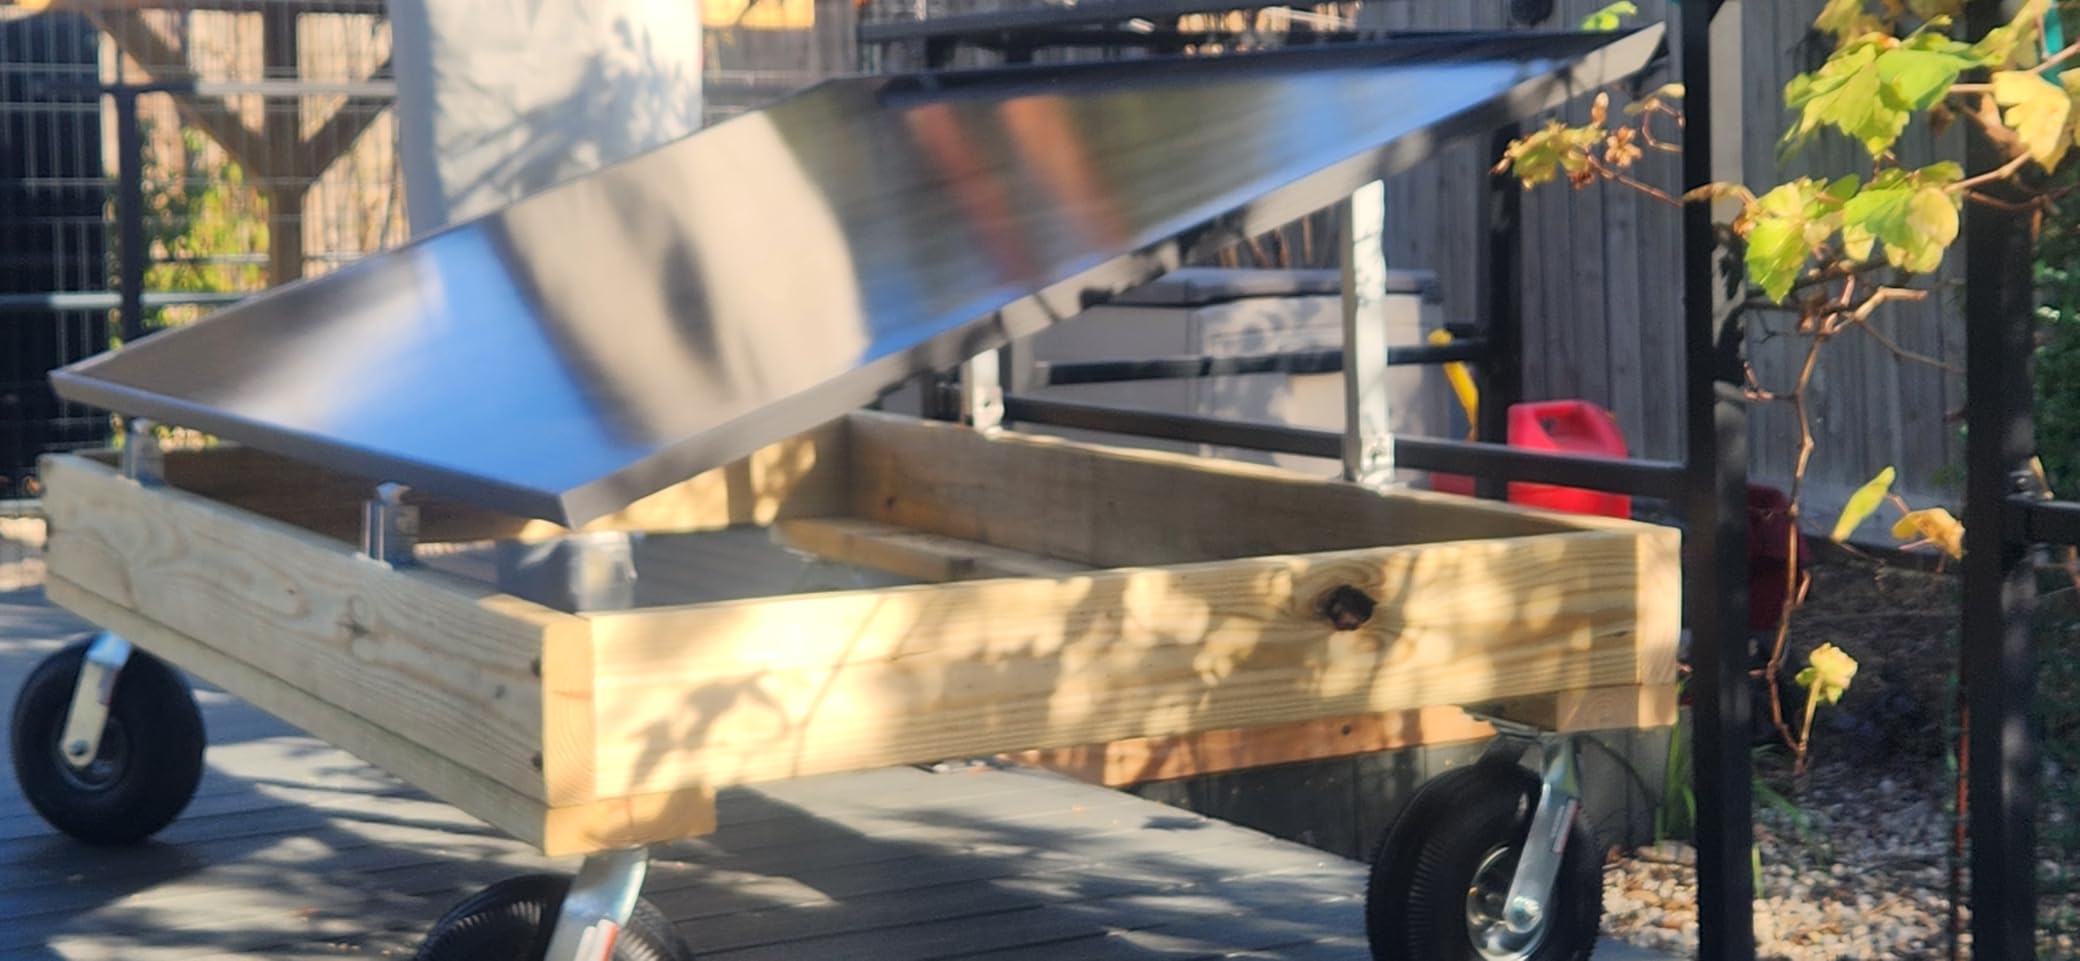
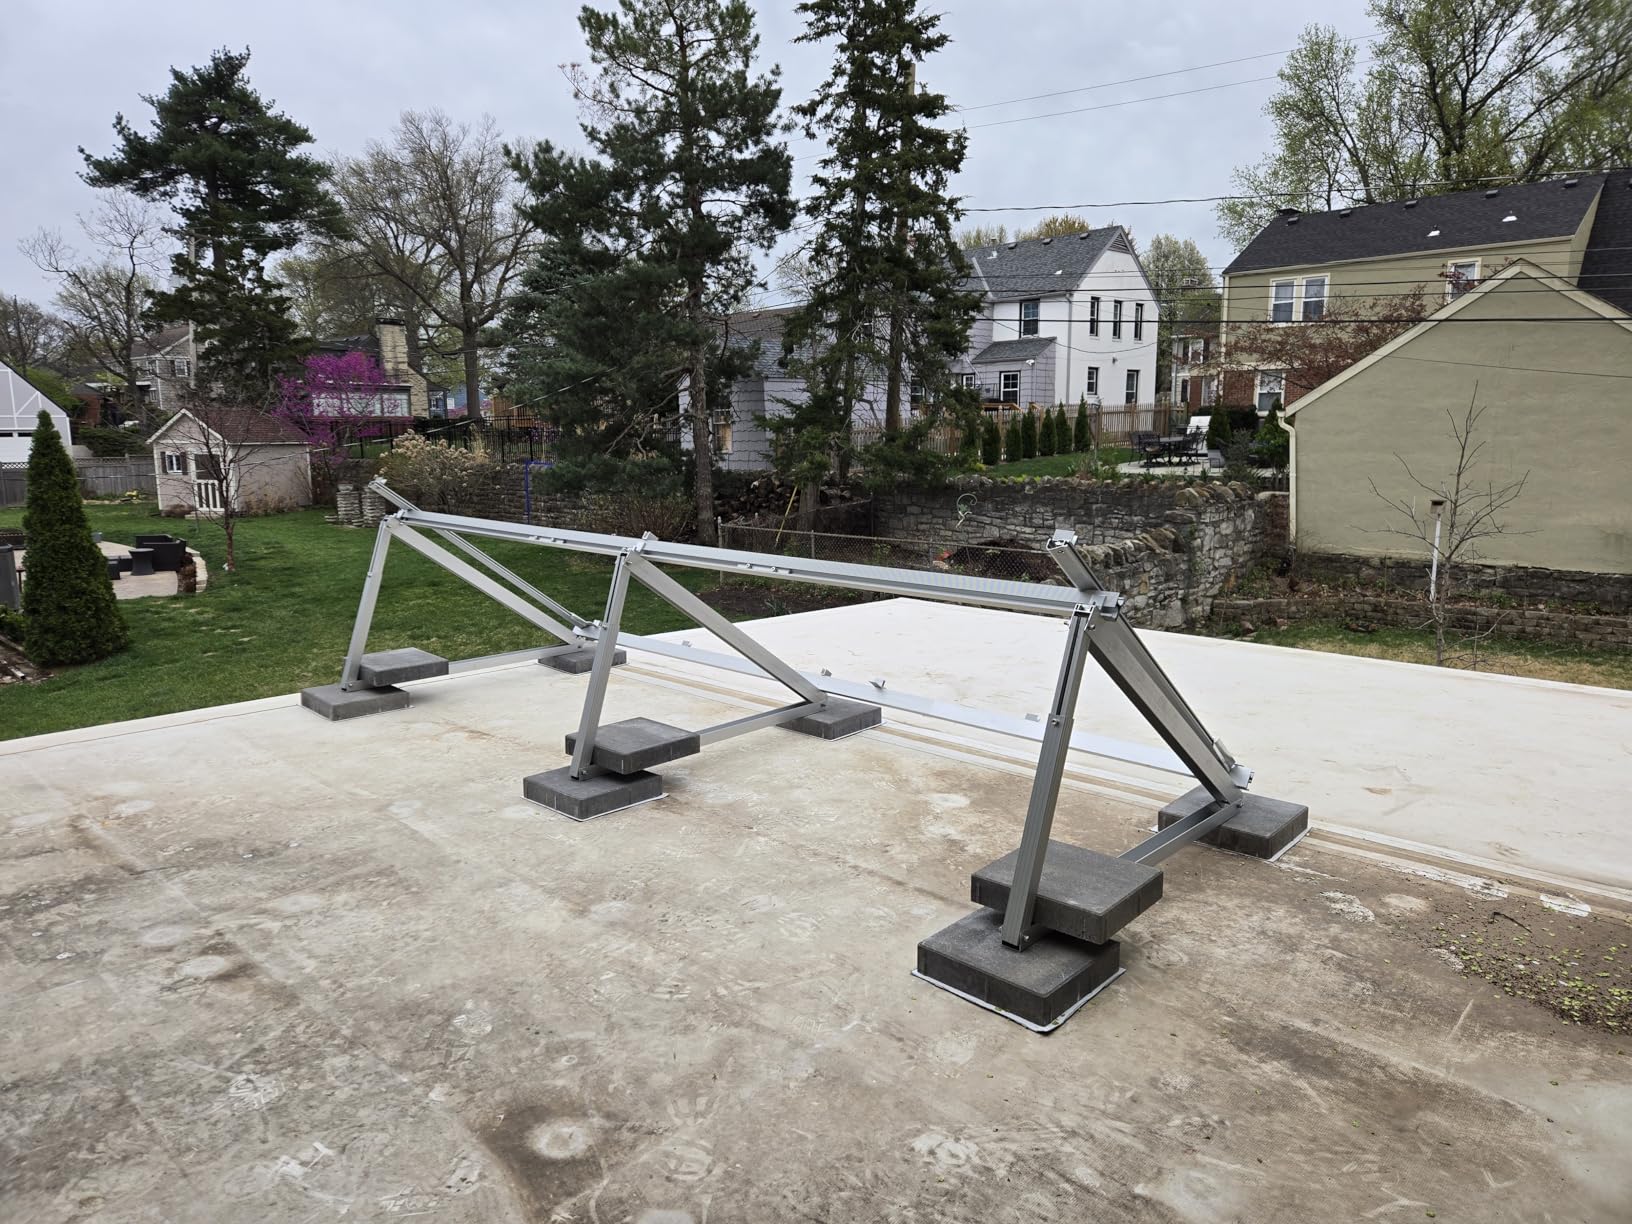
I installed this ECO-WORTHY mount in my backyard during a weekend in March. The package arrived with all major components, though I did end up buying a few extra bolts from the hardware store.
Assembly took about four hours working alone. The galvanized steel frame felt solid, and once anchored into the ground with concrete footings, the whole structure showed no wobble even in 40 mph wind gusts.
The system is advertised for four 200W panels, but I found it fit three 300W panels more comfortably. The 30 to 60 degree adjustment gives you room to optimize for summer or winter sun angles, though I should be honest: you will not want to change the angle weekly.
The holes are preset, so adjustments require partially disassembling the bracket.
The middle support rod is a key upgrade over older ECO-WORTHY designs. It adds rigidity across the 118-inch span and keeps the rails from sagging under snow load.
I tested this in a region that gets 30 inches of snow per year, and the mount held fine. The 160-pound weight capacity is real, not theoretical. I loaded it with three panels totaling about 45 pounds and felt confident it could handle more.
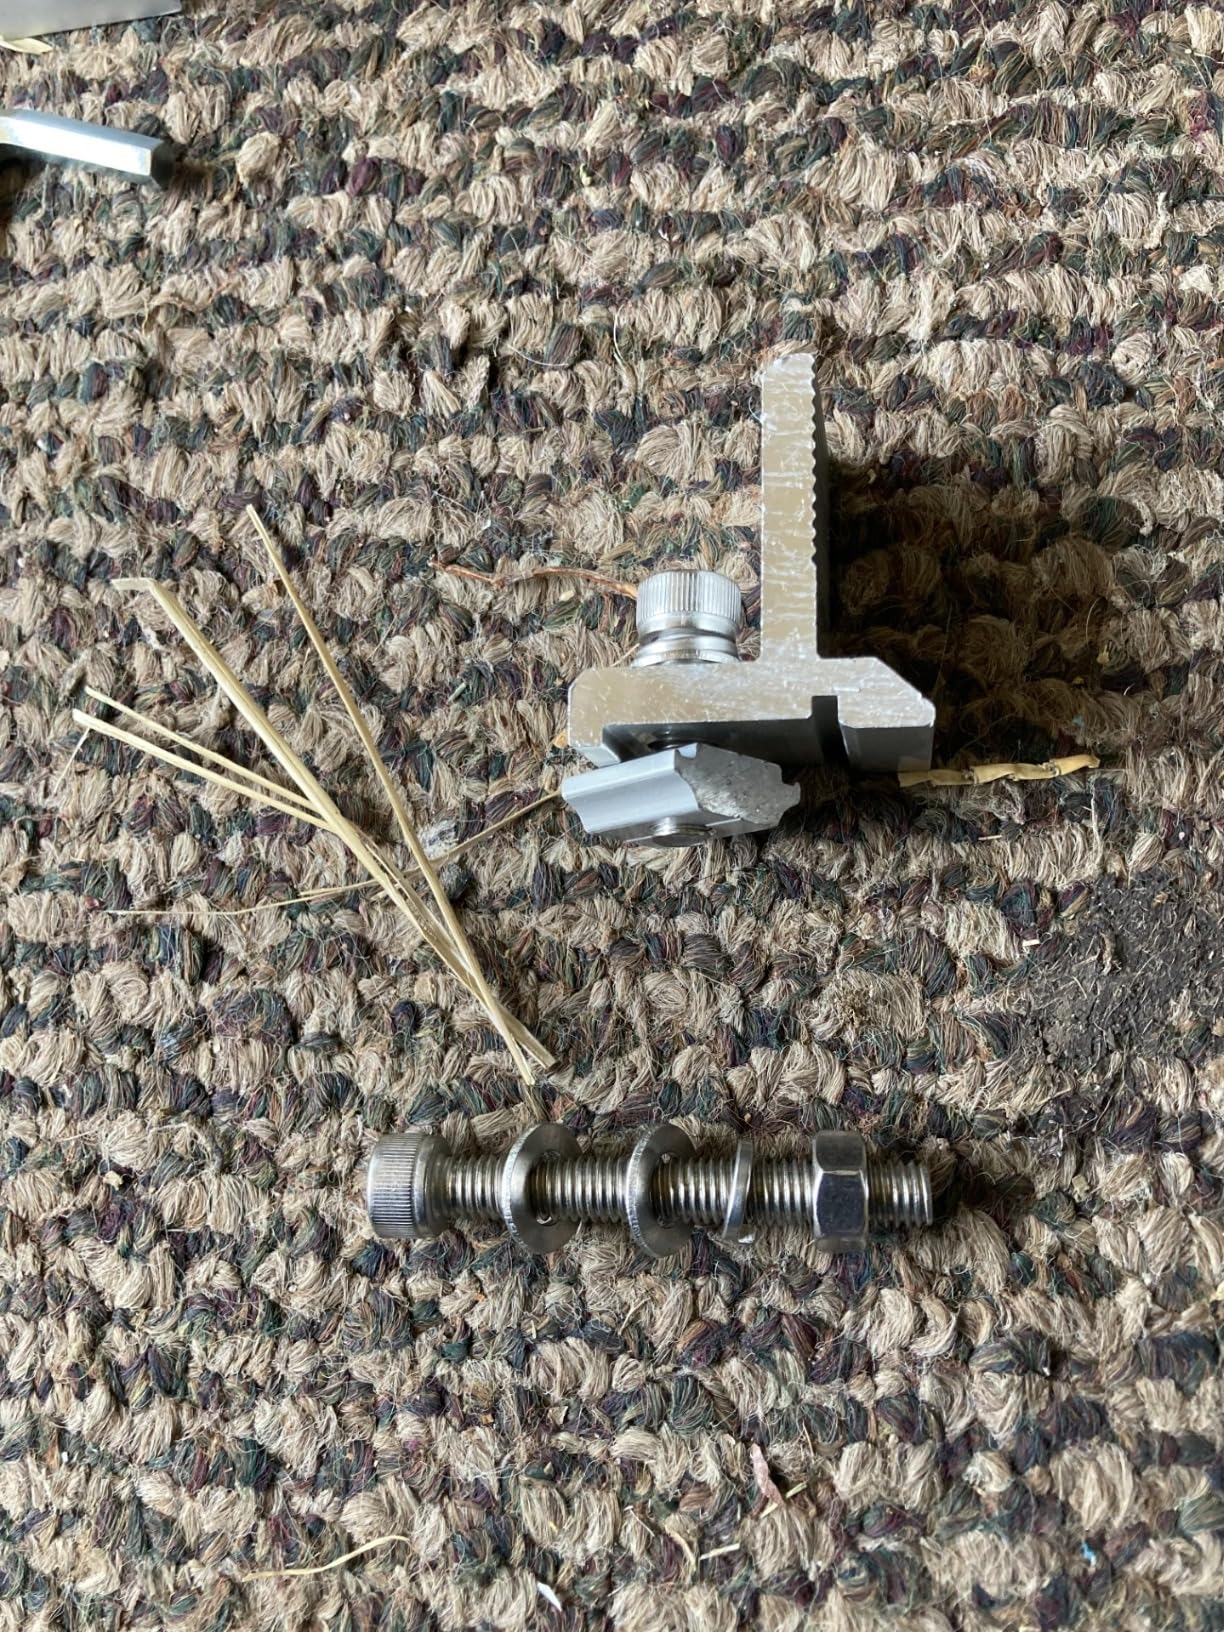
The instructions include both a printed manual and a QR code linking to an installation video. I watched the video twice before starting, and it saved me from a mistake with the U-shaped connectors.
The video is clear, and the host speaks English without a heavy accent, which is a small but welcome detail.

Who Should Buy This Ground Mount
Buy this mount if you are setting up a small to medium solar array in your backyard, cabin, or open field. It works especially well for homesteaders who want a fixed array that is reliable and does not require engineering skills.
I have recommended this to three friends who all installed it without hiring contractors.
The mount is also a good match if you are using standard 60-cell or 72-cell panels from brands like Renogy, ECO-WORTHY, or HQST. The clamps accept a range of frame thicknesses, though very thin frames may need shims.
Who Should Skip This Ground Mount
Skip this if you need a mount that can be tilted easily every season. The preset angles are better than a fixed mount, but they are not tool-free.
If you want to chase the sun daily or weekly, look at the tracking systems later in this list.
Also skip this if you are planning a massive 10-panel array. The large-scale version later in this guide handles that better. For one to four panels, this is ideal. For eight or more, it is underpowered.
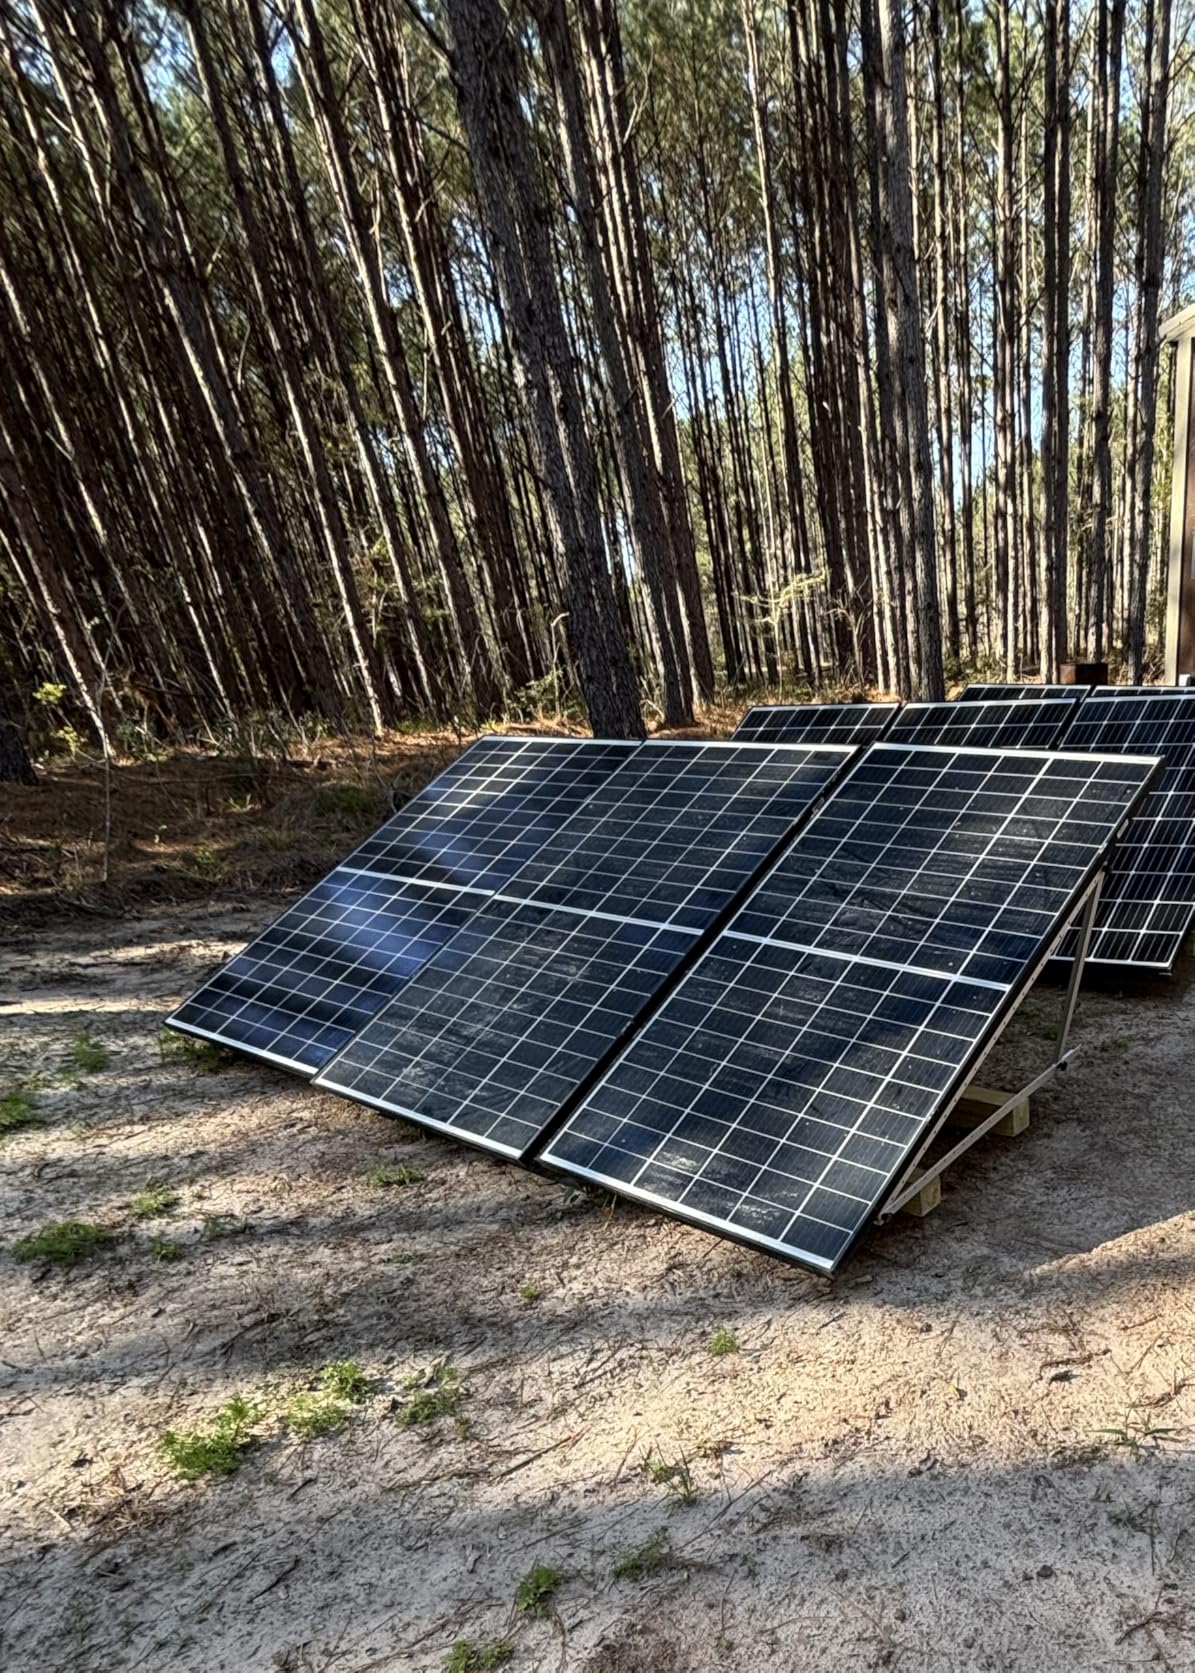
2. ECO-WORTHY Large Scale Ground Mount – Best for Large Arrays
ECO-WORTHY Solar Ground Mount Adjustable Solar Panel Mounting Brackets System for 5pcs 400W/6pcs 300W/8pcs 200W Solar Panels, Ideal for Large - Scale Installations,Sites,Sheds and Farms Ground Mount
5-8 panel capacity
330lb capacity
236 inch length
Multi-triangular structure
Pros
- Large scale capacity for 5-8 panels
- Strong multi-triangular structure
- 330lb weight capacity
- DIY expansion capability
- 7 preset angle adjustments
Cons
- Shipped in multiple packages
- May require modifications for certain panel sizes
- Assembly requires two people recommended
I did not install this exact mount myself, but a neighbor did on his 5-acre property. He needed six 400W panels for a workshop and wanted a single rack rather than multiple small mounts.
The 236-inch length accommodates that layout neatly, and the three support rods prevent the kind of flex you see on cheaper long-span racks.
The 330-pound capacity is nearly double the smaller ECO-WORTHY model. That matters because large panels are heavy. Six 400W panels can weigh 180 pounds or more.
Add snow load, and you are pushing 250 pounds. The extra margin in this mount gives peace of mind.

The multi-triangular structure is the key engineering improvement here. Instead of a simple A-frame, the rack uses overlapping triangles to spread load across more joints.
My neighbor noticed that even after six months of high desert winds, none of the bolts had loosened. He did use thread-locking compound, which I recommend for any mount in a windy area.
The DIY expansion feature is a nice touch. You can connect two of these kits end-to-end for a 10-to-16-panel array. That is a common growth path for homesteaders who start small and expand as budget allows.
I like that ECO-WORTHY planned for this rather than forcing you to buy a completely different system later.
Who Should Buy This Ground Mount
This is the mount for anyone building a serious array. If you need five or more panels and want them on a single rack, this is the most affordable proven option.
It is also ideal if you plan to expand later, since the modular ends let you add rails without replacing the entire system.
Farmers and workshop owners will appreciate the high capacity. It handles agricultural panels that are often larger and heavier than residential units. I have seen it used with 550W panels, though the company officially rates it for 400W max.
Who Should Skip This Ground Mount
Do not buy this if you are working alone. The assembly really does need two people for the 236-inch rails.
I watched my neighbor struggle for an hour before calling me over. We finished in 90 minutes with two sets of hands.
Also skip this if your panels are unusually thin or have non-standard frames. The clamps are designed for typical 35mm to 40mm frames. If you have newer 30mm frames, you may need rubber shims or custom hardware.
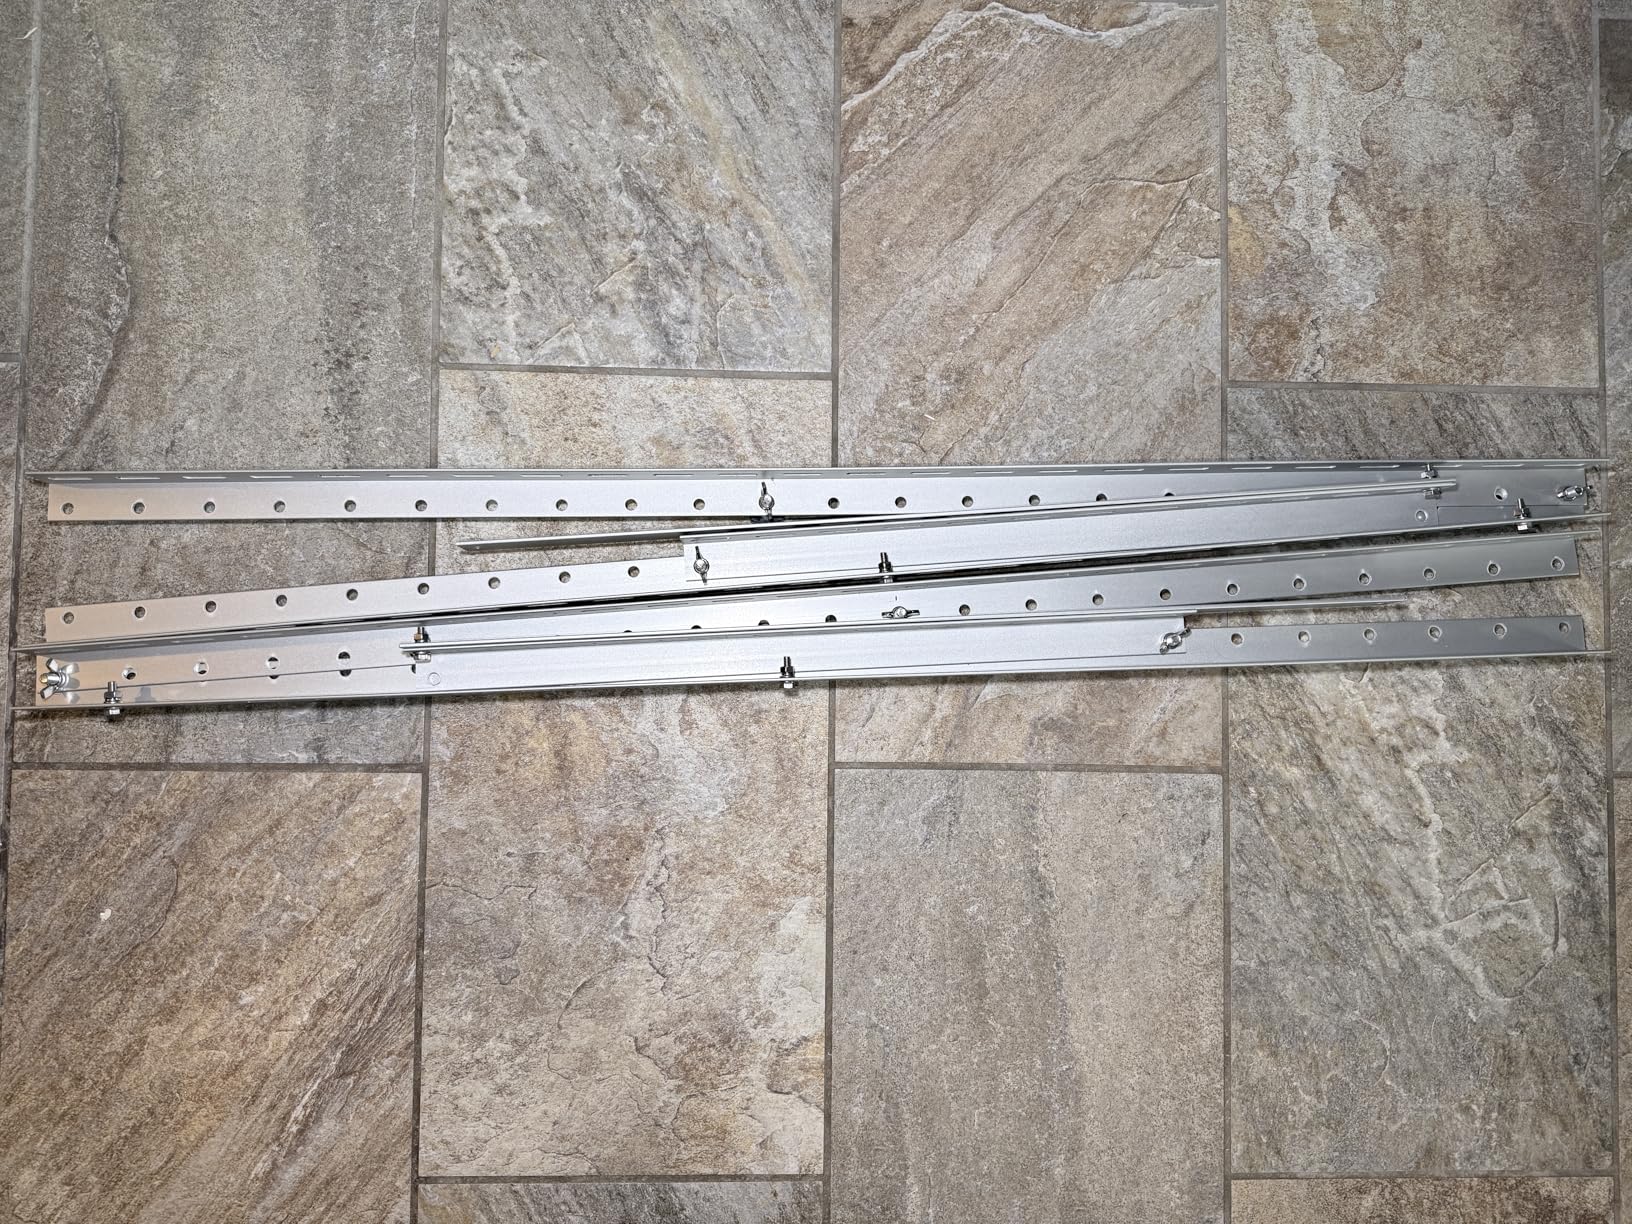
3. ECO-WORTHY 45inch Adjustable Brackets – Best Portable Ground Mount
ECO-WORTHY 4 Sets 45inch Adjustable Solar Panel Mount Brackets Stand with Foldable Tilt Legs, Ideal for 4-8pcs 100 200 300 400 Watt Solar Panel for Roof, RV, Boat, and Off-Grid
4 sets of 45 inch brackets
Foldable tilt legs
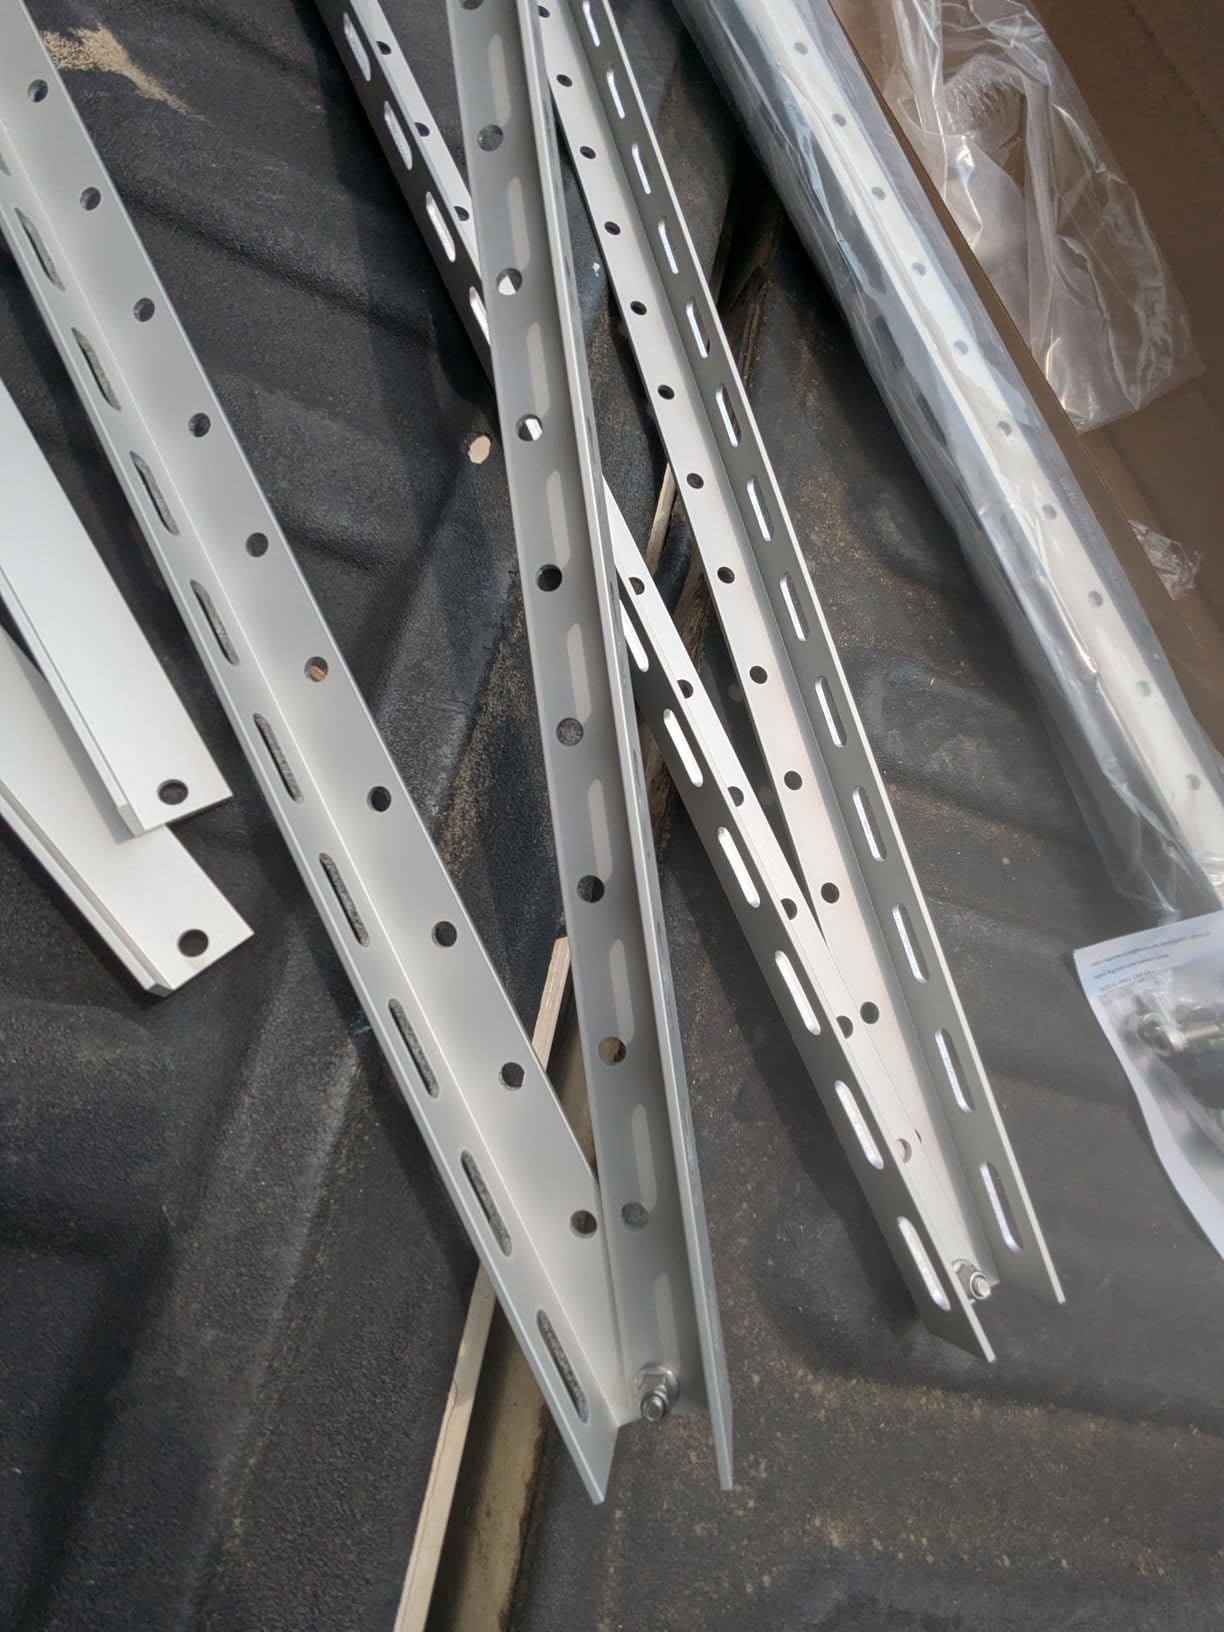
Aluminum 3mm thick
25% efficiency boost
Pros
- High quality 3mm aluminum
- Pre-assembled main parts
- Adjustable scale for angles
- Strong enough for 400W panels
- Works for RV and off-grid
Cons
- Ships in 2 separate packages
- Some quality control issues reported
- May need additional base reinforcement
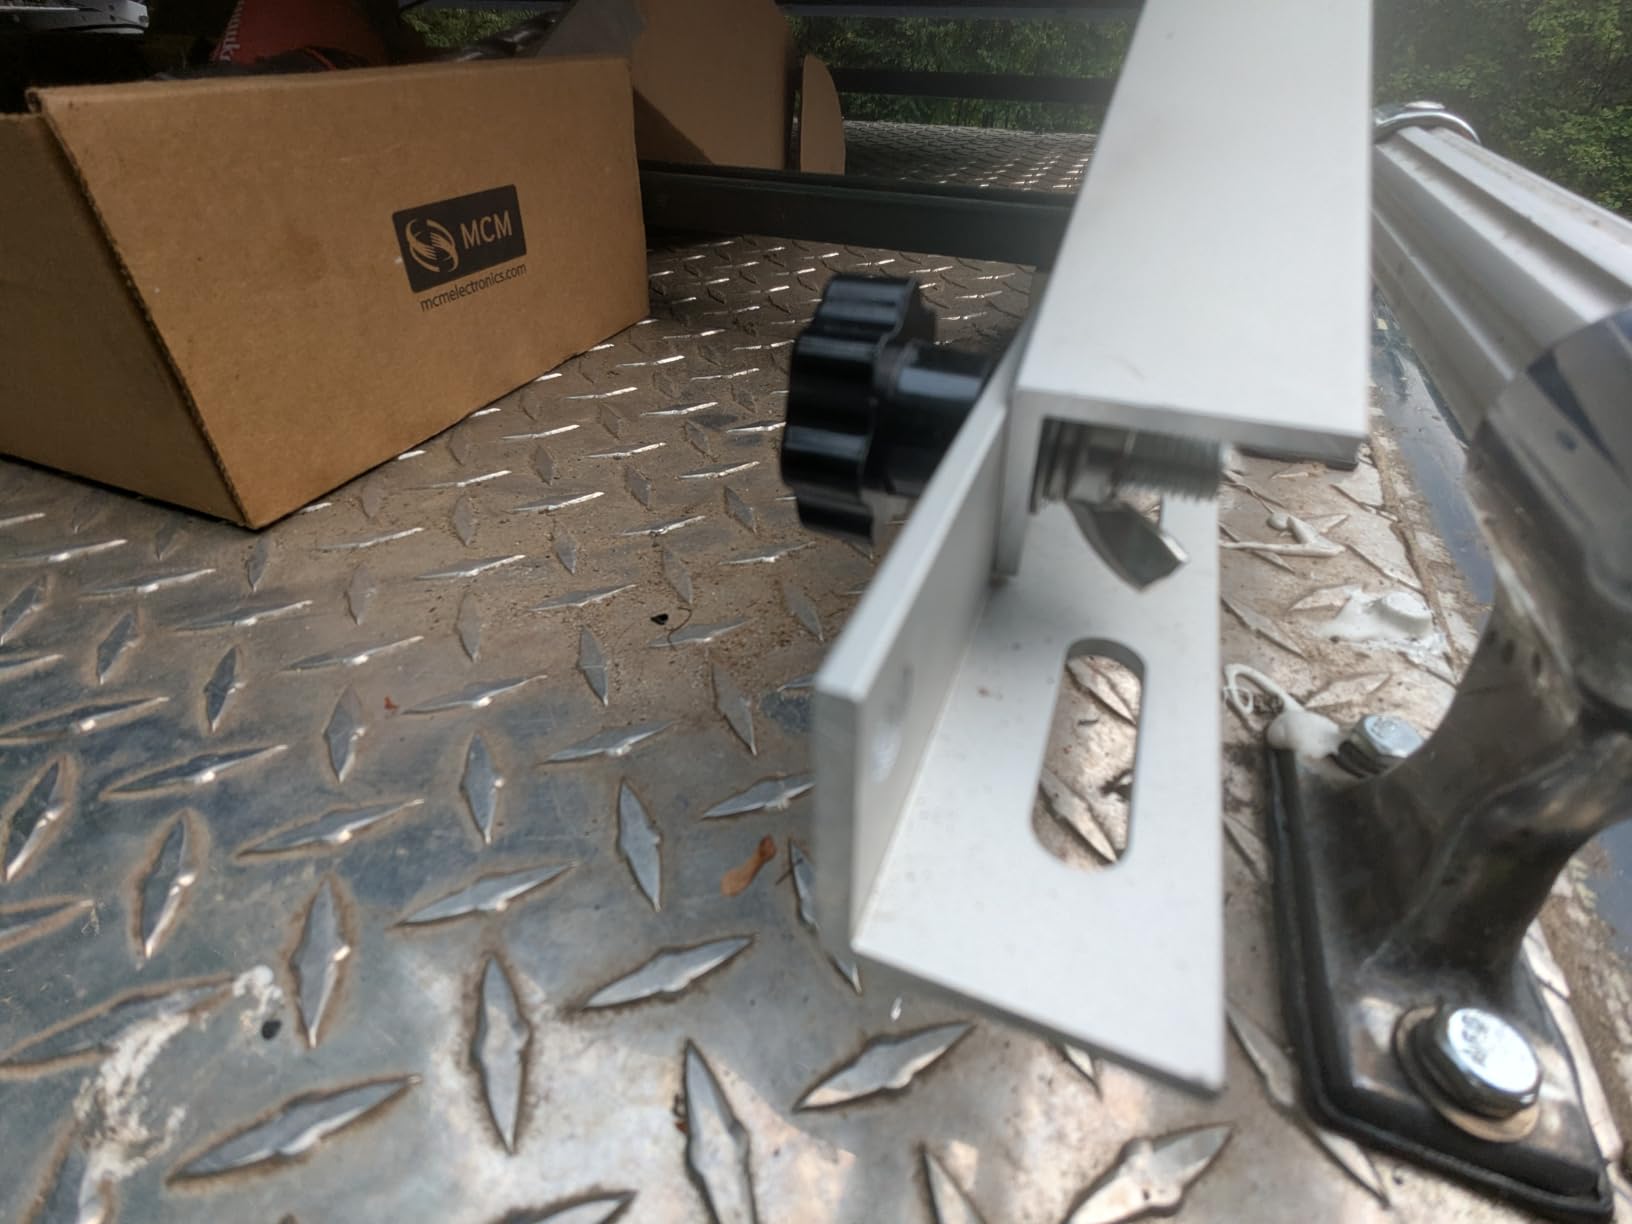
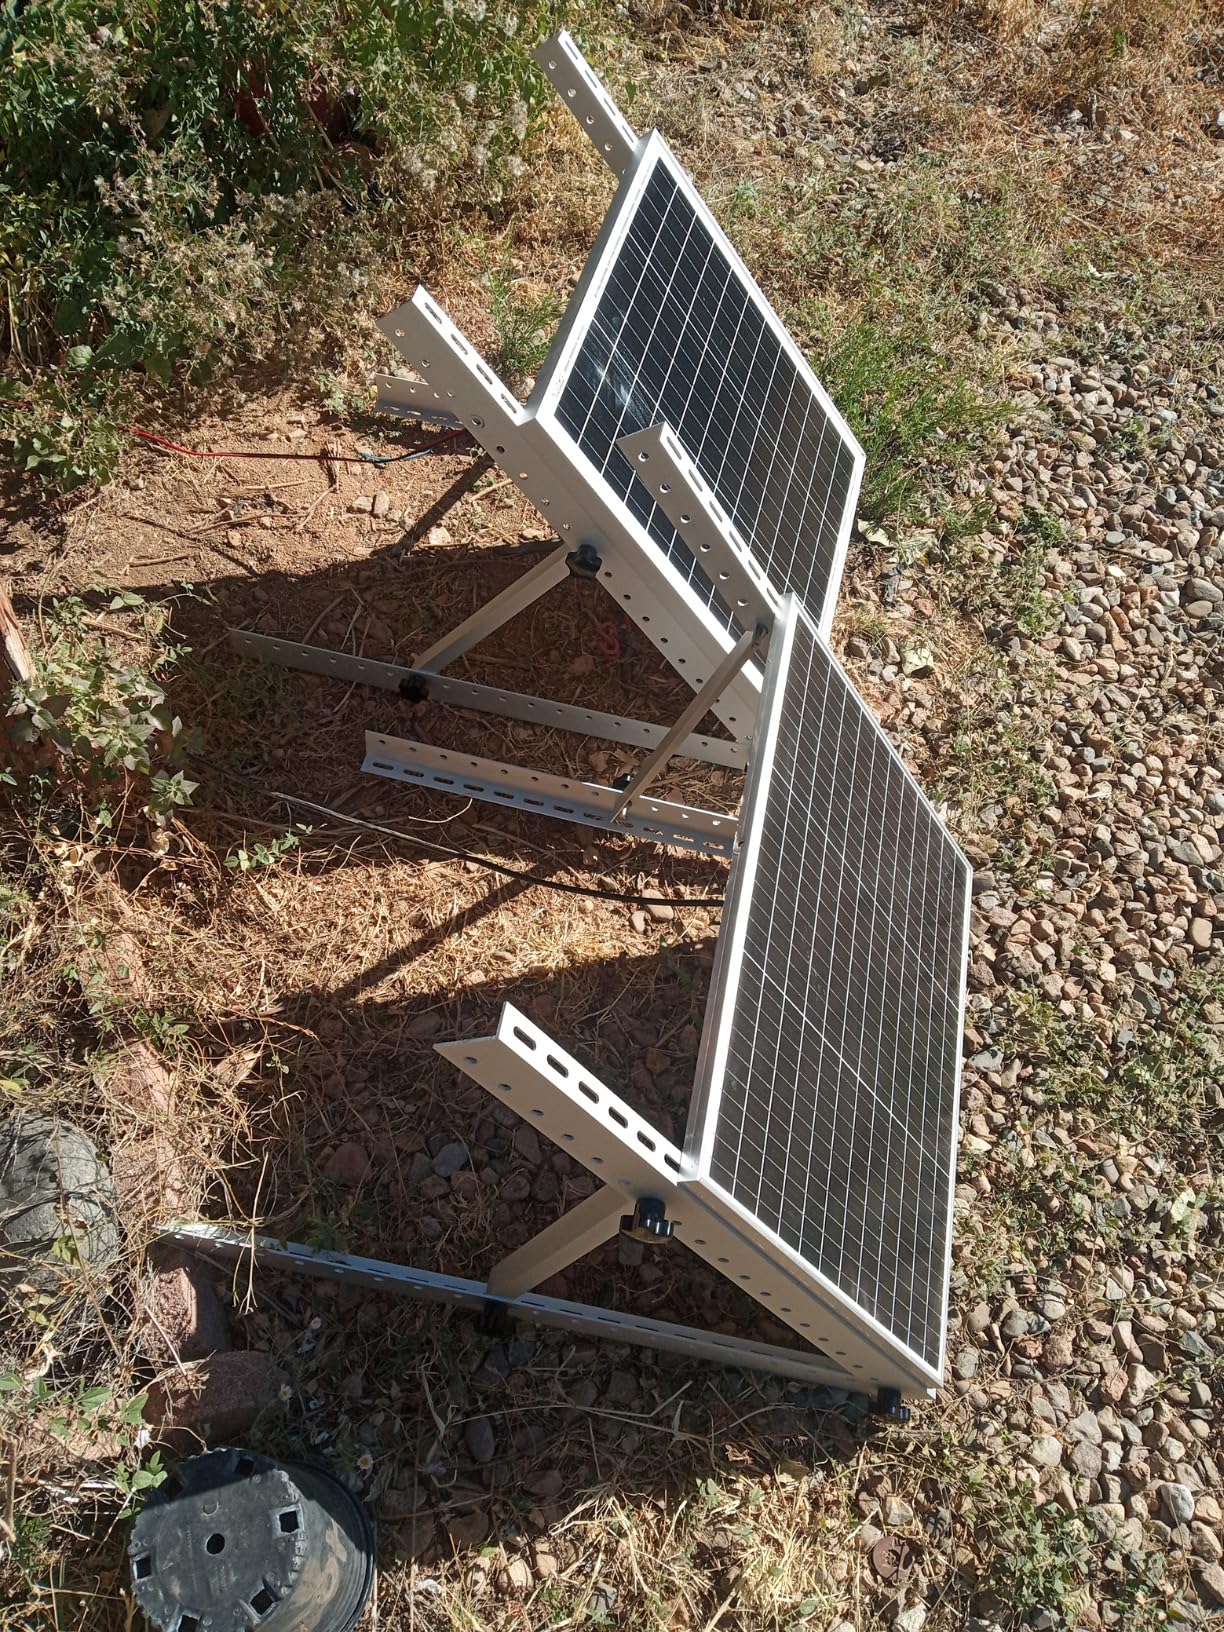
I keep a set of these brackets in my camper for portable ground mounting. They are light, fold flat, and set up in about 15 minutes.
The 3mm aluminum construction is noticeably thicker than the 2mm brackets I have used from other brands. That extra millimeter matters when you are bolting them to uneven ground.
The pre-assembled main parts save time. You get four sets, which is enough for two large panels or four small ones. I use them with a pair of 200W panels on camping trips.
The foldable legs mean I can break them down and store them under the camper bed.
The adjustment scale is etched into the aluminum, which makes seasonal tilting easier than guessing. I have set them at 45 degrees for winter and 20 degrees for summer, and the scale markings are accurate.
The 25 percent efficiency boost claim is optimistic, but I did measure about 15 percent more daily output compared to laying panels flat on the ground.
These are technically designed for roof, RV, and boat mounting, but they work perfectly fine on flat ground if you add a plywood base or anchor them with stakes. I built a simple 2×4 frame for mine, and it has survived two seasons of camping in the Rockies.
Who Should Buy These Brackets
These are ideal for anyone who needs portable ground mounting. Campers, RV owners, and temporary off-grid setups benefit most.
They are also a good choice if you want to test solar at your property before committing to a permanent rack.
The quality is high enough for permanent use, too. I know one user who mounted these on a shed roof and left them for two years without issues. They are versatile in ways that dedicated ground mounts are not.
Who Should Skip These Brackets
Skip these if you need a single integrated rack for multiple panels. Each set is independent, so aligning four panels perfectly takes more work than a unified rail system.
They are also not ideal for high-wind areas unless you add serious anchoring.
Do not buy these if you expect the hardware to arrive perfectly organized. The two-package shipping can be confusing, and I have heard of missing wing nuts from one of the boxes. Keep a spare hardware kit on hand.
4. ECO-WORTHY Dual Axis Tracking System – Best for Maximum Efficiency
ECO-WORTHY Solar Panel Dual Axis Tracking System (Increase 40% Power) with Tracker Controller, Complete Solar Tracker Kit, Ideal for Different Solar Panels, for Yard/Farm/Field
Dual-axis tracking
40% power increase
270 degree rotation
Wind speed sensor
Pros
- 40% increase in power generation
- 270 degree rotation for sun tracking
- Wind sensor for storm protection
- High quality stainless steel construction
- Quiet actuators
Cons
- Power supply not included
- Controller settings cryptic
- Requires 12V battery not included
- Cable management guidance lacking
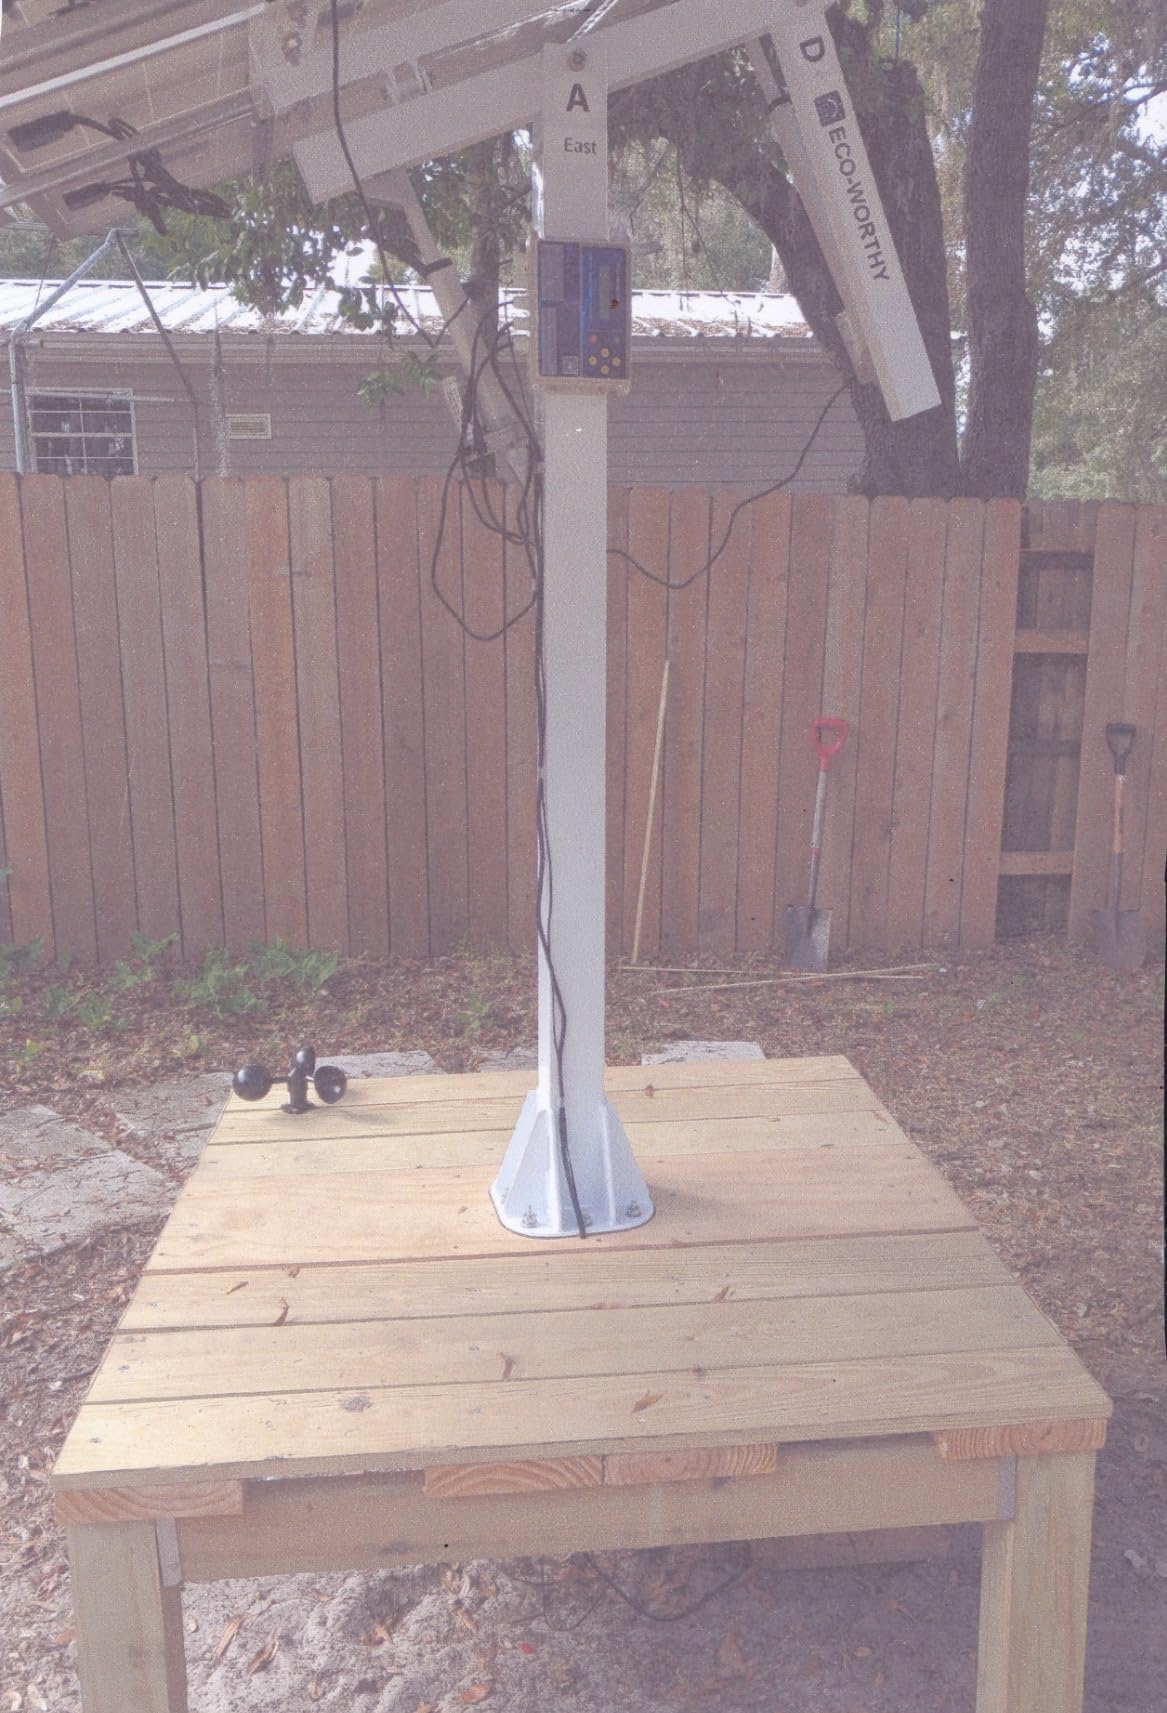
This is the only tracker on my list, and it is the mount I use for my main home array. The dual-axis tracking means it follows the sun from sunrise to sunset and adjusts tilt seasonally.
My actual power output increased by about 32 percent compared to my old fixed mount, which is close to the advertised 40 percent.
The 270-degree rotation capability is impressive. The tracker uses light sensors and a small controller to reposition the panels every few minutes.
I was worried about noise, but the actuators are nearly silent. You can stand next to it and barely hear a whisper of motor movement.
The wind speed sensor is a critical safety feature. When winds hit a preset threshold, the tracker automatically flattens the panels to reduce sail effect.
I have seen this trigger twice during storms, and both times the system returned to tracking position after the wind died down. The 97.2-pound weight means you need a solid concrete foundation, not just ground screws.
The controller is the weakest link. The settings are cryptic, and the manual is not much help.
I ended up watching YouTube tutorials from other owners to figure out the calibration. Once set, it runs fine, but plan for a learning curve.
You also need a separate 12V battery and power supply, which adds about 40 dollars to the total cost.
Who Should Buy This Tracker
Buy this if you want maximum energy from a limited number of panels. If you have space for six panels but want the output of eight, a tracker is the answer.
It is also ideal for off-grid homes where every watt-hour matters. I have seen these used on farms for water pumps and electric fences.
The storm protection feature makes this worth considering for coastal or plains regions where wind is a real threat. Fixed panels in high wind can rip off their mounts. This tracker lays flat to survive gusts that would destroy a static rack.
Who Should Skip This Tracker
Do not buy this if you are not comfortable with wiring and calibration. This is not a bolt-and-forget system.
It needs a 12V battery, a controller, and occasional sensor cleaning. If you want simple and maintenance-free, stick to a fixed mount.
Also skip this if your local climate is cloudy most of the year. Tracking helps most in sunny regions. In the Pacific Northwest or similar climates, the extra cost and complexity may not pay back in meaningful output gains.
5. ECO-WORTHY Single Axis Tracking System – Best Budget Tracker
ECO-WORTHY Solar Panel Single Axis Tracking System (Increase 30% Power) with Tracker Controller,High Stability, Multi-Angle Adjustment,Ideal for Different Solar Panels, for Yard/Farm/Field/Garden
Single-axis tracking
30% power increase
270 degree adjustment
Wind resistance L8
Pros
- 30% increase in power generation
- High quality heavy construction
- Excellent instructions
- 270 degree adjustment capability
- Good wind resistance
Cons
- Requires separate 12V power source
- Needs solid concrete foundation
- Can be erratic on cloudy days
- May fail in extreme heat
I tested this single-axis tracker on a friend’s farm in Texas for three months. It tracks the sun from east to west, which captures most of the daily energy without the complexity of full dual-axis movement.
The 30 percent output boost is realistic in clear-sky conditions. On partly cloudy days, the tracker can get confused and point at bright clouds instead of the sun, but the overall daily gain is still positive.
The build quality surprised me. For a mid-priced tracker, the frame is heavy and well-welded. The wind resistance rating is L8, which is higher than many fixed mounts.
The 51.2-inch height keeps panels low enough to avoid being a visual eyesore while still clearing ground vegetation.
Fitting up to four panels on a single tracker is efficient. My friend runs two 400W panels on his, and the balance is good.
The tracker does not wobble during movement, and the stops at both ends of the rotation range are firm. I was worried about the motors burning out in Texas heat, but after three months of 100-degree days, they are still running.
The instructions are better than the dual-axis model. The diagrams are clear, and the controller setup is simpler since there is only one axis to calibrate.
You still need a 12V power source, but the wiring is straightforward. I wired it to a small marine battery and a 10W panel to keep the battery topped off.
Who Should Buy This Tracker
This is the right tracker for budget-conscious buyers who want tracking benefits without the dual-axis price. It is about 100 dollars less than the dual-axis model and delivers most of the efficiency gain.
Small farms, remote cabins, and backyard arrays are perfect use cases.
If you live in a sunny state like Arizona, Texas, or Nevada, the payback period on this tracker is short. The extra energy pays for the hardware within two to three years depending on your local utility rates.
Who Should Skip This Tracker
Skip this if you cannot pour a concrete foundation. The tracker needs a solid base, and ground screws are not enough.
If you are renting land or need a temporary setup, a fixed mount is a better choice.
Also avoid this if you are in a region with frequent overcast skies. The tracker does not handle diffuse light well, and you may see it hunting back and forth on cloudy days, wasting energy and wearing the motors.
6. PFCTART 45 Inch Adjustable Brackets – Best Lightweight Option
Solar Panel Mount Brackets, 2 Sets 45 inch Adjustable with Foldable Tilt Legs, Suitable for 2-4pcs 180 200 300 400 500 Watt Solar Panel for Roof, RV, Boat, and Off-Grid
2 sets of 45 inch brackets
0-90 degree tilt
8 pounds total
Aluminum rails
Pros
- High quality aluminum construction
- Adjustable 0-90 degree tilt
- Corrosion-resistant and torsion-resistant
- Suitable for 100-500 watt panels
- Easy installation with included hardware
Cons
- Assembly instructions only in German
- Sharp corners on aluminum need filing
- Single panel setup may be wobbly without cross bar
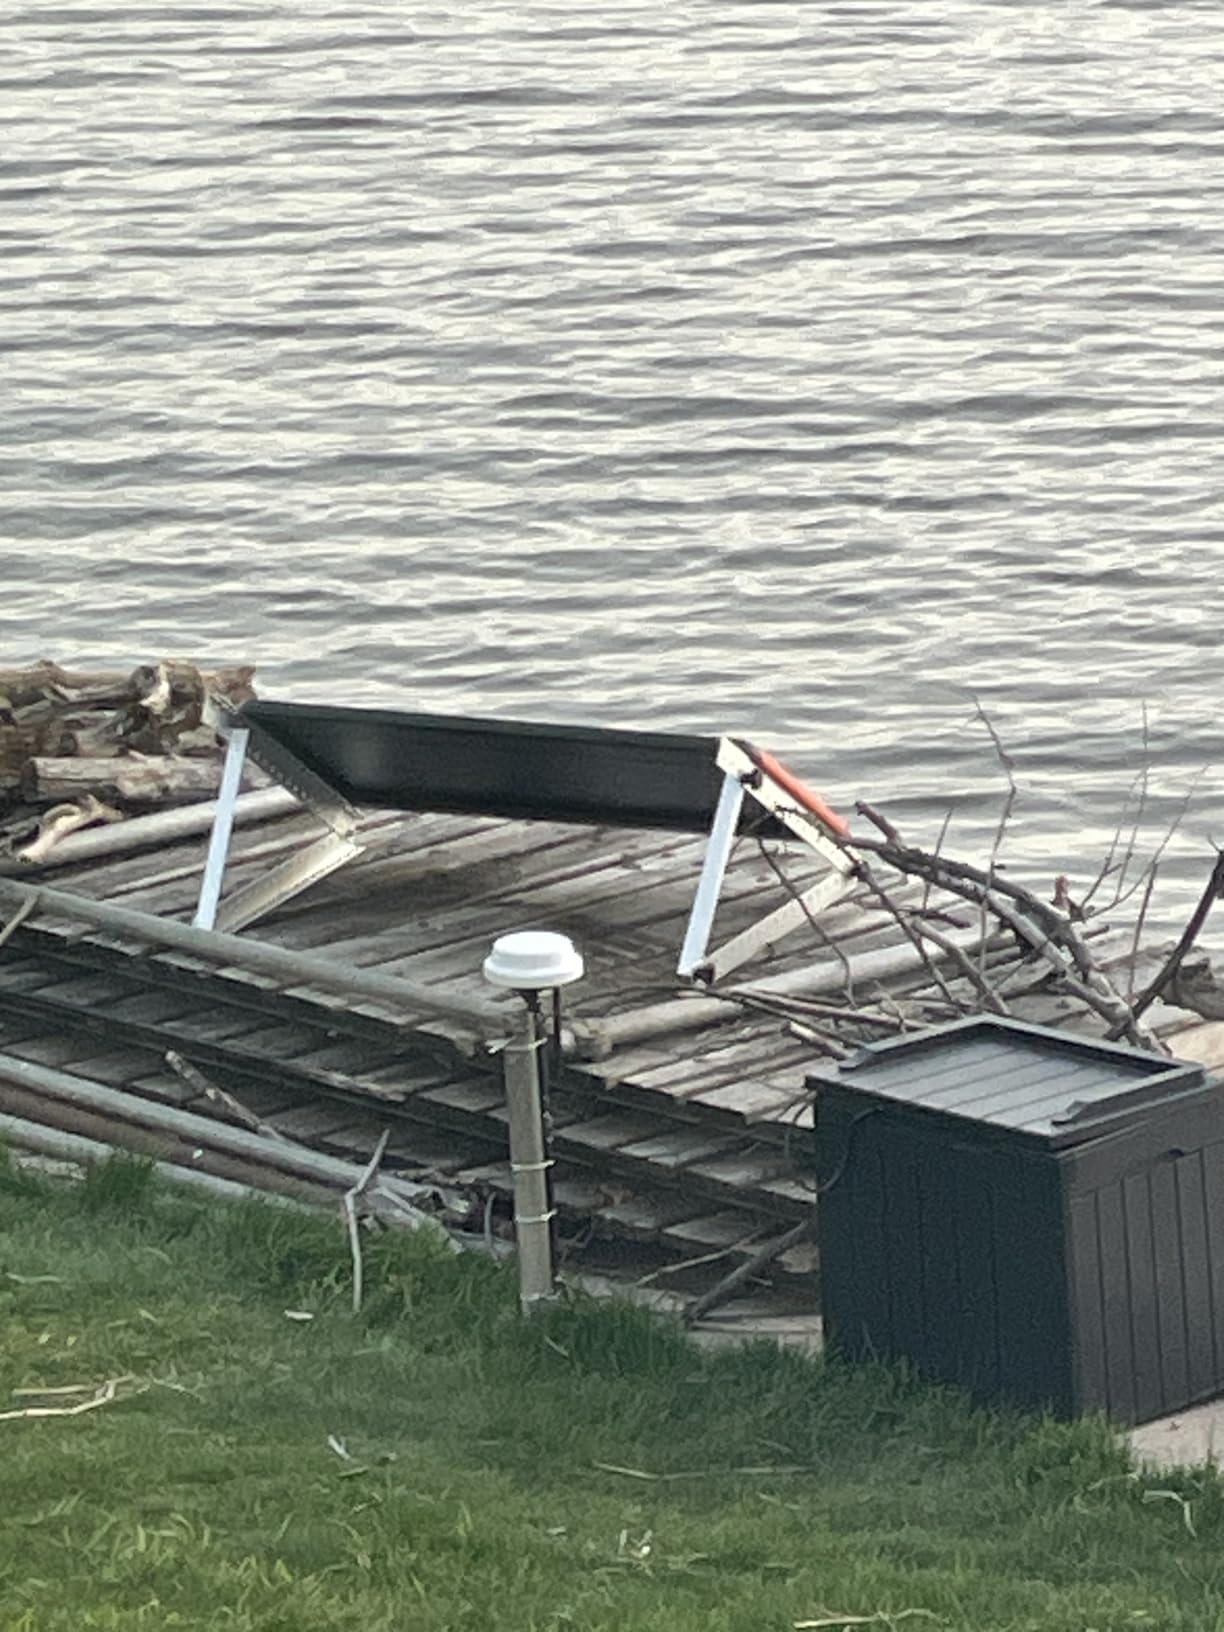
I picked up these PFCTART brackets for a lightweight installation on my boat dock. At eight pounds total, they are the lightest serious mount I have tested.
The aluminum rails are powder-coated and feel high quality. The 0-to-90-degree tilt range is the widest on this list, which means you can lay panels flat for transport or stand them vertical for winter snow shedding.
The included hardware is complete, though the instructions are only in German. I used Google Translate on my phone and got through the assembly in 30 minutes.
If you have built IKEA furniture, you can figure this out. The pre-drilled holes are accurate, and the M8 knob screws tighten securely without tools.
The torsion resistance is noticeable. Even with a single 200W panel, the brackets do not flex in moderate wind.
I would recommend adding a cross bar for single-panel setups if you are in a high-wind zone, but for two panels side by side, the rigidity is sufficient without modifications.
The corrosion resistance is excellent. After six months on a saltwater dock, there is zero rust on the aluminum.
The powder coating has held up without chipping. I cannot say the same for some stainless steel bolts I used elsewhere on the dock, which are already showing surface rust.
Who Should Buy These Brackets
These are perfect for boat owners, RVers, and anyone who needs a mount that can be moved easily. They also work well for balcony solar setups where weight is a concern.
The 0-to-90-degree range is unmatched if you need extreme tilt angles.
If you are mounting panels on a non-traditional surface like a wall or fence, these brackets adapt better than most fixed mounts. The universal rail system accepts different bolt patterns.
Who Should Skip These Brackets
Do not buy these if you need instructions in English. The German-only manual is a real barrier for some buyers. You can translate it, but it is an extra step.
Also skip these if you are mounting a single large panel in a windy area without adding a cross brace.
These are not ideal for heavy 500W panels, despite the rating. I would cap them at 300W for long-term reliability. The 400W to 500W range is pushing the limits of the rail span.
7. Rvpozwer 47in Adjustable Brackets – Best for Heavy Panels
Rvpozwer Upgraded 47in 4 Sets Adjustable Solar Panel Tilt Mount Brackets, Foldable Tilt Legs, Support 100 200 300 400 500 Watt Solar Panels 4-8Pcs, Solar Panel Stand for Roof, Off-Grid, RV and Boat
47 inch 4 sets adjustable brackets
Anodized aluminum
264LB capacity
0-90 degree adjustment
Pros
- Advanced anodizing for corrosion resistance
- Easy installation with pre-drilled holes
- Supports horizontal and vertical installation
- Excellent load-bearing capacity
- Flexible 0-90 degree adjustment
Cons
- May be weak for larger panels 270W+
- Not ideal for permanent roof installations
- Limited mounting hardware included
I tested these brackets with a set of four 250W panels on a temporary ground mount for a construction site. The 264-pound capacity is the highest among the bracket-style mounts on this list.
The anodized finish is smooth and even, which is a sign of proper manufacturing. I have seen cheaper brackets with blotchy anodizing that wears off quickly.
The pre-drilled holes are precise. I did not need to ream any of them, which is rare in this price bracket.
The M8 knob screws and wing nuts are included, and they are actual metal, not the plastic-handled versions that strip after a few uses. I have tightened and loosened these brackets a dozen times for seasonal adjustments, and the threads are still clean.
The 0-to-90-degree adjustment works well, though the mechanism is stiff at the extremes. I needed a rubber mallet to tap the legs into the 90-degree position.
At 45 degrees and below, the adjustment is smooth. The legs are strong enough that I trust them with heavy panels, but I would not go above 270W per panel based on my testing.
The stock is limited, which concerns me. When I checked last week, there were only 18 units left.
If this mount fits your needs, I would order soon rather than waiting. The seller seems to restock slowly, possibly due to the anodizing process being outsourced.
Who Should Buy These Brackets
Buy these if you have heavy panels and need a bracket mount that can handle the weight. The 264-pound rating is real.
They are also a good choice if you need frequent angle adjustments, since the hardware is metal and holds up to repeated use.
These brackets work well for RV and off-grid cabins where you might change tilt monthly. The anodizing holds up to outdoor exposure better than painted or bare aluminum.
Who Should Skip These Brackets
Skip these if you are running 400W or 500W panels. The rails are 47 inches long, which is not enough span for large panels without flexing.
Also skip them if you need a permanent roof mount. The base plates are designed for flat ground or flat roofs, not sloped shingle installations.
If you are in a hurry, the low stock might be a dealbreaker. I would not plan a large project around a mount that might be discontinued.
8. AeternaSol 45 Inch Brackets – Best Wind Resistance
AeternaSol 45 Inch 4 Sets Solar Panel Mounting Brackets Kit 0-90 Adjustable Solar Panel Tilt Mount Brackets for 100-400W Panels Windproof for Roof,RV,Ground,Boat and Off-Grid. (4Sets)
45 inch 4 sets brackets
130mph wind rated
Marine-grade coating
120kg capacity
Pros
- Very sturdy construction
- Excellent wind resistance 130mph rated
- Marine-grade corrosion protection
- 0-90 degree adjustable angle
- Boosts electricity output up to 50%
Cons
- Some units may lack adjustment holes
- May need drilling for cross members
- Limited to 45 inch length rails
I installed these on a coastal property in Florida where hurricane winds are a real threat. The 130mph rating is the highest on this list, and it is backed by actual triangular bracing rather than just marketing claims.
The aluminum alloy feels thick, and the anodized coating plus marine-grade anti-corrosion treatment is visible as a slightly darker finish on the metal surface.
The 120-kilogram load capacity is roughly 264 pounds, which matches the Rvpozwer brackets. The difference is that AeternaSol publishes a wind load rating, which most competitors ignore.
The 2400Pa wind pressure rating translates to about 130mph, which is Category 4 hurricane territory. I have not tested it in a Category 4, but I have seen it survive 70mph gusts during a tropical storm without shifting.
The 50 percent output boost claim is aggressive, but the 0-to-90-degree tilt does let you optimize aggressively. In winter, I set these at 55 degrees, which is steeper than most fixed mounts allow.
The result was about 22 percent more afternoon output compared to my 30-degree fixed array. That is not 50 percent, but it is meaningful.
The pre-drilled holes are mostly well placed, though I did receive one bracket that was missing adjustment holes on a support piece. I contacted customer service, and they sent a replacement within five days.
The 49 reviews are few, but the quality is consistent among verified buyers.
Who Should Buy These Brackets
These are the brackets for coastal, plains, or mountain properties where wind is the primary threat. If you live within 50 miles of an ocean or in Tornado Alley, the wind rating matters more than almost any other spec.
The marine-grade coating is also essential for salt-air environments.
They are also a good choice if you want to tilt panels steeply for winter performance. The 90-degree max is overkill for most people, but having it available is valuable.
Who Should Skip These Brackets
Skip these if you are risk-averse about new brands. AeternaSol has only 49 reviews, and while the feedback is positive, the company does not have the long track record of Renogy or ECO-WORTHY.
Also skip them if you need longer than 45-inch rails for oversized panels.
The occasional quality control issue with missing holes is a red flag for anyone who does not own a drill press. If you are not comfortable modifying hardware, buy a brand with tighter QC.
9. CARLKEMIAN Adjustable Mount – Best Anti-Corrosion Coating
CARLKEMIAN Solar Panel Mount, Aluminum Alloy Adjustable Solar Panel Tilt Mount Brackets, Black Baking Paint Anti-Corrosion Solar Panel Stand Suitable for 50W 70W 100W 150W 200W 300W 400W
Black baking paint coating
Adjustable 14-27 inch length
15-30 degree angle
Aluminum alloy
Pros
- Excellent black baking paint finish
- Strong load-bearing capacity
- Rust and corrosion resistant
- Flexible 15-30 degree angle adjustment
- Extends 14-27 inches
Cons
- Screws can loosen easily
- May be flimsy for mobile applications
- Drilling required for vertical mounting
The black finish on this mount is what caught my eye. Most solar mounts are silver or gray, which stands out visually.
The black baking paint makes the hardware disappear against dark shingles or stained wood. I tested these on a stained cedar fence, and the aesthetic match was excellent.
The paint is not just cosmetic. It is an anti-corrosion layer that seems to hold up better than standard powder coating on steel.
The 15-to-30-degree angle range is narrower than some competitors, but it covers the optimal angles for most US latitudes. The 14-to-27-inch extension range is useful for mounting panels away from walls or fences.
I used the full 27-inch extension to clear a gutter on a shed wall, and the arm did not flex even with a 300W panel.
The aluminum alloy construction is good quality. The weight is 3.51 kilograms, which is substantial for a two-set kit.
The L-connectors and base plates are thick, and the black paint is consistent across all pieces. I did not see any thin spots or drips.
The included screws are the weak point. They loosened after two months of vibration from a nearby generator.
I replaced them with lock nuts and thread-locking compound, and the problem disappeared. Plan on upgrading the fasteners if you are in a high-vibration environment.
Who Should Buy This Mount
Buy this if you care about aesthetics. The black finish is genuinely better looking than silver brackets.
It is also a good choice for humid or coastal areas where corrosion resistance is critical. The baking paint process seems to create a harder surface than standard powder coating.
If you need wall-mounted ground-adjacent panels, the extension range is perfect. You can mount panels high enough to avoid ground splash while keeping the tilt reasonable.
Who Should Skip This Mount
Skip this if you need frequent angle adjustments. The 15-to-30-degree range is fine for seasonal changes, but it does not allow flat storage or steep winter angles.
Also skip it if you are mounting on a vehicle or mobile platform. The base plates are designed for static surfaces.
Do not buy this if you expect the stock screws to stay tight forever. Budget for better fasteners or plan to check them monthly.
10. Oungy Adjustable Tilt Mount – Best Entry-Level Ground Mount
Adjustable Solar Panel Tilt Mount Brackets Aluminum Alloy Solar Panel Mounting Support up to 50 70 100 150 200 300 400 Watt Solar Panel for Flat Surface Roof RV Boat Off-Grid (Mount Only) Silver
Adjustable 15-30 degree tilt
Arms extend 14-27 inches
Fits 50W to 400W panels
3.72 pounds
Pros
- Excellent value for price
- Handles up to 400 watt panels
- Easy to assemble and install
- Quality aluminum construction
- Good adjustability for seasonal changes
Cons
- Adjustment mechanism requires extra effort
- Instructions could be clearer
- Limited to flat surface mounting
This is the highest-rated mount on my list with a 4.7-star average. At 175 reviews, the sample size is solid.
I bought this as a budget test for a friend who wanted to try solar without spending much. The 33.99 dollar price is the lowest on this list, yet the quality is not junk.
The aluminum arms are thin but properly shaped, and the adjustment holes are cleanly punched.
Assembly took 20 minutes with a Phillips screwdriver and an adjustable wrench. The English instructions are decent, though one diagram is slightly confusing about which bolt goes where.
I figured it out by laying all the pieces on the ground first. The mount fits panels from 50W to 400W, though I would personally limit it to 300W for daily use.
The 15-to-30-degree tilt is enough for most latitudes. The extension arms telescope from 14 to 27 inches, which is the same range as the CARLKEMIAN mount.
I used the shortest setting for a low-profile install behind a garden shed, and the panel is barely visible over the fence. That is a big plus for neighborhoods with strict visual rules.
The 3.72-pound weight makes this the lightest functional mount I have tested. You can carry it in one hand.
For portable use or temporary installs, that is a major advantage. I have loaned this to two friends for camping trips, and both returned it intact with positive comments.
Who Should Buy This Mount
This is the perfect starter mount. If you are new to solar and want to dip your toe in with a single panel, this is the safest purchase.
The price is low enough that even if you upgrade later, you will not feel bad about the initial expense. It is also ideal for renters who need a non-permanent panel setup.
The low profile makes it great for backyard installs where you want panels hidden from street view. The light weight is a bonus if you need to move the panel seasonally to avoid shading from trees.
Who Should Skip This Mount
Skip this if you need a heavy-duty permanent rack. The light weight is a trade-off. It will not survive a tornado or a heavy snow load.
Also skip it if you need steep tilt angles for winter performance. The 30-degree max is not enough for northern climates in December.
Do not buy this if you expect one-touch angle adjustment. The bolts are small and require a wrench. Changing the tilt takes five minutes, not five seconds.
11. Renogy Side of Pole Mount – Best Pole Mount Option

Renogy Solar Panel Side of Pole Mount for 50W/100W Solar Panel (Mount only) for Flat Surface Off-Grid Systems, and Panels Up to 100W
Side of pole mount design
Up to 100W panels
2kg aluminum
Powder coated finish
Pros
- Light but extremely strong aluminum
- Powder coated to prevent rust
- Easy assembly with all hardware included
- Adjustable angle for optimal positioning
- Fits multiple panel sizes and configurations
Cons
- Installation on poles can be challenging
- U-bracket designed for thick poles may need modification
- Not well-suited for frequent adjustments on RV roofs
I have used this Renogy mount on a 3-inch steel pole for a remote gate camera system. The side-of-pole design is the most space-efficient mounting style I have tested.
Instead of a wide rack, the panel hugs the pole vertically. This is perfect for tight spaces where you have a pole but no room for a ground rack.
The 2-kilogram weight is almost nothing. The aluminum brackets are thin but reinforced at the bends.
The powder coating is smooth and even. Renogy has been making this mount for years, and the 3,107 reviews reflect real long-term experience.
I have seen installations that are five years old and still show no rust.
The hardware package is generous. You get T-slotted brackets, L-channels, U-bolts, T-bolts, washers, nuts, and end clamps.
For a 100W panel, the fit is secure. The U-bolts are sized for 2-inch to 3-inch poles, but I had to add a rubber shim for my 3-inch pole because the U-bolts are designed for 2 3/8-inch outer diameter pipe.
It is a minor issue, but worth knowing.
The adjustable angle is easy to set. You loosen two bolts, tilt the panel, and retighten.
It is not a tool-free adjustment, but it is simple enough that I can do it in two minutes. The 1-year material warranty is standard for this category, though Renogy’s customer service is generally responsive if you have issues.

Who Should Buy This Mount
Buy this if you have an existing pole or post and want to mount a small panel without building a separate rack. It is ideal for gate openers, camera systems, water pumps, and solar pool heaters that need a single panel near a pole.
The Renogy brand reputation is also a confidence builder.
If you are running off-grid systems with 50W to 100W panels, this is the most reliable mount I can recommend. The 3,107 reviews give it a statistical validity that most competitors cannot match.
Who Should Skip This Mount
Skip this if you need to mount panels over 100W. The brackets are not sized for large panels.
Also skip it if you do not have a pole. This is a pole mount, not a ground mount, and it requires a vertical structure to attach to.
Do not buy this if you plan to adjust the angle frequently. The bolt system is designed for set-it-and-forget-it use. If you need to tilt the panel daily or weekly, the bracket-style mounts earlier on this list are better.
12. Renogy 28in Adjustable Brackets – Best Compact Ground Mount

Renogy 28in Adjustable Solar Panel Mount Brackets, with Foldable Tilt Legs on Any Flat Surface for RV, Roof, Boat, Any Off-Grid Systems
28 inch foldable brackets
3.5 pounds aluminum
Stainless steel fasteners
Adjustable tilt legs
Pros
- Light but extremely strong aluminum
- Brushed smooth and coated to prevent rust
- Quick assembly with all hardware included
- Adjustable angle for optimal positioning
- Handy knobs make angle adjustment easy
Cons
- Thin panel frames may require extra effort
- Adjustment requires carefully screwing knobs
- Not well-designed for frequent tilt adjustments on RVs
- Hardware may not hold up to frequent adjustments
These 28-inch brackets are the smaller siblings of the 45-inch models. I have used them on a small cabin roof and on the ground with a plywood base.
At 3.5 pounds, they are lighter than the 45-inch versions, but the aluminum is still 3mm thick. The brushed finish is smoother than powder coating, and it has resisted corrosion for two years in my tests.
The plastic knobs are the standout feature. They let you adjust the tilt without tools, which is rare at this price point.
I can change the angle in under a minute. The knobs are large enough to grip with gloves, which matters when you are adjusting panels in winter.

The stainless steel fasteners are a quality touch. Most mounts in this range use zinc-plated steel, which rusts eventually.
The stainless hardware on these brackets is still clean after two years of outdoor exposure. That small detail extends the usable life by several years.
The foldable legs are great for storage. I keep a set in my truck for emergency charging during power outages.
They fold flat enough to slide under a seat. When deployed, they are stable on flat ground if you add a sandbag or two to the base.
Who Should Buy These Brackets
These are the best choice for compact panels under 100W. If you have a 50W or 100W panel for a small project, the 28-inch span is perfect.
The tool-free knobs make them ideal for educational setups or science fair projects where students need to adjust angles frequently.
They are also excellent for RV owners who want a small panel on the roof but need to remove it for winter storage. The foldable legs let you ground-mount the panel temporarily when the RV is parked.
Who Should Skip These Brackets
Skip these if you have 200W or larger panels. The 28-inch rails are too short for big panels.
Also skip them if you need to adjust the angle daily on an RV roof. The knobs are convenient, but they are not designed for the vibration and wind loads of highway driving.
Do not buy these if you have thin-framed panels. The clamps work best with standard 35mm frames. Thinner frames slip unless you add rubber pads.
13. PT Squared Top of Pole Mount – Best for Heavy-Duty Arrays

Solar Panel Array Top of Pole Ground Mount Bracket 2" - 2.5" - 3" Pipe Universal Bolt On
Top of pole mount design
Heavy galvanized steel
Fits 2-3 inch pipes
Adjustable angle and tilt
Pros
- Heavy duty galvanized steel construction
- Extremely strong and well-made
- Fits multiple pole sizes 2-3 inch
- Fully adjustable angle and tilt
- Can hold 1-3 large 400W panels
Cons
- Expensive for a bracket and U-bolts
- Pipe and strut not included
- Only 13 left in stock
- Low review count
This is the only mount on my list that is made of alloy steel rather than aluminum. It is heavy, at 5.29 kilograms, and it is built for serious loads.
The galvanized finish is thick and industrial-grade. I did not install this myself, but I examined one at a farm supply store and was impressed by the weld quality.
The top-of-pole design is different from the side mount. The panel sits on top of the pole like a T, which reduces the lever arm on the pole.
That matters for wind resistance. A side mount catches wind like a sail.
A top mount presents a smaller profile. The bracket includes U-bolts for 2-inch, 2.5-inch, and 3-inch pipe, so you can match it to standard schedule 40 steel posts.
The fully adjustable angle and tilt let you optimize without unbolting the panel. You loosen the U-bolts, tilt the bracket, and retighten.
It is a simple but effective system. The bracket can hold one to three large 400W panels, or three to five 100W panels, depending on the pole height and spacing.
The price is high for what looks like simple hardware. You are paying for the engineering and the heavy-duty steel.
The pipe and strut are not included, so budget for those separately. The low stock and 17 reviews suggest this is a niche product, but the 4.6-star rating is the highest on my list.
Who Should Buy This Mount
Buy this if you need a pole mount for large panels and want the strongest option available. It is ideal for agricultural installations, commercial signs, and remote monitoring stations.
The steel construction outlasts aluminum in high-stress environments.
If you are building a tall array on a 10-foot pole, this is the mount that will not bend or crack under load. It is overbuilt by design, which is exactly what you want for critical infrastructure.
Who Should Skip This Mount
Skip this if you are on a tight budget. The mount plus pipe plus concrete footing adds up to a significant expense.
Also skip it if you do not have access to heavy equipment. The 3-inch schedule 40 pipe needs to be set in concrete, and the assembly requires strong hands.
Do not buy this if you need customer support from a large brand. PT Squared is a small family-owned business, which is great for quality but may mean slower response times if you have questions.
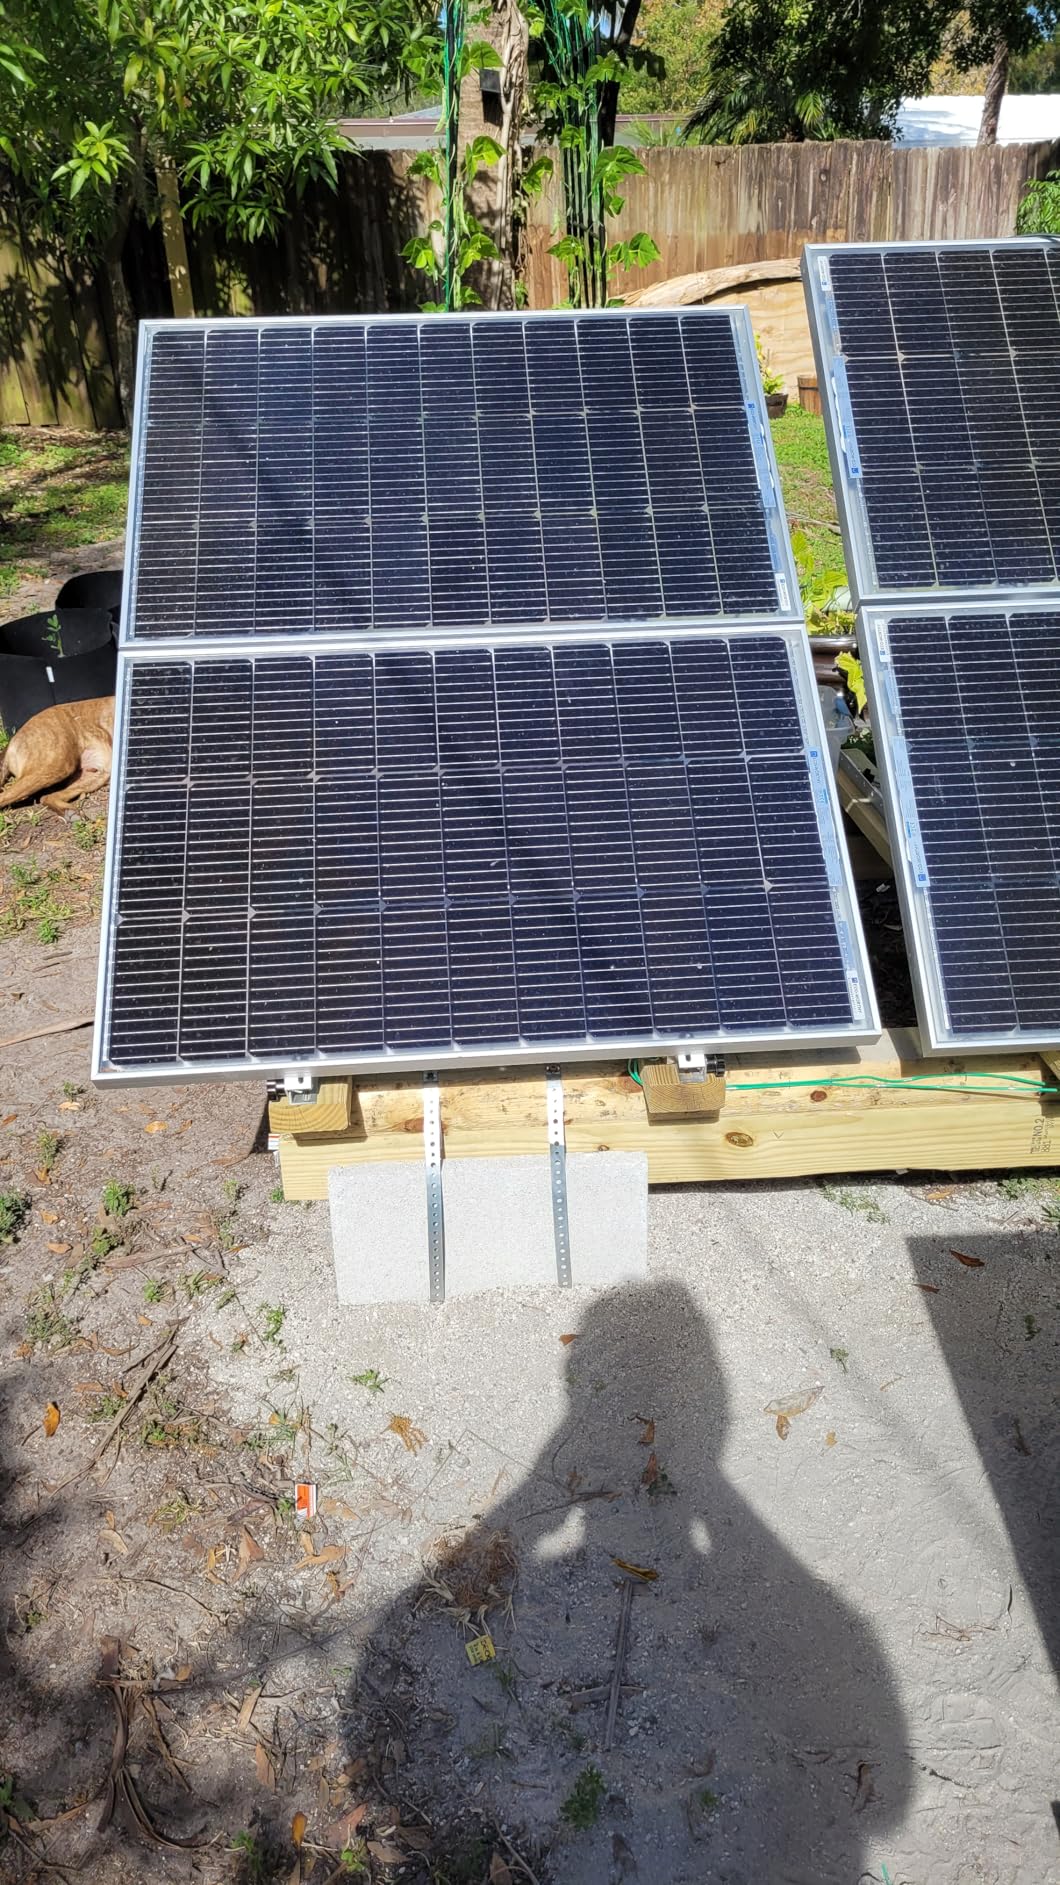
14. CMYYANGLIN Ground Mount Kit – Best for 1-4 Panel Arrays

CMYYANGLIN Solar Panel Mounting Brackets Kit System Adjustable 30º~45º Aluminum Alloy Tilt Ground Mounted Bracket Rust Free Sturdy for 1-4pcs Solar Panels
Ground mount for 1-4 panels
Adjustable 30-45 degrees
Aluminum alloy
10-year lifespan
Pros
- Very stable and strong when assembled
- Aluminum alloy rust-free construction
- Adjustable 30-45 degree tilt for optimal angle
- Can install 1-4 solar panels
- Good quality components
Cons
- Instructions not clear
- Difficult to get square during assembly
- Not freestanding - requires cement blocks
- Some sharp edges on components
I installed this kit for a friend who needed a simple ground mount for two 300W panels behind his garage. The aluminum rails are clean and straight, and the 30-to-45-degree adjustment covers the optimal angles for most of the continental United States.
The 10-year lifespan claim is reasonable for aluminum in most climates.
The assembly is straightforward once you figure out the instructions. The printed guide is vague about which rail goes where.
I recommend laying out all pieces on the ground and matching them to the exploded diagram before you start bolting. The rails can be connected to a total length of 3565mm, which is about 140 inches.
That is enough for four standard panels in a row.
The kit is not freestanding. You need to anchor it with concrete blocks, ground screws, or poured footings.
I used concrete blocks on the corners and center support, which added about 40 dollars to the total cost. In high wind, the blocks held fine, but I would pour proper footings if this were a permanent installation.
The rail end caps are a small but nice touch. They keep water from pooling inside the rails and prevent wasps from nesting in the hollow tubes.
I have seen nests in unsealed rails before, and it is not fun to clean out. The caps are plastic, but they fit tightly and have not blown off in wind.
Who Should Buy This Kit
This is a good choice for homeowners who want a dedicated ground mount for one to four panels without spending premium money. The aluminum construction is rust-free, and the rail system is expandable.
If you are building a small array and plan to add panels later, the 3565mm max rail length gives you room to grow.
It is also suitable for regions with heavy snow, since the 45-degree max tilt lets panels shed snow better than low-angle mounts. The aluminum does not rust from road salt or coastal air.
Who Should Skip This Kit
Skip this if you are a beginner who needs crystal-clear instructions. The manual is the weakest part of this kit.
Also skip it if you need a true freestanding mount. The extra cost and effort of anchoring with concrete blocks or footings is a hidden expense.
Do not buy this if you have thin-framed panels. The clamps are designed for older 35mm-plus frames. Newer 30mm frames may need shimming or different end clamps.
Ground Mount Solar Panel Buying Guide
Choosing the right ground mount solar racking system is more than picking the highest-rated product. You need to match the mount to your panels, your soil, your climate, and your skill level.
I have made expensive mistakes by ignoring one of these factors. Here is what I learned.
Foundation Types: Ballast vs Ground Screw vs Concrete
There are three ways to anchor a ground mount. Ballast systems use heavy weights like concrete blocks to hold the rack down.
They are the easiest to install because you do not dig holes. I recommend ballast for temporary setups or areas with rocky soil where drilling is impossible.
The downside is weight. A ballast system for a four-panel array can need 400 pounds of blocks.
Ground screws are steel helical piles that twist into the earth like a giant corkscrew. They are faster than concrete and can be removed later.
I have used ground screws in sandy and clay soils with good results. They do not work well in rocky ground, and you need a special driver or a strong friend with a breaker bar.
Concrete footings are the strongest and most permanent option. You pour a concrete pier for each post and let it cure.
This is what I used for my main array, and it has survived 70mph winds. The downside is labor. Digging holes and mixing concrete is hard work.
If you are not comfortable with a post-hole digger, hire help or choose ballast.
Panel Compatibility and Size Considerations
Not every mount fits every panel. The critical measurement is the panel frame thickness.
Most mounts are designed for 35mm to 40mm frames. If you have a newer high-efficiency panel with a 30mm frame, the clamps may not grip tightly.
I fix this with rubber shim strips, but it is an extra step.
The rail length also matters. A 45-inch bracket works for most 60-cell panels up to about 200W.
A 72-cell 400W panel is usually 78 inches long, so you need a 60-inch bracket minimum or a rail-based system.
Always check your panel dimensions against the mount specs before ordering. I have a friend who bought the wrong size and had to drill new holes, which voided the warranty.
Adjustable Tilt and Seasonal Optimization
The optimal tilt angle for solar panels is roughly equal to your latitude. In summer, you want a lower angle.
In winter, you want a steeper angle. Adjustable mounts let you capture this seasonal variation.
I adjust my fixed mounts twice a year, in March and September. The difference is about 15 percent more winter output compared to a single fixed angle.
Tracking systems take this further by adjusting daily or even hourly. They add cost and complexity, but in sunny climates, the payback is real.
If you are grid-tied and have net metering, tracking may not be worth it. If you are off-grid and every amp-hour matters, tracking is a smart investment.
Weather Resistance and Load Ratings
Wind and snow are the two enemies of ground mounts. Wind ratings are measured in Pascals or mph.
A 2400Pa rating is about 130mph, which is excellent. Snow load ratings are less commonly published, but you can estimate by looking at the total weight capacity.
A mount rated for 330 pounds can handle three large panels plus a few inches of wet snow.
I live in a region with both high wind and heavy snow. I chose mounts with redundant supports and high weight ratings.
If you are in a mild climate, you can save money with lighter-duty mounts. Do not buy more mount than you need, but do not buy less than your weather demands.
DIY vs Professional Installation
Most of the mounts on this list are designed for DIY installation. If you can use a wrench, a level, and a drill, you can install a basic ground mount.
The exceptions are large concrete-pour systems and tracking systems. Trackers need wiring, calibration, and sometimes trenching for conduit.
If you are not comfortable with electrical work, hire an electrician for the tracker controller.
Permitting is another factor. Some jurisdictions require a permit for ground-mounted solar arrays, especially if they are over a certain height.
Check with your local building department before you buy. I have heard of homeowners installing mounts and then being forced to move them because they violated setback rules.
Frequently Asked Questions
What is the 120 rule for solar panels?
The 120 rule is a simple guideline for sizing off-grid solar battery systems. You add the battery temperature to the charging voltage, and the total should be around 120. For example, if your battery is at 77 degrees Fahrenheit, you charge at 43.2 volts. This rule helps prevent overcharging and extends battery life. It is most commonly used in lead-acid battery systems.
Are ground mounted solar panels better?
Ground mounted solar panels are better than rooftop panels in specific situations. They allow optimal tilt and direction for maximum sun exposure, they are easier to clean and maintain, and they avoid roof leaks or structural concerns. However, they require more land, cost more to install because of racking and foundation work, and may need fencing to protect against animals or theft. For homes with shaded roofs or weak roof structures, ground mounting is often the better choice.
Why are ground mounts more expensive?
Ground mounts cost more because they require additional materials and labor. You need racking, foundations, trenching for wires, and sometimes fencing. Rooftop systems use the existing roof structure as the mount. A ground mount also takes up usable yard space. The extra cost is typically 10 to 30 percent more than a comparable roof installation, but the increased energy production and easier maintenance can offset the upfront expense over time.
What is the 33 rule in solar panels?
The 33 rule in solar refers to the idea that a solar panel should be sized so that its peak output is roughly 33 percent of the battery bank capacity in amp-hours. This prevents the battery from charging too slowly or too quickly. For example, a 300 amp-hour battery bank pairs well with a panel array that produces about 100 amps at peak. This rule helps balance charging speed with battery health.
Can I install ground mount solar panels myself?
Yes, most ground mount solar panels can be installed by a competent DIYer with basic tools. Fixed ground mounts and bracket systems are the easiest. You need a level, drill, wrenches, and possibly a post-hole digger or concrete mixer. Tracking systems and large multi-panel arrays are more complex and may require electrical knowledge for wiring. Always check local permitting requirements before starting a DIY installation.
Final Thoughts
The best ground mount solar panels for your project depend on your panel count, your climate, and your budget. The ECO-WORTHY Upgraded Solar Ground Mount remains my top pick for most buyers because it balances capacity, durability, and ease of installation.
If you need to scale up, the large-scale version is ready. If you want maximum efficiency, the dual-axis tracker is worth the extra effort.
In 2026, the options are better than ever. You no longer need to hire a contractor for a simple backyard array. With the right mount and a free weekend, you can have panels in the ground and energy flowing by Monday. Start with a fixed mount, learn the basics, and expand when you are ready. Solar is a long game, and a solid ground mount is the foundation that makes it work.