

Kayaking is an enjoyable and adventurous activity that can be done alone, with family, or even with friends. Having a kayak rack for your RV makes it easier to transport your kayaks from place to place without the need for additional transportation.
However, professionally-made kayak racks can be quite expensive. Luckily, it is possible to build a kayak rack for an RV yourself. Doing so will save you money and provide you with a customized solution that fits your RV perfectly.
In this blog post “How to build a kayak rack for an RV”, we will walk through the steps you need to take to build your very own kayak rack. With the help of this article, you’ll be able to have a custom kayak rack installed on your RV quickly and easily.
Contents
Contents
What Is Kayak Rack?
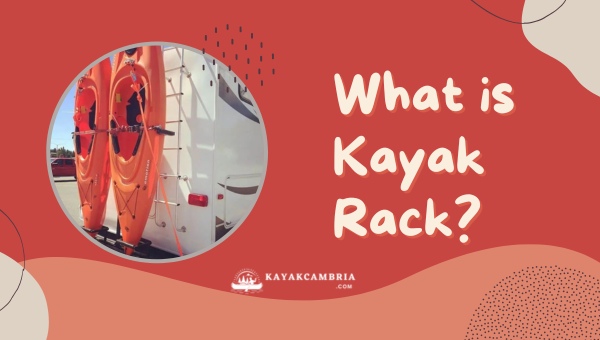
A kayak rack is a device used to transport your kayak(s) from storage to the shore. It typically consists of a frame that is mounted onto the side or roof of an RV and holds your kayaks securely on the exterior of the vehicle. They provide easy access for loading and unloading your kayaks, as well as a safe and secure way to transport your kayaks from one location to another.
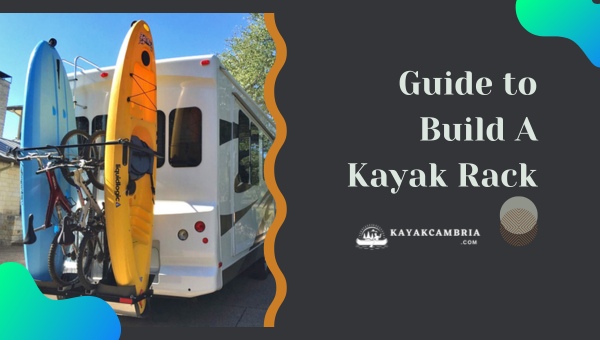
Guide To Build A Kayak Rack
Now that you know what a kayak rack is, let’s discuss how to build one. Building your kayak rack for an RV is not as difficult as it may seem and can be done in just a few simple steps. Below are the steps you need to take in order to build a kayak rack for your RV:
1. Check Your RV’s Compatibility
Before you start building your kayak rack, it is important to check if your RV is compatible with modifications and can carry the extra load adding the weight of the kayaks, as well as the rack and securing material. To determine if your RV can handle the additional weight, consult the RV’s owner’s manual or get in touch with the manufacturer for clarity. Keep in mind that a single kayak can weigh anywhere between 100-130 lbs, and a rack, 20-30 lbs.
2. Determine the Number of Kayaks You Would Carry
If you’re looking to transport more than one kayak, you must determine how many kayaks, exactly, would fit on your kayak rack. It is generally advised to build a two-kayak rack for your RV, and even if you’ve only one kayak to bring, you can leave the extra space for another day. It is always better to have it and not use it than to need it and not have it!
3. Choose the Location for the Rack
Once you’ve determined your RV’s compatibility and the number of kayaks to be carried, it is time to decide where the rack should be mounted. Generally, installing a kayak rack on the roof or rear side of an RV is ideal as that allows easier reinforcement of these areas and also makes it easier to load and unload the kayaks. Keep in mind that installing a rack on either of these locations will take up almost all of your RV’s roof space, so make sure you’re comfortable with that before moving forward.
4. Choose the Material
The material you choose for your kayak rack will determine its strength, durability, and cost. PVC and metal are two of the most commonly used materials for constructing a kayak rack. PVC is durable, lightweight, and can easily be modified to adapt to any surface.
Metal is rigid, strong, and lightweight but must be welded or secured with screws and bolts. Wood is another option, but it is expensive, cannot be easily repaired and molded, and is a bit heavy as well. The best option is to use a combination of metal and PVC which offers strength, the flexibility of construction, easy repairs, and economical prices.
5. Take Measurements
Take all the measurements precisely using a tape measure. The areas to measure are the rear bumper’s width, the height of the kayaks, and the dimensions of the supporting platform. Keep in mind that your measurements should be as close to accurate as possible to ensure secure and stable mounting of the kayak rack.
6. Build the Kayak Rack
Once your measurements are taken, it is time to build the kayak rack. Begin by reinforcing your RV’s rear bumper with a sleeve and hooks on its sides. Then, build the platform using PVC pipes, steel angle iron, and a wooden frame. Secure the frames together using bolts and screws and make sure that the length and width are accurate and do not exceed 2’. Once the frame is complete, add padding along the edges and on the surface of the racks to prevent your kayaks from getting scratched during transport.
7. Secure the Kayaks
The last and most important step is to secure your kayaks onto the rack. To do this, use elastic wires and hooks. Measure out the length of each wire and attach it securely to each side of the kayak. Then, use a sturdy hook on each end of the wire to fasten it securely onto the frame. This will ensure your kayaks are secure and firmly held in place while you travel.
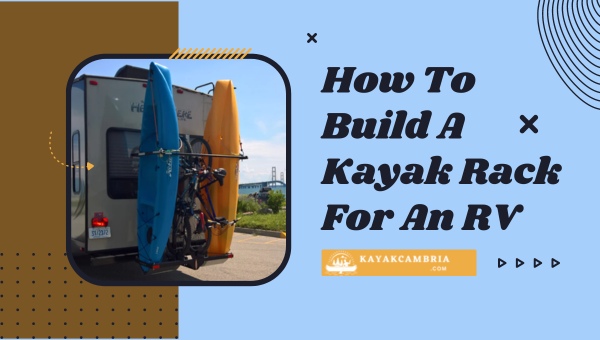
How To Build A Kayak Rack For An RV?
There are a few different options you have when choosing how to build your RV kayak racks, whether you want a vertical RV kayak rack versus a horizontal one or storing your kayaks on your RV roof, or placing your kayak mount for RV behind the vehicle. Here is an easy DIY RV kayak rack guide to help you with the job.
1. DIY Vertical Kayak Rack for RV
The vertical kayak rack for RV is the most popular option when it comes to kayak storage and transportation. This type of rack offers easier access, as well as a more secure way of storing your kayaks. Below is the step-by-step process for how to build your own vertical kayak rack for an RV.
a. Install The Dual Hitch
First, you’ll need to install the dual hitch extension receiver in order to connect other accessories such as a cargo carrier or bed extender. To do this, insert the dual hitch into your RV’s hitch receiver tube opening located at the bumper area. Once inserted, put a pin and hook in place to secure the hitch connection.
b. Weld The Bars
You’ll then need to weld four bars onto a straight horizontal bar, where the spacing should fit the width of your kayaks. Hang a pulley on the bar to take some of the weight off when loading and unloading. Also, attach a strap on the farthest end of the bar to wrap around your kayak. This will help secure the kayak while you’re travelling.
c. Fit The Bed Extender
To store your kayaks vertically, you’ll need to fit a bed extender stand on the back of your RV. The extender should be inserted in reverse mode and the attachment bar should go to the top part of the hitch. After that, drill a hole to secure the connection with a pin or weld it if possible. To make sure everything is in place, add stabilizers on the hitch joints.
d. Attach The Cargo Carrier
To complete the installation of your vertical kayak rack for RV, you need to attach a cargo carrier. This will help secure the lower portion of the kayak. Firstly, put the left and right frames of the cargo carrier together using bolts and nuts. Then, slide the main arm and the angled shank onto the basket carrier. Add the bolts, nuts, and pins into place, then tighten. Finally, align the holes of the angled shank and the hitch’s lower receiver and secure it with a pin to install.
e. Extra Cushions
This step is optional but it will help protect your kayaks from any scratches or dents. Cut square holes at the bottom of the meshed metal grating and insert foam pool noodles on the cutout’s inner sides. You can also add some foam pool noodles on the upper bars for extra cushioning.
2. DIY Roof Kayak Rack for RV
If you don’t have enough room in your RV, using a roof rack for kayak transport is the best option. Here’s a step-by-step guide on how to build your own DIY RV roof kayak rack.
a. Prepare The Pool Noodles
The first step is to prepare the pool noodles. Cut two pieces of pool noodles into the same shape and size, then cut a slit down the middle of each piece and line them up side-by-side. Cut the foam noodles to size depending on if you are aligning them parallel or perpendicular to your roof. This will create a base for your kayak rack.
b. Secure The Pool Noodles And Kayak
Next, you will need to secure the pool noodles and kayak. Place the pool noodles on top of the kayak, then use duct tape or zip ties to secure them in place. Then put the kayaks on top and use ratchet straps or rope to secure them in place. It is a good idea to use a ladder and add additional padding on the kayaks when loading them onto the roof.
Why Build Your Kayak Rack?
There are many benefits to building your kayak rack, instead of purchasing one. Here are some reasons why it can be a great option:

- Cost Savings: Building your kayak rack is much more cost-effective than buying one from a store or online. You can save hundreds of dollars simply by using items you may have lying around the house, such as pool noodles and rope. It is also a great way to recycle materials that may otherwise go unused.
- Customization: With a DIY kayak rack, you can customize the size and shape to fit exactly what you need. You can adjust the materials and measurements to account for different types of kayaks or vehicles. This way, you can create a rack that fits perfectly with your needs.
- Improve DIY Skills: Building a kayak rack also allows you to gain new skills and experience. You can develop your existing skills, as well as learn completely new ones. Not only will this give you confidence in tackling future projects, but it could also save you money down the line if you need any additional help with designing or building other items.
Frequently Asked Questions
1. What is the best material for a DIY kayak rack?
The best material for a DIY kayak rack depends on your specific needs and preferences. Some good materials to consider include wood, metal, and plastic, as well as pool noodles for extra cushioning.
2. What is the best location for a kayak rack?
The best location for a kayak rack depends on the size and weight distribution of your kayaks. Generally, it is best to place the rack as close to the center of gravity as possible. This will ensure that the weight of your kayaks is evenly distributed and prevents any shifting or damage while driving.
3. Is a vertical kayak rack possible?
Yes, it is possible to build a vertical kayak rack. The best way to do this is by using a basket carrier and attaching it with bolts, nuts, and pins to the receiver of your hitch. You can also add extra cushions like foam pool noodles on the base and upper bars of the rack to ensure the kayaks remain secure.
4. What is a roof rack?
A roof rack is a set of bars that attach to the roof of your vehicle and are used to transport items such as kayaks, bikes, luggage, and more. They come in different sizes and designs to fit different types of vehicles. Roof racks are an easy and convenient way to move items without having to completely pack up the interior of your vehicle.
Final Words
Building your DIY kayak rack is a great way to save money and gain new skills. With the right materials, tools, and instructions, you can create a custom rack that fits perfectly with your vehicle and kayaks. Keep in mind the best location for your rack when planning out the design, as well as any extra cushioning you may need.
We hope this article “How to build a kayak rack for an RV”, has given you the information and inspiration you need to create your kayak rack. Good luck!