

While kayaking is a fantastic way to silently maneuver through waters on your adventures, sometimes you might need a little extra help getting where you want to go. That’s when installing a trolling motor on your kayak can be a game changer. Over the years, I’ve learned how to put a trolling motor on a kayak effectively and ensure smooth travels on the water.
In order to install a trolling motor on your kayak, you’ll need to follow a few essential steps. First and foremost, it’s crucial to choose the right trolling motor for your specific kayak. I’ve discovered that selecting one with the correct thrust level and size is essential to achieving optimal performance. Once you have the perfect match, it’s all about proper mounting and securing the battery to get your kayak up and running.
As you embark on this DIY project, remember that safety is the key. By taking the time to properly install the trolling motor and taking necessary precautions, you’ll enjoy an enhanced kayaking experience that combines the best of both worlds – the serene glide of a paddle and the non-intrusive power of a trolling motor. So, let’s dive into how to put a trolling motor on a kayak, and start making your kayaking adventures even more fulfilling.
Evaluating Your Kayak Compatibility

Before learning how to put a trolling motor on a kayak, it’s crucial to evaluate your kayak’s compatibility. Not all kayaks are built for trolling motors, and you’ll find that some may not have the necessary features to support them. Let’s dive into the key factors you should consider.
First, consider your kayak’s size and weight. It’s essential to select a trolling motor with the appropriate thrust capacity suitable for your kayak. The heavier your kayak, the more pounds of thrust you’ll need to move efficiently. Here’s a general thrust estimate based on the kayak’s weight:
| Kayak Weight | Needed Thrust |
| 0-1500 lbs | 30 lbs |
| 1500-2500 lbs | 40 lbs |
| 2500-3500 lbs | 50 lbs |
| 3500-4500 lbs | 65 lbs |
Next, think about the available mounting options. Trolling motors can typically be mounted at the bow (front), stern (rear), or side of your kayak. It’s important to examine your kayak’s design and determine the best mounting location. Keep in mind that some kayaks may come with designated trolling motor mounts, which make the installation process more accessible.
Furthermore, you should also consider the power source. Trolling motors require an external battery, so you need to make sure there’s enough space inside your kayak to accommodate this additional weight. In general, a dedicated space for the battery is recommended, ensuring the battery remains secure while you’re out on the water.
By keeping these factors in mind, you’ll be well-equipped to determine whether your kayak is suitable for a trolling motor. Once you have assessed your kayak’s compatibility, you’ll be ready to explore how to put a trolling motor on a kayak. This ensures smooth sailing, and you’ll be ready for new adventures on the water in no time.
Choosing the Right Trolling Motor

Before diving into the installation process, let’s discuss the factors to consider when picking the perfect trolling motor for your kayak.
- Thrust: Measuring the power of a trolling motor, thrust is a vital factor to consider. The weight of your kayak, your gear, and yourself will determine the required thrust. A higher thrust rating ensures proper propulsion and efficient movement. As a rule of thumb, you’ll need at least 2 pounds of thrust for every 100 pounds of combined weight. Here’s a quick reference table:
| Combined Weight | Recommended Thrust |
| 400 lbs | 8 lbs |
| 600 lbs | 12 lbs |
| 800 lbs | 16 lbs |
- Voltage: Trolling motors come in different voltages, including 12V, 24V, and 36V. For kayaks, a 12V trolling motor is typically sufficient, offering a balance of power and runtime.
- Shaft Length: It’s important to choose a shaft length that’s suitable for your kayak. A too-short shaft may not submerse the propeller properly, while a too-long shaft can create control issues. For most kayaks, a shaft length between 24″ to 36″ is ideal. To determine the right shaft length, measure the distance from the kayak’s mounting point to the waterline, and add 16″ to 20″.
- Transom vs. Bow Mount: Trolling motors are available in transom and bow mount varieties. Transom mount motors are easier to install and more affordable. They’re also best suited for small boats, including kayaks. On the other hand, bow mount motors offer better control and maneuverability but are more difficult to install and typically used on larger boats.
- Hand or Foot Control: Consider which control method you’re most comfortable with, as trolling motors can have hand or foot controls. Hand-operated motors offer precise steering and speed control, while foot-operated motors allow hands-free operation.
- Battery Life: Don’t forget to take into account the battery life required for your trips. Typically, a deep cycle marine battery works well for trolling motors, and you should consider the amp-hour rating to ensure it’ll provide enough power for your needs.
By considering these crucial factors, you can confidently pick the right trolling motor for your kayak before moving on to the next steps of the installation process.
Gathering Necessary Tools and Materials

Below are the steps I recommend you follow to ensure a smooth and hassle-free installation process.
- Choose the right trolling motor and battery: To begin, I advise selecting a trolling motor and battery suitable for your kayak’s size and weight capacity. Smaller kayaks typically require lower thrust motors, while larger kayaks can accommodate more powerful ones. The battery should also offer a sufficient runtime that matches your usage and preferences. Many anglers prefer a 12V deep cycle marine battery for a good balance between performance and weight.
- Obtain a mounting kit or bracket: Next, you’ll need a mounting kit or bracket compatible with your trolling motor and kayak. Some popular options include:
- Side-mount brackets, which attach to the gunwale of the kayak
- Stern-mount brackets, which connect to the stern of the kayak
- Custom mounts built specifically for your kayak model
- Make sure to choose a mounting option that allows for simple adjustments and quick removal if needed.
- Gather the necessary tools: Before starting the installation, ensure you have all the required tools on-hand. Typical tools needed for this project include:
- Drill and drill bits
- Wrenches and ratchet sets
- Screwdrivers
- Marine sealant
- Pliers
- Wiring tools (wire strippers, connectors, and heat shrink tubing)
- Acquire any additional accessories: Finally, consider any extras to improve the overall performance and convenience of your new setup. Some useful add-ons include:
- A remote control to operate the trolling motor from a distance
- An extension handle to reach the trolling motor’s tiller more easily
- A battery box to securely store and protect your battery
- An inline fuse to safeguard the motor and electrical system from potential surges
By preparing for the installation in advance, you’re one step closer to enjoying the benefits of having a trolling motor on your kayak.
Determining the Motor Mount Location

In this section, I’ll walk you through some considerations to keep in mind before choosing a spot and outline the steps to find the ideal location.
Several factors can impact the decision on where to position the trolling motor:
- Comfort: It’s important to install the trolling motor where it won’t interfere with your paddling. You want to make sure you can comfortably reach the motor controls and steer the kayak with ease. A well-fitted motor mount ensures a comfortable kayaking experience.
- Stability: Positioning the motor correctly improves your kayak’s stability, which is essential for safety while out on the water. Installing a trolling motor towards the kayak’s stern or bow can help maintain balance and maneuverability.
- Weight Distribution: Distributor the weight of the trolling motor evenly is crucial to maintaining your kayak’s stability. Opt for a location that will balance the additional weight of the motor and battery against your body weight in the kayak.
Here’s a step-by-step process for determining the ideal motor mount location:
- Examine your kayak’s design: Take a good look at the kayak’s structure, noting any pre-existing mounts or attachment points. Some kayaks have built-in brackets for trolling motors, making the process much more straightforward.
- Decide on the type of motor mount: Kayak trolling motors can be placed on either the bow or the stern, each offering its advantages. Bow-mounted trolling motors provide better maneuverability and control, while stern-mounted motors are easier to install and tend to be less expensive.
- Measure the kayak: Accurate measurements are key for determining the appropriate mounting location and what size of motor mount bracket you will need. Measure the width of your kayak’s stern or bow to find a motor mount that will fit securely.
- Mark your preferred location: With a marker or some tape, indicate your chosen motor mount location. This will help you visualize the motor’s placement and make any necessary adjustments before installation. Keep in mind how close it will be to your seating position and try sitting in the kayak to test whether it feels comfortable.
- Test for stability: To be safe, it’s essential to simulate the trolling motor’s weight and location in the kayak before installation. Use a weighted object that’s roughly the same weight as your motor and battery and place it where the motor will be installed. Check for stability when you’re in the kayak, making any adjustments as needed.
By following these steps, you’ll be well on your way to finding the perfect motor mount location for your kayak. Once you’ve chosen the ideal spot, you can proceed with confidence, knowing that your kayak will provide a comfortable and stable experience with its new trolling motor.
Assembling and Installing the Motor Mount
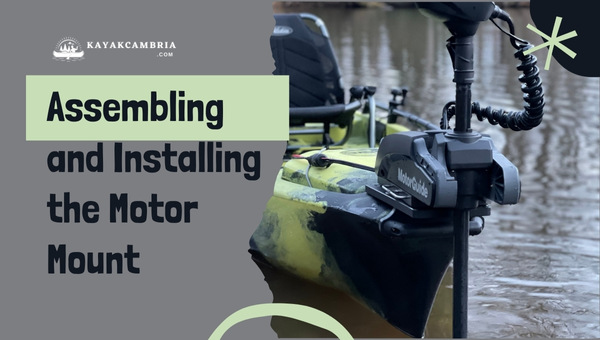
Learning how to put a trolling motor on a kayak begins with assembling and installing the motor mount. I’ll guide you through the process step by step. Grab your tools, and let’s get started!
First things first, you’ll need to choose a reliable motor mount for your kayak. There are several options available, including:
- Custom motor mounts specifically designed for your kayak model
- Universal motor mounts that can be adjusted to fit various kayak sizes
- DIY motor mounts, which can be built using basic materials like PVC pipes, brackets, and bolts
Once you’ve selected a suitable motor mount, it’s time to gather the necessary tools for the job. Common tools required include:
- Wrenches and/or socket sets
- A drill with various bits
- An adjustable wrench
- A measuring tape
- A hacksaw (for DIY mounts)
- A file or sandpaper (for DIY mounts)
With your tools ready, you can now follow these brief steps for assembling and installing the motor mount:
- Measure and mark the location for the motor mount: Choose the optimal spot on your kayak to install the motor. It’s usually best to place the mount towards the rear of the kayak, as this balances the weight distribution and makes it easier to steer. Use the measuring tape and a marker to indicate the exact location for the mount.
- Secure the brackets: If using a custom or universal motor mount, attach the provided brackets to your kayak at the marked location. Ensure they’re properly lined up and level before drilling holes and bolting them in place. Tighten the bolts securely with a wrench.
- Assemble the motor mount: Follow the manufacturer’s instructions to assemble the motor mount, ensuring all components are securely fastened. For DIY mounts, cut the PVC pipes and brackets to the appropriate size using a hacksaw and smooth any rough edges with the file or sandpaper.
- Attach the motor mount: Place the assembled motor mount onto the secured brackets and tighten it in place with the provided bolts or fasteners. Ensure the mount is level and properly aligned, as this will prevent any issues with the trolling motor’s performance.
- Attach the trolling motor: Once the mount is securely fastened to your kayak, it’s time to attach the trolling motor. Follow the motor manufacturer’s instructions carefully, ensuring you’ve secured the motor to the mount properly and connected the battery cables correctly.
With the motor mount assembled and installed, you’re all set to enjoy a more efficient and effortless paddling experience. As always, double-check all connections and fasteners before hitting the water, and practice safe boating habits.
Securing the Trolling Motor to the Kayak
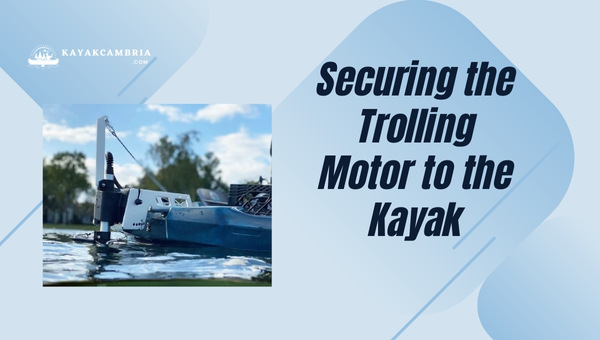
In this process, I’ll give you several tips and advice to make sure your trolling motor stays firmly attached, ensuring excellent performance on the water.
To start with, you’ll need to pick the appropriate mounting location for your trolling motor. This location should provide adequate clearance for the propeller and allow you to easily reach the motor controls. Take into account the kayak’s weight distribution, available space, and the size of the trolling motor when choosing the spot. Common mounting positions include:
- Bow of the kayak: Offers better control and maneuverability.
- Stern of the kayak: Simplifies installation and takes up less space.
- Side of the kayak: Less common but might be a suitable option for specific trolling motor setups.
Once you’ve decided on the location, it’s time to prepare the chosen area. You might need to install a mounting bracket or plate to provide a base for attaching the trolling motor. There are different types of mounting brackets available, such as:
- Universal mounting plates: Compatible with a variety of trolling motors and offer adjustable positioning.
- Brand-specific brackets: Designed to work with specific trolling motor models for a precise fit.
After you’ve prepped the mounting spot, it’s time to attach the trolling motor. Follow these steps carefully for a secure connection:
- Align the motor: Make sure the motor’s mounting bracket aligns with the mounting bracket or plate on your kayak.
- Attach the motor: Secure the trolling motor to the mounting bracket using the provided bolts or screws that came with the motor. Keep in mind to tighten them firmly.
- Double-check your work: Ensure your motor is secure by giving it a gentle shake. The motor shouldn’t feel loose or wobbly.
One last detail to consider is the wiring for your trolling motor. Properly connect your trolling motor to the power source, using connectors specially designed for marine environments. Be sure to keep the wiring organized and secure by using tie wraps, clips, or Velcro straps.
By following these simple guidelines on how to put a trolling motor on a kayak, you’ll ensure a secure attachment and a smooth sailing experience. So gear up, and enjoy the extra comfort and convenience that a trolling motor brings to your kayaking adventure.
Managing Wiring and Power Source
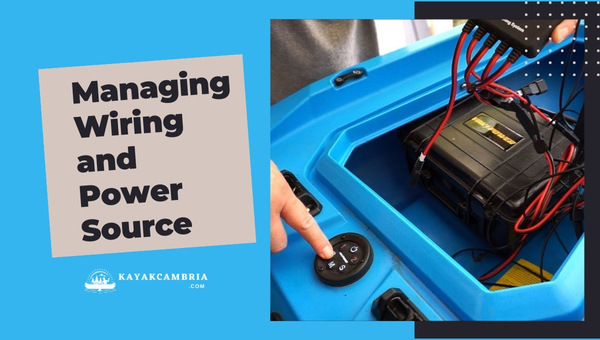
A well-organized wiring system and reliable power source are essential for the safe and efficient operation of your trolling motor. Now, let’s start how to manage wiring and the power source:
First, let’s discuss the power source. Most trolling motors require a 12-volt deep-cycle battery as the primary power source. It’s important to choose the right battery capacity, depending on the motor’s power consumption and your anticipated usage. Here are some factors to consider when selecting a battery:
- Battery capacity in amp-hours (Ah)
- Weight and size of the battery
- Type of battery (lead-acid, lithium, or AGM)
It’s also a good idea to invest in a battery box to protect the battery from water damage and to keep it securely in place within the kayak.
Now that we’ve covered the power source, let’s move on to managing the wiring. Proper wiring management ensures that the motor runs efficiently and reduces the risk of accidents or system failures. Here are some tips for managing the wiring when installing a trolling motor on a kayak:
- Use the appropriate gauge wire based on the motor’s power rating and the distance between the motor and the battery. Thicker wires are generally better for higher current flow and longer distances.
- Keep the length of the wire as short as possible to reduce power loss and increase efficiency.
- Consider using a quick-connect/disconnect system for easier attachment and removal of the trolling motor.
- Secure the wires with cable ties or clips to keep them out of the way and reduce the risk of snagging or other accidents.
- Use marine-grade heat shrink tubing to cover and protect wire connections from water and corrosion.
By properly managing the wiring and having a reliable power source in place, you’ll ensure a safe and enjoyable experience while using your trolling motor on your kayak. Remember to always follow the manufacturer’s guidelines and consider seeking professional assistance if you’re not confident in installing the motor yourself.
Is It Legal To Put A Trolling Motor On A Kayak in 2026?

Before making any modifications to your kayak, it’s crucial to understand the local laws and regulations. In most regions, it is legal to put a trolling motor on your kayak. However, there may be specific restrictions and guidelines that you need to follow.
For instance, in some places, you might be required to register your kayak with a trolling motor as a motorized vessel and obtain a specific license. You may also need to display registration numbers on your kayak. It’s always a good idea to check with the local authorities or do some research online to ensure that you comply with the applicable regulations.
How Fast Will A Kayak Go With A Trolling Motor?
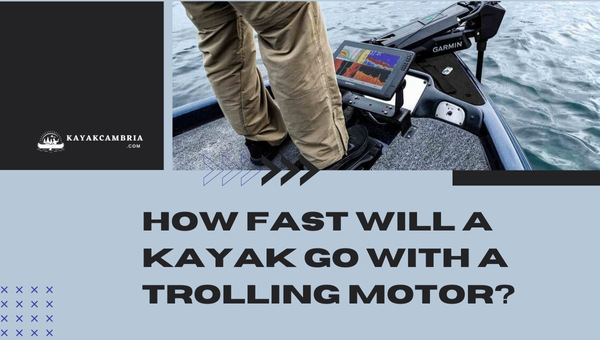
The speed that a kayak can achieve with a trolling motor depends on several factors, such as the size of the motor, kayak design, weight capacity of the kayak, and water conditions. In general, adding a trolling motor to a kayak can significantly enhance its speed and overall performance.
A trolling motor typically ranges between 30 to 55 pounds of thrust. On average, a kayak fitted with a trolling motor can achieve speeds between 4 to 6 mph. This is relatively faster than paddling, making it an excellent option for longer trips or when you need to cover vast distances quickly.
The kayak’s design can impact the maximum achievable speed. For instance, longer and slimmer kayaks will generally move faster with a trolling motor due to lesser drag when compared to shorter and wider models.
In addition, the overall load on the kayak matters. The weight of the gear, the paddler, and the motor itself can affect the top speed. Heavier loads will reduce the maximum speed achievable, while lesser loads will allow for higher speeds.
Water conditions, such as wind and current, can also influence the speed of a kayak equipped with a trolling motor. When paddling against strong currents or headwinds, one may not achieve the maximum possible speeds.
How To Test A Used Trolling Motor in 2026?
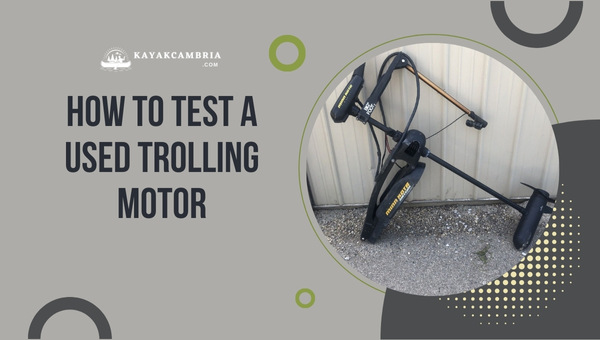
Purchasing a used trolling motor can be a cost-efficient move, but ensuring its functionality before making the purchase is crucial. To test a used trolling motor, follow these steps:
- Visual Inspection: Begin with a thorough visual inspection of the trolling motor. Check for any visible damages, corrosion, or wear on the motor’s exterior, shaft, propeller, and wiring. Pay attention to loose or frayed wires and any cracks or dents in the motor and shaft.
- Test the Battery: For a reliable performance test, it’s essential to ensure that the trolling motor battery is fully charged. Use a multimeter to check the battery voltage and make sure it matches the voltage requirements of the trolling motor, either 12V, 24V, or 36V.
- Connection: Connect the trolling motor to the battery by attaching the red or positive (+) wire to the positive terminal of the battery and the black or negative (-) wire to the negative terminal. Ensure the connections are secure.
- Switch and Speed Control: Trolling motors usually come with 3-5 different speed settings. Make sure your test area is clear and safe before starting, and then turn the motor on. Test all forward and reverse speed settings to ensure they are functioning correctly. Listen for any unusual noises. The motor should operate smoothly at all speeds without any rattling, grinding, or humming sounds.
- Propeller Inspection: While the motor is running, inspect the propeller for any cracks, chips, or damage that can impact performance. If needed, you may consider replacing the propeller.
- Test the Shaft: Check if the shaft extends and retracts smoothly with minimal friction. Observe the motor while it’s running at different speeds to ensure it doesn’t wobble or vibrate excessively.
- Steering Test: While the motor is at low speed, test the foot control (if applicable) or the tiller handle to ensure the motor responds and turns smoothly in both directions. A responsive motor will be easier to control and more efficient.
- Inspect Mounting Bracket and Hardware: Make sure all hardware, including mounting brackets, nuts, bolts, and clamps, is present and in good condition. Tighten any loose parts to ensure stability and safety.
By following these steps, you can confidently test a used trolling motor’s functionality and significantly reduce the risk of purchasing a faulty or poorly-performing motor.
What Size Trolling Motor Do I Need For My Kayak?
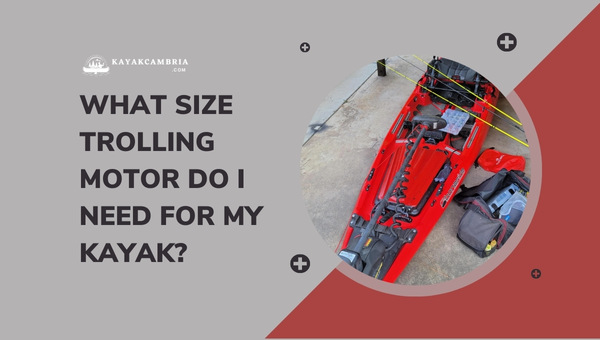
Before diving into the installation process, it is paramount to choose the appropriate trolling motor size for your kayak. When determining the right size and power, you need to consider the following factors:
- Kayak Size and Weight: A larger and heavier kayak will require a more powerful motor to propel it efficiently. Typically, you’ll need 30-40 pounds of thrust for a 10-12 feet long kayak and 45-55 pounds of thrust for a 12-16 feet long kayak.
- Anticipated Conditions: Consider the kind of water conditions you’ll be dealing with, such as water currents, wind, and waves. A more powerful motor will better cope with rougher water conditions and swift currents.
- Load Capacity: Make sure to take into account the combined weight of you, your gear, and any additional passengers or equipment. A heavier load will require a more powerful motor to maintain adequate performance.
Once you have taken these factors into consideration and chosen the right size trolling motor for your needs, proceed with the installation process.
What Kind Of Battery To Use For A Trolling Motor in 2026?
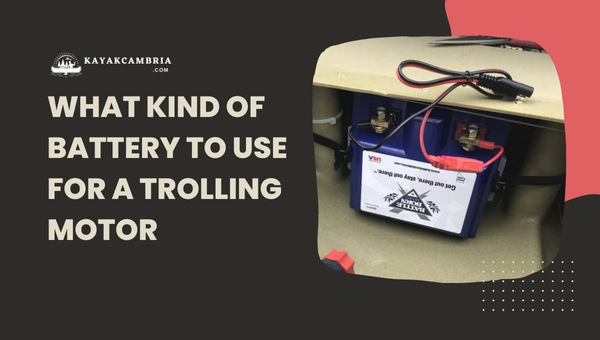
Choosing the right battery for your trolling motor is essential for optimal performance and longevity. There are three primary types of batteries suitable for trolling motors:
- Flooded Lead-Acid (FLA) or Wet Cell Batteries: These are the most common and affordable type of battery for trolling motors. They contain plates submerged in liquid electrolyte solution and require periodic topping up with distilled water. FLA batteries can handle deep discharge cycles but have a lower energy density compared to other types, which means they don’t last as long. They are also sensitive to high temperatures and need proper ventilation.
- Absorbent Glass Mat (AGM) Batteries: AGM batteries offer better performance than wet cell batteries and require very little maintenance. They contain an electrolyte solution absorbed in a fiberglass mat, which means they don’t need topping up and can be mounted in any position without the risk of spills. AGM batteries provide higher current output and a slower self-discharge rate, making them excellent for trolling motors. However, they tend to be more expensive than wet cell batteries.
- Lithium-Ion (Li-ion) Batteries: These are the most advanced and lightweight option for trolling motor batteries, offering the longest service life and highest energy density. Li-ion batteries require virtually no maintenance and provide superior performance concerning charge-discharge cycles and efficiency. They have a faster charging rate compared to other types and can deliver stable voltage even under heavy loads. However, Li-ion batteries are the most expensive option.
When selecting a battery for your trolling motor, consider the following factors:
- Voltage: Ensure the battery matches the voltage requirements of your trolling motor – typically 12V, 24V, or 36V.
- Amp-Hour (Ah) Rating: The higher the Ah rating, the longer the battery will last when in use. Choose a battery with sufficient capacity to meet your needs, keeping in mind that a higher Ah rating will also add to the overall weight.
- Weight: The battery’s weight can be a critical factor when it comes to kayaks or smaller watercraft. Lithium-ion batteries are the lightest option, followed by AGM and wet cell batteries.
- Maintenance: If you prefer a hassle-free experience, AGM and Li-ion batteries are maintenance-free, while wet cell batteries require periodic check-ups and topping up.
- Budget: Determine your budget for a battery, as prices can vary significantly between the different types. Wet cell batteries are the most affordable option, while Li-ion batteries can be pricey.
Taking these factors into consideration will help you choose the perfect battery for your trolling motor, ensuring efficient performance and a lasting investment.
Conclusion
Having gone through the various steps involved, I’m confident that you now have a strong understanding of how to put a trolling motor on a kayak. Let’s briefly recap the main takeaways of this process:
- Choose the right trolling motor: Consider factors such as thrust, voltage, battery life, and the type of shaft and mount to make the best choice.
- Select the right kayak: Opt for a kayak that can support the additional weight of a trolling motor and battery, and has the appropriate mounting options available.
- Secure the motor to your kayak: Utilize mounting brackets and hardware specifically designed for your kayak, ensuring a stable and safe setup.
- Connect the battery: Safely and securely connect the trolling motor to a suitable battery, keeping in mind the voltage requirements.
- Create a steering system: You’ll want to implement a suitable steering system, either by using specialized foot pedals or a tiller extension, to steer your kayak with ease.
- Test everything: Before venturing out, perform a thorough test of your setup to ensure everything is working efficiently and is securely in place.
With these steps in mind, any kayak enthusiast can quickly and safely add a trolling motor to their vessel. Remember, safety should be your top priority, so always follow the manufacturer’s guidelines and make sure to wear a personal flotation device while on the water.
Happy kayaking!