

I’ve always found that there’s something special about being out on the water in a kayak. Navigating through serene, glassy waters or fighting against the thrilling rapids, kayaking offers a unique perspective and connection to nature. But did you know that building your own kayak can be an incredibly rewarding and empowering experience? In this article, I’ll guide you through the process of how to build your own kayak, ensuring you have the knowledge and confidence to take on this exciting project.
Now, you might be wondering why someone would want to build their own kayak when there are so many great options available for purchase. Well, there’s a sense of accomplishment and pride that comes from creating something with your own two hands.
Plus, customizing your own kayak allows you to tailor it to your specific needs, whether it’s for fishing, touring, or just recreational use. So, if you’re ready to challenge yourself and take on a new endeavor, let’s dive into the world of kayak building!
Before we begin, it’s important to note that there are various types of kayaks to choose from, such as sit-on-top, sit-inside, and inflatable models. Each type has its own unique advantages and building processes, so it’s essential to research which style best suits your needs and skill level.
In the following sections, I’ll provide you with valuable information, tips, and techniques to successfully build your very own kayak. So grab your tools, get ready to learn, and let’s begin this journey together!
Gathering the Necessary Materials
When it comes to building your own kayak, the first step is gathering all the necessary materials. In this section, I’ll provide you with a comprehensive list of items you’ll need to create your perfect kayak. Keep in mind that this list isn’t exhaustive and can vary depending on your specific design preferences.
Firstly, let’s discuss the primary materials needed for the kayak’s structure:
- Marine plywood or stitch-and-glue panels for the kayak’s hull and deck. Ensure the plywood is high-quality and suitable for marine use.
- Epoxy resin and fiberglass cloth for extra strength and sealing of the plywood panels. These materials will make your kayak watertight and more durable.
- Wooden or aluminum frames can be used to support the shape of the kayak while you’re building it.
- Paint or varnish to seal and protect the finished kayak, providing an added layer of protection from the elements.
Moving on to the kayak’s additional components, you will need:
- Seats: Comfortable, ergonomically designed seats to provide adequate support for long paddling adventures.
- Foot braces: Adjustable foot braces to enhance paddling efficiency and comfort.
- Deck rigging: Bungee cords or rope systems for securing cargo, paddles, and safety equipment on the kayak.
- Carrying handles: Easy-to-grip handles for portability and easy transportation of the kayak.
Next, let’s talk about the tools you will require to shape, assemble, and finish your kayak:
- Stitching wires or zip ties to temporarily hold the panels together during assembly.
- Hand saw or jigsaw for cutting plywood panels according to your desired design or pattern.
- Router or planer to shape the bow and stern stems of the kayak.
- Drill for creating holes in the panels and assembling the kayak.
- Sandpaper to smooth the plywood surfaces and edges.
- Paintbrushes, rollers, or spray equipment for applying epoxy, fiberglass, and paint or varnish.
Finally, remember to acquire proper personal protective equipment (PPE) to ensure your safety while building your kayak. This includes safety glasses, gloves, a dust mask, and protective clothing.
Choosing a Suitable Kayak Design
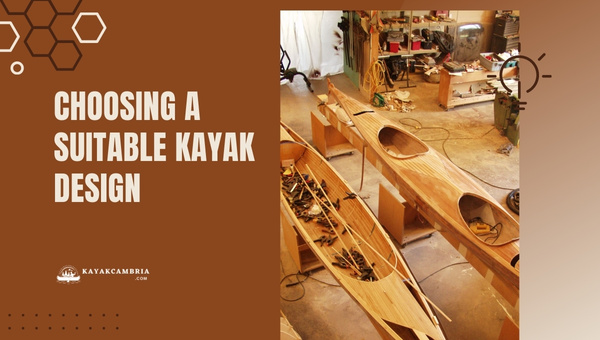
The perfect kayak design will depend on my experience level, intended use, and personal preferences. In this section, I’ll discuss a few popular kayak styles, their advantages, and some factors to keep in mind when making a choice.
There are three main types of kayaks that I can consider for my DIY project:
- Sit-on-top (SOT) kayaks are great for beginners and those who prefer a more stable and user-friendly experience. These kayaks have an open deck design and are easy to get in and out of, making them perfect for casual paddling, fishing, and enjoying warm weather.
- Sit-inside kayaks offer more protection from the elements and come in various styles to cater to different interests, such as touring, recreational, and whitewater kayaking. These kayaks are ideal for paddlers who want more control, a faster ride, and the ability to use spray skirts.
- Inflatable kayaks provide excellent portability and are typically easier to build. They can deflate and fold up for easy storage and transportation. Inflatable kayaks are ideal for those with limited space or who plan to use their kayak for occasional trips.
Some factors I need to consider when choosing a suitable kayak design include:
- Purpose: Determine why I want to build my own kayak. Is it for recreational use, fishing, touring, or challenging whitewater adventures? Identifying my primary goal will help me narrow down the type of kayak best suited to my needs.
- Experience level: I should consider my skill level when selecting a design. If I’m a beginner, I might want to start with a more stable and straightforward kayak, like a sit-on-top model. More experienced paddlers may want to explore more specialized designs.
- Size and weight capacity: The size of the kayak and its weight capacity should match my needs. If I plan to use my kayak for fishing or extended trips, I need a larger, more stable kayak with adequate storage space and a higher weight capacity.
- Materials: When planning how to build my own kayak, I need to choose materials that suit my requirements and budget. Common options include wood, composite materials like fiberglass or carbon fiber, and plastic. I also need to consider the cost, durability, and ease of working with these materials.
Selecting the right kayak design requires careful consideration of several factors. I need to keep in mind the intended usage, skill level, size requirements, and materials. By considering these elements, I can make an informed choice suitable for building my own kayak and set myself up for success on the water.
Assembling Your Kayak Frame
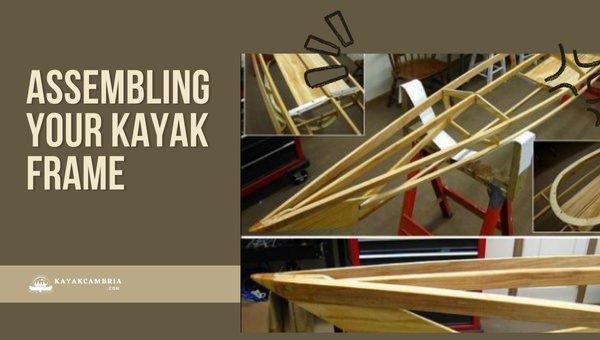
The first step I’ll walk you through is assembling your kayak frame. By following these guidelines, you’ll be well on your way to creating a sturdy, reliable vessel.
First and foremost, gather the necessary materials:
- High-quality marine plywood or other durable materials for the kayak frame
- Wood glue and epoxy resin to secure the pieces
- Saw, clamps, drill, router, and other woodworking tools
- Sandpaper for smoothing the frame
- Stainless steel screws or wooden dowels for joining the frame sections
- Builders square and measuring tape
Now, let’s discuss the main steps involved in assembling your kayak frame.
- Choose a design: Start by selecting a suitable kayak design, considering factors such as size, style, and intended use. You can find many free or purchasable plans online or consult books on kayak building.
- Cut the plywood: Based on the design and measurements, cut the plywood pieces that’ll form your kayak frame. Ensure that you follow the specs closely and make precise cuts for a perfect fit.
- Assemble the kayak floor and ribs: Begin by laying out the floor pieces, ensuring they’re properly aligned. Then, attach the ribs (cross-sections) to the floor using wood glue or epoxy resin, making sure they’re accurately positioned and square. You might want to use clamps to hold the pieces temporarily while the glue dries.
- Attach the kayak gunwales: Identify the top edge of your kayak’s sides, known as gunwales. Attach these pieces to the ribs, again using wood glue or epoxy resin. Securely fasten them into place with clamps, ensuring they’re correctly aligned and square.
- Install the stem and stern pieces: Next, attach the pointed prow (stem) and rear (stern) pieces of your kayak to complete the frame. Apply wood glue or epoxy resin and fasten them snugly with screws or wooden dowels, depending on your design.
- Reinforce the frame: To reinforce your kayak frame, you might need to add additional support pieces such as stringers (longitudinal supports), bulkheads (vertical walls), or thwarts (horizontal braces).
- Smooth the frame: With the frame entirely assembled, give it a thorough sanding to remove any rough edges or imperfections. This step is crucial for the longevity of your kayak and the ease of applying a protective coating or skin later on.
With the frame fully assembled and sanded, you’re now ready to move on to the next stages, including skinning, sealing, and outfitting your kayak. Building your own kayak might be a challenging task, but seeing it come together as you assemble the frame is incredibly rewarding!
Attaching the Skin to Your Kayak
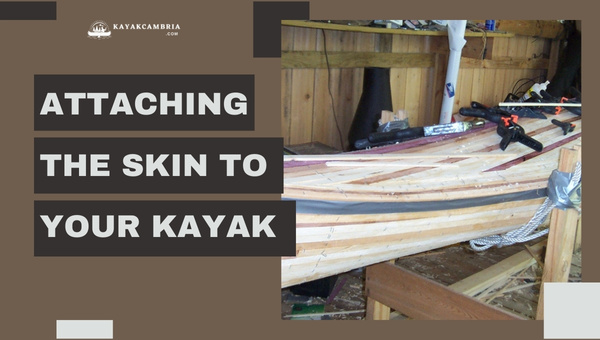
When you’re building your own kayak, one critical step you’ll need to take is attaching the skin to the kayak frame. Getting this done properly is essential for a watertight and durable kayak. I’ll take you through the process in a few easy-to-follow steps.
Step 1: Materials and Preparation
Before attaching the skin, gather the necessary materials and tools:
- Kayak skin material (such as PVC, urethane, or Dacron)
- Adhesive (specific to your skin material, e.g. PVC glue)
- Primer (optional, but recommended)
- Scissors or utility knife
- Staple gun (optional, for temporary fastening)
- Clean cloth and rubbing alcohol (or mineral spirits, depending on the skin material)
Ensure your kayak frame is clean, smooth, and free from any sharp edges that could damage the skin. Give the frame a once-over with a fine-grit sandpaper if necessary.
Step 2: Cut the Skin to Size
Roll out your skin material on a flat surface and position your kayak frame on top. Trace around the frame, allowing enough extra material on each edge for overlapping (usually around 2-3 inches). Use scissors or a utility knife to cut out the skin, following your traced outline.
Step 3: Attach the Skin
Starting at the bow or stern of the kayak, begin wrapping the skin around the frame. Ensure the skin is evenly stretched and smooth, without wrinkles or puckering. Use clamps or a staple gun to temporarily hold the skin in place as you work your way down the length of the frame.
When you reach the opposite end, trim any excess material so that the skin overlaps evenly. Before permanently attaching the skin, double-check that there are no wrinkles or gaps and that it’s sitting snugly on the frame.
Step 4: Apply Adhesive
Following the manufacturer’s instructions, apply adhesive to the overlapping edges of the skin. Be sure to use the correct adhesive for your chosen skin material. For a stronger bond, it’s recommended to apply a primer to the areas where you’ll be gluing.
Press the overlapping edges together, ensuring a tight seal. Use clamps, tape, or weights to hold the edges together while the adhesive dries. Repeat this process for any additional seams, such as those at the kayak’s ends.
Step 5: Finishing Touches
Once the adhesive has completely dried, carefully remove any clamps, staples, or tape. Use a clean cloth and rubbing alcohol (or mineral spirits) to remove any residue or marks left during the gluing process.
Now you’re ready to attach any additional fittings, such as cockpit coamings or grab handles. With the skin securely in place, your kayak is one step closer to being ready for adventures on the water.
Applying the Waterproof Coating
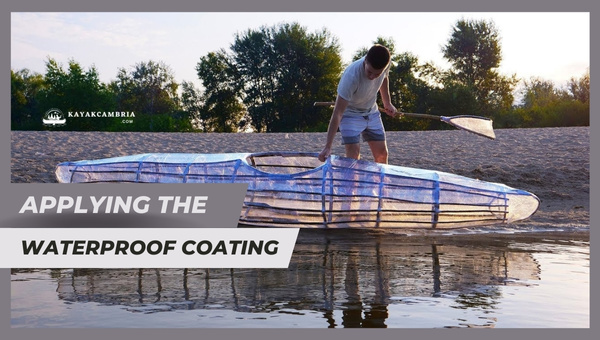
Applying a waterproof coating to your kayak is an essential step in how to build your own kayak. This process ensures that your vessel stays protected from the elements and increases its durability. I’ll guide you through the steps to apply a professional-grade waterproof coating to your kayak.
First, let’s discuss the materials you’ll need for this task:
- Waterproof coating/varnish: Marine-grade epoxy resin or polyurethane for wooden kayaks, or a specialized coating for plastic or fiberglass kayaks.
- Paintbrushes: Choose brushes with soft, natural bristles to avoid streaks and achieve a smooth finish.
- Sandpaper: Choose medium to fine grit (150-220) for sanding between coatings.
- Clean cloth or tack cloth: Essential for wiping off dust and debris before applying the coating.
Here are the steps to apply the waterproof coating effectively:
- Prepare the surface: Clean the kayak’s surface thoroughly and make sure it’s dust-free. If using a fiberglass or plastic kayak, scuff the surface lightly with sandpaper to enhance adhesion.
- Mix the coating: Follow the manufacturer’s instructions for mixing the epoxy resin or polyurethane. Some products may require a hardener, while others are single-component. Stir the mixture well before application.
- Apply a base coat: With a paintbrush, apply an even base layer of the waterproof coating to your kayak in long, smooth strokes. Be attentive to avoid drips and streaks and ensure full coverage. Let the base coat dry according to the manufacturer’s guidelines.
- Sand and clean: Once the base coat is dry, lightly sand the surface with medium to fine-grit sandpaper to smooth out any imperfections. Wipe the dust away with a clean cloth or tack cloth.
- Apply additional coats: Repeat steps 3 and 4 for each additional coat, as recommended by the manufacturer. Most coatings will require 2-3 coats for optimal performance.
- Inspect: After applying the final coat and allowing it to dry, inspect your kayak carefully for any missed areas or imperfections. If necessary, apply touch-up coats as needed.
By carefully following these steps, you’ll have a well-protected, water-resistant kayak that’s ready to hit the water. Remember, the quality of the waterproof coating is essential for the longevity and performance of your kayak; so it’s best to invest in a high-quality product and take the time to apply it correctly.
Installing the Kayak Seats and Storage
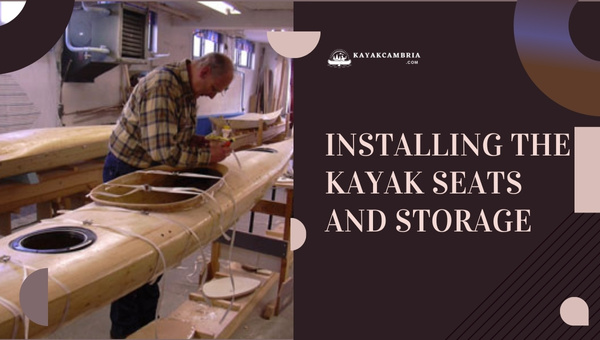
Installing the kayak seats and storage might seem like a challenging task, but with the right approach, it’s quite manageable. To make it easier, I’ve broken down the process into a few simple steps.
1. Determine the Type of Seat
First, decide on the type of seat that’s best for your kayak. There are different seat options available in the market:
- Basic foam pad
- Inflatable seat
- Folding seat with back support
Consider your personal comfort and the intended use of the kayak before making a decision.
2. Installing the Seat
Once you’ve chosen the right seat, it’s time to install it. Follow these steps for a hassle-free installation:
- Place the seat in the desired position inside the kayak.
- Mark the spots where the attachment points will go.
- Drill holes for the attachment points and fasteners (if needed).
- Attach the seat using adjustable straps, bolts, or other hardware provided.
For added stability, it’s a good idea to install the seat at the kayak’s center of gravity.
3. Adding Storage to Your Kayak
After the seat installation, we can now focus on adding storage options to enhance the functionality of the kayak. There are several storage options available:
- Deck bags
- Dry bags
- Bungee cord storage system
- Hatches
While deciding on the storage option, consider factors like ease of access, weight, and the type of gear you plan to carry.
4. Installing the Storage Options
Now that you’ve chosen the storage option, follow these steps for proper installation:
- Determine the ideal location for your storage option, depending on accessibility and stability.
- Mark the spots where you will install the storage option.
- Drill holes (if needed) for the attachment points and fasteners.
- Attach the storage option using straps, bolts, or other hardware provided.
Remember, always ensure the storage is secure and watertight to protect your gear from water damage. By following these simple steps, you’ll have a comfortable and functional kayak that is tailored to your needs.
Trying Out Your Kayak

After learning how to build your own kayak, it’s finally time to test your creation and enjoy the rewards of your hard work. Before hitting the water, consider the following tips to ensure a successful maiden voyage.
Firstly, you’ll want to find a calm and safe location for paddling. I suggest picking a shallow area with minimal waves and currents, especially if you’re a beginner at kayaking. Some ideal places include:
- Protected bays
- Calm lakes
- Slow-moving rivers
Once you’ve found the perfect spot, take some time to inspect your kayak. Check for any cracks, leaks, or loose parts to make sure it’s built to uphold your safety. Some key areas to examine include:
- Hull: Verify the integrity of the hull and ensure there are no visible damage or weak spots.
- Seams: Confirm that seams are sealed properly and securely.
- Deck and Cockpit: Ensure that the deck and cockpit are firmly attached.
Before setting out, it’s essential to strap on a personal floatation device (PFD). Even if you’re an experienced swimmer, unexpected circumstances can arise, and wearing a PFD can ultimately save your life.
Let’s now focus on launching your kayak. Follow these steps for a smooth entry:
- Approach the water at a perpendicular angle with your kayak parallel to the shoreline.
- Place your paddle within reach.
- One foot at a time carefully steps into the cockpit.
- Sit down and tuck your legs into position.
- Secure the spray skirt, if applicable.
- Grab your paddle, and you’re ready to go!
As you paddle, pay attention to how your kayak handles the water. You might need to make adjustments to your paddle length or stroke technique to match your self-built kayak. As you gain confidence in your abilities, feel free to explore different paddling environments and continually refine your skills.
Conclusion
Building your own kayak can be an incredibly rewarding and fulfilling experience. Not only do you get a customized vessel tailored to your specific needs, but you also gain the satisfaction of knowing you created it with your own hands. Throughout this article, I’ve shared essential information and valuable tips on how to successfully build your own kayak.
When starting this journey, it’s crucial to consider several factors:
- Determining your needs: Before diving into the building process, it’s vital to assess your kayaking goals, desired style, and skill level. This will ensure your finished kayak meets your expectations and performs well on the water.
- Choosing the right materials and tools: Selecting high-quality materials, such as marine plywood, epoxy, and fiberglass, is critical to creating a strong, durable, and long-lasting kayak. Make sure you also have the necessary tools at your disposal to tackle this project efficiently.
- Understanding and following the building process: Building a kayak requires patience and diligence. Carefully follow the instructions and be prepared to invest time and effort into each step.
Overall, the process of building a custom kayak may be time-consuming, but it’s a worthwhile endeavor. As you embark on your kayaking adventures, you’ll appreciate the fruits of your labor even more, knowing that you built your very own kayak.