

As a passionate kayaker, one of the things I’ve learned over the years is the importance of proper kayak cleaning and maintenance. Just like any other prized possession, taking good care of my kayak ensures its longevity, performance, and safety. However, I’ve realized that not everyone knows the best practices for maintaining their kayaks in top-notch condition. That’s why I’ve put together this comprehensive guide on how to clean a kayak.
In this guide, you’ll find valuable tips, tricks, and advice on everything you need to know about keeping your kayak clean and well-maintained. From choosing the right cleaning supplies to dealing with pesky stains and mildew, as well as protecting your kayak from the elements, you’ll learn essential techniques that will help your watercraft stay in excellent shape for many adventures to come. And if you’re an eco-conscious kayaker, you’ll love the green-friendly approach I’ve included for good measure.
So grab your cleaning supplies, gear up, and let’s dive into the world of kayak cleaning and maintenance to ensure you have more enjoyable and worry-free moments out on the water!
How To Clean A Kayak in 2026: Step-by-Step Guide
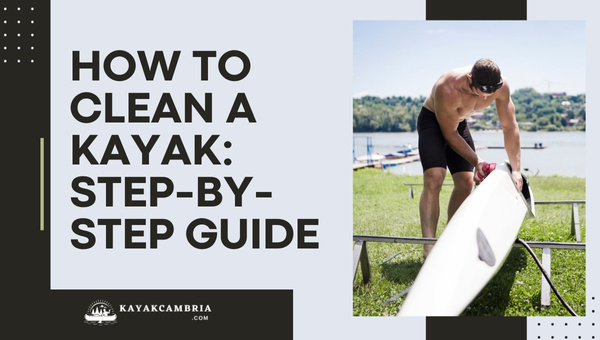
The kayaking season is well underway and after a few unforgettable trips, I realized it was time to give my trusty kayak some much-needed care and attention. As a responsible and environmentally conscious kayaker, it’s important for me to keep my kayak clean and well-maintained. Not only does it prolong the lifespan of my kayak, it also prevents the spread of invasive species. That being said, I thought it would be useful to share my step-by-step guide on how to clean a kayak.
1. Gather Your Supplies
Before starting, make sure you have these essential cleaning items on hand:
- Mild detergent or soap: A gentle, environmentally-friendly cleaner is ideal.
- Soft sponge or cloth: This will help you scrub without damaging your kayak’s surface.
- Hose with adjustable nozzle: A hose will make rinsing off your kayak easier and more thorough.
- Soft-bristled brush: For stubborn stains or areas that need extra attention.
2. Prepare Your Kayak
Remove all equipment and accessories from your kayak. This includes paddles, life jackets, and any attachments or mounts. Inspect your kayak for any visible damage or issues that may need to be addressed. Drain any remaining water by tilting your kayak on its side or upside down.
3. Clean The Exterior
- Rinse your kayak thoroughly with water using the hose, starting from the top and working your way down. This will help remove any loose debris and dirt.
- Apply a small amount of mild detergent or soap to your sponge or cloth. Gently scrub the entire surface of your kayak, paying special attention to areas with dirt, stains, or algae buildup.
- Clean the grooves and crevices of your kayak with a soft-bristled brush if necessary.
- Rinse your kayak again with the hose, making sure to remove all soap and residue.
- Dry your kayak with a clean, absorbent towel, or allow it to air dry in the sun.
4. Clean The Interior
- Empty any storage compartments and clean the inside with a sponge or cloth and soapy water. Rinse and dry thoroughly.
- Clean the seat and backrest with mild soap and a sponge, rinse, and dry them properly.
- Scrub the inside of your kayak, focusing on the hull and footrests. Use the soft-bristled brush for heavily soiled areas if needed.
- Rinse the interior with the hose and make sure to get rid of any soap or residue.
- Allow the interior to air dry, or use a clean, absorbent towel to speed up the process.
5. Address Stubborn Stains And Mildew
- Treat tough stains or discolorations by applying a non-abrasive cleaner or a paste made from baking soda and water. Gently scrub the affected area and rinse thoroughly.
- For mildew, mix equal parts white vinegar and water in a spray bottle. Spray the solution on the affected areas, let it sit for a few minutes, then scrub and rinse.
6. Inspect, Repair, And Maintain Your Kayak
After thoroughly cleaning your kayak, inspect it for any damages, such as scratches, dents, or cracks. Perform necessary repairs, and maintain proper hull shape and rudder system. Apply a UV protectant spray to your kayak’s exterior to protect it from potential sun damage.
7. Store Your Kayak Properly
When not in use, store your kayak in a dry, sheltered area, preferably off the ground on a rack or hanging system. Make sure your kayak is completely dry before storing it to prevent moisture buildup and potential mold and mildew growth.
By following this step-by-step guide, you’ll keep your kayak in great shape, ensure its longevity and enjoy many more paddling adventures!
Taking Care Of Your Kayak Accessories
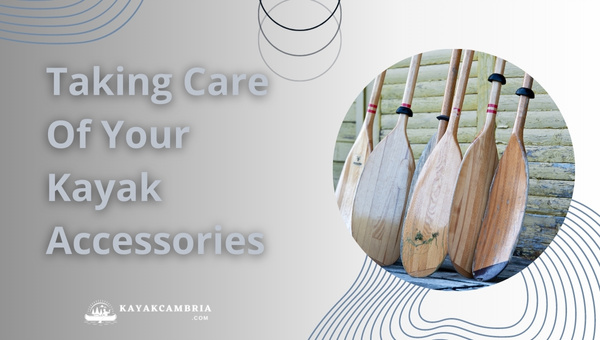
It is important to not only maintain your kayak but also to take care of the accessories that make kayaking an enjoyable and safe experience. From paddles to life jackets and flotation devices, knowing how to clean and maintain these items ensures they last longer and perform their best when needed.
Cleaning Paddles And Other Gear
One of the essential parts of kayak maintenance is taking care of accessories such as paddles, bilge pumps, and dry bags. Start by rinsing your paddles and other gear with fresh water after each use, especially when kayaking in salt water. Remove any dirt or debris with a soft brush or sponge and use a mild detergent if necessary. Make sure to rinse thoroughly and allow the accessories to air-dry completely before storing them.
Inspecting Life Jackets And Flotation Devices
Safety should always be prioritized when it comes to kayaking, so be sure to inspect your life jackets and other flotation devices regularly. Look for any signs of wear and tear, like fraying straps or tears in the fabric. Ensure all buckles and zippers are functioning correctly, and keep an eye on the overall buoyancy of your life jackets. If any flotation devices are damaged or showing signs of excessive wear, it is time to replace them with new ones.
Proper Storage And Maintenance Of Accessories
Storing your kayak accessories properly will ensure their longevity and effectiveness. Take note of the following tips for efficient storage:
- Store your paddles horizontally or vertically, but avoid leaning them against a wall or other objects, as this can cause warping or bending. Instead, opt for a paddle rack or use wall hooks to hang them safely.
- Ensure that dry bags and flotation devices, like life jackets or tow belts, are clean and completely dry before storing them in a cool, dry place.
- Keep items such as bilge pumps and throw ropes neatly coiled or stored in a storage bag to prevent tangling or damage.
By taking the time to clean, inspect, and properly store your kayak accessories, you will not only prolong their life but also ensure a safe and enjoyable experience on the water.
Keep Your Kayak’s Hull In Optimal Condition

The hull of a kayak is not only responsible for the vessel’s buoyancy but also plays a significant role in its performance, speed, and stability. Therefore, keeping your kayak’s hull in optimal condition is essential for ensuring a safe and enjoyable paddling experience. Here are some practical tips to help you maintain your kayak’s hull in tip-top shape:
Inspecting The Hull For Scratches, Dents, Or Cracks
Before cleaning your kayak, it’s essential to inspect the hull for any signs of damage. Start at one end of the kayak and carefully work your way to the other, looking for scratches, dents, or cracks. Take your time and inspect every inch of the surface, as even minor damages can impact your kayak’s performance in the water.
Repairing Minor Damages
If you come across any minor scratches or dents, don’t panic. Most of these can be easily fixed with a little bit of DIY magic. For shallow scratches, some fine-grit sandpaper and polish can usually buff them out. For deeper scratches or dents, you may need a kayak repair kit, which typically consists of plastic patches and a heat source to mold the material into shape.
Maintaining Proper Hull Shape
An often-overlooked aspect of kayak maintenance is ensuring the hull maintains its proper shape. Over time, poor storage conditions or excessive weight can cause the hull to deform. To prevent this, make sure you store your kayak in the correct manner (upright, hanging, or on a rack), and avoid placing heavy objects on top of the kayak when it is not in use.
The hull shape is essential for optimal performance and stability on the water, so take the time to inspect and maintain your kayak’s hull regularly. This will help you preserve the life of your kayak and ensure you have many enjoyable paddling adventures ahead.
Maintaining Your Kayak’s Rudder System
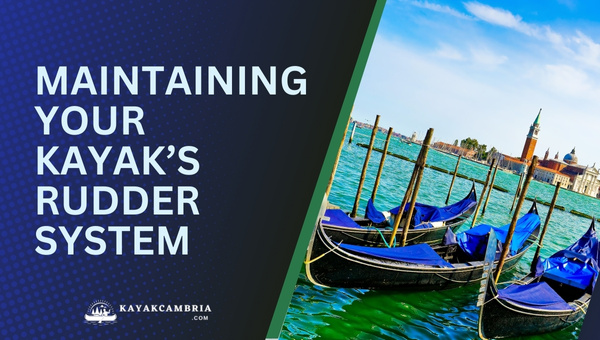
The rudder system in your kayak plays a crucial role in steering and maintaining control over your vessel. Regular maintenance of this component is essential to ensure smooth and safe paddling experiences. Follow these steps to keep your kayak’s rudder system in top condition:
1. Inspecting The Rudder
Make a habit of inspecting the rudder system before and after every kayaking trip. Check for any signs of wear and tear, loose screws, or misaligned components. If you notice any issues, address them immediately to prevent further damage and possible safety risks.
2. Cleaning The Rudder Mechanism
Dirt and debris can accumulate in the rudder mechanism over time, affecting its performance. To clean the mechanism:
- Remove the rudder assembly from the kayak.
- Rinse it thoroughly with fresh water to remove dirt, sand, and any salt deposits (for those who paddle in saltwater environments).
- Gently clean the rudder with a soft-bristled brush.
- Dry the mechanism completely to prevent rust or corrosion.
3. Lubricating Moving Parts
Proper lubrication is crucial to keep your rudder system running smoothly. Use a water-resistant, marine-grade lubricant on all moving parts, including cables, pulleys, and hinges. Be sure to wipe away any excess lubricant to avoid attracting dirt.
4. Checking And Tightening Hardware
Your kayak’s rudder system is made up of various hardware components. Check for any loose screws, nuts, or bolts, and tighten them as needed. If you notice any rusted or corroded hardware, consider replacing these parts to maintain optimal performance and avoid potential failure.
5. Regularly Realigning The Rudder
After extended use or if your kayak is frequently exposed to rough conditions, the rudder can become misaligned. Regularly check the alignment and adjust it as needed to ensure smooth steering and maneuvering. Refer to your kayak’s manufacturer guidelines for proper alignment instructions.
Preparing Your Kayak For Storage
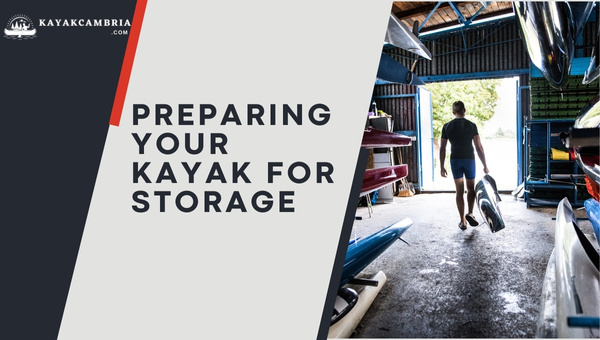
When it comes to putting your beloved kayak away for the season or just between adventures, proper storage solutions are essential for maintaining its longevity, performance, and overall integrity. In this section, I will guide you through the steps to prepare your kayak for storage, ensuring that it remains in great condition and is ready for your next paddling adventure.
1. Thoroughly Clean Your Kayak
Before storing your kayak, make sure to give it a proper cleaning. Follow the guidelines discussed earlier in this article, addressing both the interior and exterior of the kayak. Remove any stubborn stains, dirt, or mildew, and ensure that no debris is left behind, as it may cause further damage over time.
2. Allow Your Kayak To Dry
One crucial aspect of preparing your kayak for storage is complete drying. Ensure that there is no remaining moisture trapped in the kayak, as it may promote the growth of mold, mildew, or unpleasant odors. Allow your kayak to air dry in a well-ventilated area, or softly wipe down its surfaces with a clean, dry cloth if needed.
3. Protect Vulnerable Areas
Prior to storage, inspect your kayak for any vulnerable areas that may be prone to damage during storage. These could be areas with existing scratches, dents, or abrasions. To provide additional protection, you can apply a protective wax or a UV protectant solution on these vulnerable spots.
4. Choose The Best Storage Method
The final step in preparing your kayak for storage involves selecting the most suitable method. The three most common storage solutions include hanging, upright standing, and using a rack.
- Hanging: In this method, suspend your kayak from the ceiling or a wall using strong hooks or straps. Make sure to distribute its weight evenly and avoid placing too much pressure on a single point, especially near the cockpit or the kayak’s ends.
- Upright Standing: This method involves placing the kayak upright on its stern or bow. Use supportive racks or stands to hold the kayak steady and provide even weight distribution. Ensure that the surface is stable and non-abrasive.
- Using a Rack: A specialized kayak rack offers a sturdy storage solution tailored to your kayak’s shape and dimensions. It prevents deformations and can accommodate multiple kayaks if needed.
Remember to store your kayak in a cool, dry, and shady place, away from direct sunlight and potential sources of heat or moisture to ensure it stays in perfect condition, waiting for your next adventure.
Keeping Your Kayak Clean On The Go
Whether you’re on a multi-day expedition or a spontaneous afternoon paddle, keeping your kayak clean is essential for maintaining its performance and longevity. Armed with a few portable cleaning supplies and some simple techniques, you can ensure your kayak remains in top-notch condition regardless of where your aquatic adventures take you. Here’s a guide to keeping your kayak clean on the go.
Essential Portable Cleaning Supplies
- Microfiber cloth: These lightweight and absorbent cloths are perfect for quick clean-ups and drying. They can easily fit in your dry bag or gear storage compartment.
- Travel-sized biodegradable soap: An eco-friendly soap ensures you’re not harming the environment while cleaning your kayak.
- Collapsible bucket: Useful for scooping water to rinse your kayak and remove dirt or debris.
- Soft-bristled brush: Ideal for quickly tackling stubborn stains or dried mud.
Quick Clean-Up Tips For On-the-Go Kayaking
- Rinse after each use: Whether you’re going from one location to another or taking a break, give your kayak a quick rinse with water using your collapsible bucket. This helps prevent dirt and debris from drying on the kayak’s surface. Pay extra attention to areas that collect grime, such as the rudder, cockpit, and hull.
- Clean visible messes: Use the microfiber cloth and a little biodegradable soap to wipe down any visible stains or spills on your kayak.
- Take advantage of rain: A sudden rain shower may seem like a setback, but it can also be the perfect opportunity to rinse your kayak. Let nature do the heavy lifting, and pat your kayak dry with a microfiber cloth afterward.
- Be mindful of mud: Muddy shores can make for challenging clean-ups. Try to avoid dragging your kayak through mud, and give it a thorough rinse later to remove any embedded dirt.
- Leave no trace: Remember to leave your kayaking environment as pristine as you found it. Clean up any trash or waste materials and dispose of them properly once you’ve reached your destination.
Water-Friendly Cleaning Techniques
Use water-friendly cleaning techniques to minimize your impact on the environment when cleaning your kayak. Biodegradable soaps are a wise choice, as they break down naturally and don’t harm aquatic life. Moreover, avoid using harsh chemicals or abrasive materials that can damage your kayak’s surface or pollute the water.
By following these on-the-go kayak cleaning tips and techniques, you’ll ensure that your kayak remains in great shape and is ready for every adventure.
An Eco-friendly Approach To Kayak Cleaning
As kayakers, we enjoy the beauty and serenity of nature. It’s our responsibility to preserve the environment we treasure by adopting eco-friendly practices when it comes to cleaning and maintaining our kayaks. Here are some tips on how to clean your kayak without harming our precious water sources and wildlife.
Choose Environmentally Friendly Products
When selecting cleaning supplies, opt for biodegradable and non-toxic products. These environmentally friendly alternatives are gentle on your kayak while minimizing harm to aquatic life and water quality. A simple solution of warm water and mild detergent is often enough to clean the exterior and interior of a kayak effectively. If you encounter tougher stains or mildew, consider using a vinegar solution instead of harsh chemicals.
Avoid Harmful Runoff
Be mindful of where you clean your kayak as harmful runoff can enter storm drains, creeks, or other water sources. Consider cleaning your kayak on grass, gravel, or other permeable surfaces to reduce the flow of pollutants into water bodies. Using a bucket instead of a hose while washing your kayak will also help minimize water waste.
Proper Disposal Of Cleaning Products And Water
Ensure you dispose of cleaning products and water responsibly. Empty leftover soapy water into designated drains or sinks rather than directly into the nearest river, lake, or ocean. This will help prevent chemical contamination of water sources and protect aquatic creatures.
Clean Your Gear Responsibly
Take the same eco-friendly approach when cleaning your paddles, life jackets, and other gear. Rinse off dirt and debris with fresh water, and use biodegradable soap or mild detergent to wash your equipment. Always dry your gear thoroughly before storing it to prevent mold and mildew growth.
By incorporating these eco-friendly practices into your kayak cleaning routine, you can do your part in protecting our treasured waterways and the environment as a whole. Together, we can ensure that future generations can continue to enjoy kayaking and the beauty of nature.
Adjusting Your Kayak Cleaning Routine for Different Environments
Different environments will present unique challenges when it comes to cleaning and maintaining your kayak. The material your kayak is made of, as well as the water conditions, can impact your cleaning routine. Here are some tips for adjusting your kayak cleaning process based on the environment.
Saltwater vs Freshwater Considerations
Kayaks used in saltwater environments require extra attention, as salt can be highly corrosive. After each outing, rinse your kayak thoroughly with fresh water to remove any salt residue. Don’t forget to pay extra attention to the rudder system and metal hardware, which are more susceptible to corrosion.
On the other hand, if you’re using your kayak in freshwater, you’ll still need to rinse it after each trip, but you may not need to be as thorough as with saltwater. Just make sure to remove any debris or dirt that might have accumulated.
Dealing with Muddy or Dirty Water
If your adventures take place in muddy or dirt-filled water, you’ll need to take additional measures to ensure your kayak stays clean. A soft brush is perfect for removing mud or dirt from your kayak’s hull, and make sure to clean out any crevices or hard-to-reach areas on the interior. Use your hose to rinse off as much of the mud as possible, then scrub any remaining areas with a soft-bristled brush. Finally, rinse the kayak again to remove any leftover dirt or grime.
Temperature and Weather Effects on Maintenance
Climate and weather can also have an impact on your kayak cleaning routine. In colder climates, you may need to be more careful about cleaning and drying your kayak before storing it to prevent freezing and cracking. In hot climates, always store your kayak in a shaded area to protect it from sun damage.
Extreme weather conditions can also affect your cleaning process. Heavy rainstorms, for example, might result in additional debris being carried onto your kayak. If you experience any extreme storms, inspect your kayak carefully afterward and clean as necessary to ensure your kayak stays in top condition.
Additionally, be aware of the local aquatic life when cleaning your kayak. Be cautious when using cleaning products in areas where sensitive aquatic species live, as these chemicals could harm them. Always use eco-friendly cleaning products, and check local regulations to ensure you’re not harming the environment.
Cleaning your kayak is an essential part of being a responsible paddler, and adjusting your cleaning routine based on the environment you’re in will help ensure your kayak stays looking and performing its best for years to come.
Inspecting Your Kayak Before and After Each Adventure

The safety and performance of your kayak depend heavily on the maintenance and care you put into it. A key factor in ensuring your kayak stays in good condition is to inspect it before and after each adventure. By making this a regular part of your routine, you increase the lifespan of your kayak and ensure an enjoyable experience on the water.
Why Inspections Are Important?
Before and after each adventure out on the water, it is essential to carefully inspect your kayak to ensure optimal performance and safety. By creating a routine for long-lasting enjoyment and efficient use of your time, you’ll keep your kayak in great shape and detect any potential issues before they become significant problems.
Before-Adventure Inspection
Before hitting the water, make sure you carry out the following checks:
- Examine the hull for any scratches, dents, or cracks that might affect the kayak’s performance or cause it to leak. Ensure that the hull’s shape is not distorted.
- Check the rudder or skeg system to ensure it is functioning correctly. Look for wear and tear, and lubricate moving parts if necessary.
- Inspect bulkheads and hatches for any leaks and verify that they are sealed correctly to prevent water from entering the storage compartments.
- Review footrest and seat adjustments to make sure they are secure and comfortable for your paddle session.
Post-Adventure Inspection
Once you’ve finished your paddle session, follow these post-adventure inspection steps:
- Survey the hull again for any new scratches, dents, or cracks that might have occurred while out on the water. Promptly address any identified damages to prevent further issues.
- Examine the rudder or skeg system to ensure that it is free of debris and is functioning as it should. Rinse it with fresh water if you have paddled in salt water.
- Empty any water from the storage, bulkheads, or cockpit by draining it. Check for any leaks or damage, and be sure to repair them as needed.
- Look over your paddling gear and accessories. Clean and store them properly to extend their lifespan and maintain functionality.
Remember to always clean your kayak before storage. This final step helps to maintain your kayak and prolong its lifespan and usefulness during future adventures.
As a responsible paddler and a steward of the beautiful waterways you explore, be sure to develop a proper inspection routine for your kayak. By doing so, you’ll ensure that it remains ready for adventure wherever you are – letting you enjoy your time on the water with confidence and peace of mind.
How To Clean Your Kayak Outside?
Cleaning your kayak on the outside is essential for maintaining its appearance and ensuring that it remains in peak condition. Here, we’ll focus on a simple step-by-step process to clean your kayak’s exterior efficiently and effectively.
1. Rinse Off The Dirt
Begin by placing your kayak on a stable surface, preferably on a soft mat or a pair of sawhorses to prevent damage. Use a garden hose with an adjustable nozzle to rinse off any loose dirt, sand, or debris from the kayak’s exterior. Taking care to aim from top to bottom, and pay extra attention to any crevices or grooves that may collect debris.
2. Apply A Mild Detergent Or Soap
It’s important to use a mild detergent or soap when cleaning the outside of your kayak to avoid damaging the material. Fill a bucket with water, and add a small amount of detergent or soap. Mix the solution thoroughly.
3. Scrub With A Soft Sponge Or Cloth
Dip a soft sponge or cloth into the soapy water and gently scrub the kayak’s surface. Be sure to cover the entire exterior, including the hull’s bottom. For particularly stubborn stains, use a soft-bristled brush and apply additional pressure during scrubbing. However, never use an abrasive pad, as this can damage your kayak’s surface.
4. Rinse Off The cleaning solution
Once you have thoroughly scrubbed the outside of your kayak, use your hose to rinse off the soapy water. Ensure that you remove all soap residue, as leaving it on the kayak can cause discoloration or damage to the surface.
5. Dry Your kayak
With your kayak now rinsed, it’s important to dry it completely to prevent the growth of mildew or mold. Use a clean, soft towel to wipe down the surface and absorb excess water. If possible, allow your kayak to air dry in the sun, making sure it’s not exposed to direct sunlight for an extended period to avoid UV damage.
How To Clean Your Kayak Inside?
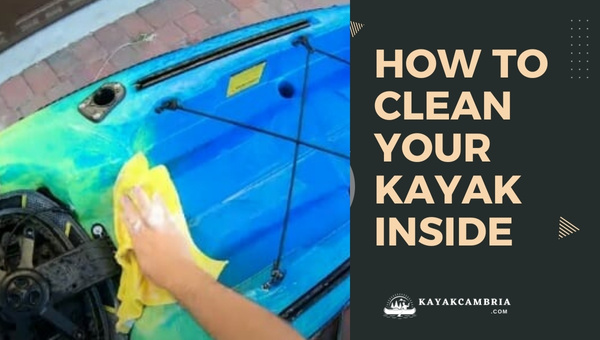
Cleaning the inside of your kayak is just as important as cleaning the exterior. Proper care and maintenance of the interior will ensure a comfortable and safe paddling experience. Here’s a step-by-step guide on how to effectively clean the inside of your kayak:
1. Remove Loose Items And Debris
Begin by removing any loose items or debris from your kayak’s interior. This includes gear, seat cushions, and other accessories. This will not only make cleaning easier but also allow you to inspect your kayak for potential damage or areas that need extra attention.
2. Vacuum Or Sweep The Interior
Use a portable vacuum cleaner or a small brush to remove dirt, sand, and other debris from the bottom of your kayak. Be thorough in reaching tight spaces and corners to ensure proper cleaning.
3. Use A Mild Cleaning Solution And a Soft Cloth
Mix a few drops of mild detergent or soap in a bucket of water. Dampen a soft cloth or sponge with the cleaning solution and gently wipe down the interior of your kayak. Focus on areas like the seat, backrest, footrests, and any storage compartments.
4. Get Rid Of Stuck-On Dirt
If there are any stubborn stains or tough spots, use a soft-bristled brush to lightly scrub them away. Be cautious not to damage the interior surface of your kayak.
5. Rinse Thoroughly
Rinse the inside of your kayak by using a hose with an adjustable nozzle or pouring clean water from a bucket. Make sure to remove all soap and cleaning solution residue for a spotless finish.
6. Dry Your Kayak
To prevent mildew growth and keep your kayak in top condition, use a microfiber or chamois cloth to wipe down the inside surface. Alternatively, you can let the kayak air-dry by leaving it in a well-ventilated area away from direct sunlight.
How To Clean Mildew From A Kayak?

Mildew can be quite a pesky problem for kayak owners. Not only does it look unpleasant, but it can also produce an undesirable odor, and if left untreated, it can deteriorate your kayak’s material. Here, I will share my go-to method for dealing with mildew growth on a kayak. Just follow these steps:
1. Gather The Necessary Supplies
Gather some essential cleaning items like a soft sponge or cloth, a scrub brush, a bucket, white vinegar, water, and protective gloves.
2. Create A Vinegar Solution
In a bucket, mix equal parts of white vinegar and water. Vinegar is not only an effective mildew remover, but it’s also eco-friendly, so it won’t harm your kayak or nearby water sources. You can increase the vinegar proportion for more stubborn mildew patches, just ensure to adjust according to the severity of the problem.
Note: If the smell of vinegar is too strong, you can add a few drops of mild, biodegradable soap to the mixture.
3. Apply The Vinegar Solution
Put on your protective gloves and submerge the sponge or cloth in the vinegar solution, then apply it generously to the mildew-affected area on your kayak. Be sure to soak the spot thoroughly to make the cleaning process more effective.
4. Scrub Away The Mildew
Using a scrub brush with soft bristles, gently scrub the area where the mildew is visible. Make sure not to scrub too hard, as this can damage your kayak’s surface.
5. Rinse The Kayak
After scrubbing mildew spots thoroughly, rinse the area using clean water from a hose or bucket. Make sure to rinse off all the vinegar solution, as the acidic nature of vinegar can harm your kayak if left on the surface for too long.
6. Dry The Area
Use a clean, dry towel or cloth to wipe down the cleaned area and remove any excess water. It’s essential to dry your kayak properly after cleaning, as moisture can promote mold and mildew growth.
7. Inspect The Cleaned Area
Once your kayak is dry, check the treated area to make sure the mildew has been completely removed. If there are still signs of mildew, repeat the steps outlined above.
Important: To prevent future mildew growth, ensure proper ventilation and drying after each use, and store your kayak in a dry area away from moisture.
Is Pressure-Washing Your Kayak Possible?
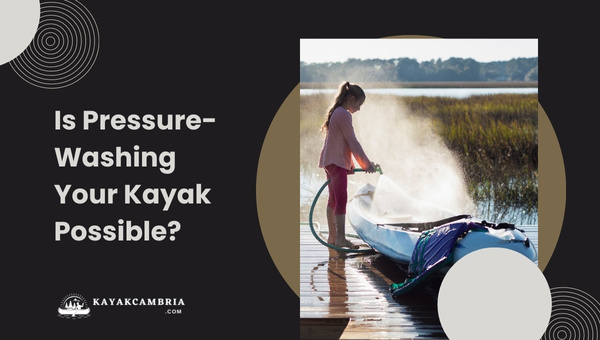
As a kayak enthusiast, one question that often comes up is whether pressure-washing your kayak is a viable option for cleaning. While it might seem like a quick and efficient approach, there are a few factors to consider before going this route.
The Pros Of Pressure-Washing Your Kayak
- Speed and Ease: A pressure washer can definitely make quick work of cleaning your kayak, particularly when it comes to removing mud, algae, and other stubborn debris from the surface.
- Accessibility: With a pressure washer, you can easily reach parts of the kayak that are usually difficult to access with a sponge or cloth.
The Cons Of Pressure-Washing Your Kayak
- Potential Damage: The high-pressure water stream of a pressure washer can cause damage to your kayak, especially if it’s made of delicate materials like fiberglass or thin plastic.
- Loss of Protective Coating: In addition to directly causing damage, the force of the pressure washer can also strip away the protective coatings that help prevent your kayak from UV degradation and other forms of wear and tear.
- Environmental Hazards: Pressure washing can result in chemical runoff, which can potentially harm the environment.
- Risk to Accessories: The powerful water stream can also damage or dislodge small and fragile kayak accessories like clips, straps, and decals.
Precautions And Considerations For Pressure-Washing Your Kayak
If you decide to give pressure washing a try, it’s essential to take the following precautions:
- Lower the pressure: Use a pressure washer with adjustable settings, and use the lowest possible setting to minimize the risk of damaging your kayak.
- Use a wide nozzle: Make sure to use a nozzle with a wide spray pattern to distribute the force of the water more evenly.
- Keep a safe distance: To avoid harming your kayak, maintain a safe distance between the pressure washer nozzle and the kayak’s surface, about 12-24 inches should be enough.
- Test a small area first: Before going all out, test out the pressure washer on a small, inconspicuous part of your kayak to ensure it won’t cause damage.
- Avoid sensitive areas: Be extra cautious around areas with decals, tight seams, and other delicate parts of the kayak that can be susceptible to damage.
- Use eco-friendly cleaning products: If you plan to use a detergent or soap, opt for an environmentally friendly option to minimize harm to the environment.
While pressure-washing your kayak is possible, it’s not always the most advisable method. The potential risks to your kayak may outweigh the benefits, especially if you’re inexperienced in using a pressure washer. Stick to manual cleaning methods as a safer and more environment-friendly alternative for keeping your kayak in tip-top shape.
Kayak Waxing: Advantages And Disadvantages

Kayak waxing is the process of applying a layer of protective wax on the surface of your kayak. It is typically used to improve the appearance of your kayak and offer some protection from the elements. However, there are both advantages and disadvantages associated with kayak waxing. Here, we will go over the major pros and cons of this process.
Advantages Of Kayak Waxing
- Increased UV Protection – Waxing your kayak can help protect the surface from the harmful effects of the sun’s UV rays. This can significantly slow down the process of fading and color degradation, keeping your kayak looking newer for longer.
- Easier Cleaning – Waxing your kayak can make it easier to clean in the future. The smooth, waxed surface allows dirt and grime to slide off easily, reducing the amount of scrubbing needed to keep your kayak clean.
- Improved Aesthetic Appeal – A freshly-waxed kayak can look more attractive and well-maintained. The shininess adds a polished, professional look to your kayak.
- Enhanced Water Repellency – A well-waxed kayak surface allows water to slide off easily, which can help prevent water stains and may even improve the speed and efficiency of your paddling.
Disadvantages Of Kayak Waxing
- Time-Consuming Application – Waxing a kayak is not as simple as just applying the wax. You need to properly clean the kayak first, then apply the wax evenly, and finally buff it to a shine. The entire process can be time-consuming.
- Not Suitable for All Materials – Kayak waxing is primarily designed for hard-shelled kayaks made from materials like polyethylene, fiberglass, and thermoformed plastic. Waxing may not be suitable for inflatable, fabric, or wood kayaks, as the wax may not adhere properly to their surfaces.
Waxing your kayak can have its benefits – primarily in terms of protection, maintenance, and aesthetic appeal. However, considering the time-consuming nature of the process, potential safety hazards, and incompatibility with certain kayak materials, it is important to weigh the pros and cons before deciding whether waxing your kayak is the right choice for you.
Kayak Cleaning: Necessary?

You might wonder if cleaning your kayak is truly a necessary part of ownership or just an optional activity. The simple answer is: yes, kayak cleaning is an essential aspect of proper maintenance and care. Keeping your kayak clean not only helps to maintain its appearance, but it also prolongs the life of the vessel and ensures optimal performance on the water. Here are a few key reasons why cleaning your kayak is indispensable:
Protecting The Kayak Material
- Preventing damage and wear and tear: Over time, dirt, grime, and other contaminants can cause your kayak to degrade, scratch, and dull. Regularly cleaning your kayak helps to prevent these issues, keeping it in top condition for years to come.
- Preventing mold and mildew growth: Moisture, dirt, and organic material can cause the growth of mold and mildew on your kayak, especially in its interior. A consistent cleaning routine will mitigate this problem, protecting both the kayak and your health.
Maintaining Performance
- Reducing drag: A dirty hull can create more drag in the water, which can slow down your kayak and even impact its maneuverability. By cleaning your kayak’s exterior, you’ll ensure that it runs smoothly and efficiently on the water.
- Maintaining rudder system function: If your kayak has a rudder, cleaning it regularly will help prevent wear and tear on its components, ensuring better control and steering.
Safety
Monitoring for damage: Cleaning your kayak regularly gives you an opportunity to inspect it for any damages, such as cracks or wear, that might affect its performance or safety on the water. It’s easier to spot these issues when the kayak is clean.
Aesthetic Appeal
Looking good on the water: You’ve invested money and time into your kayak. Naturally, you want it to look its best. Cleaning your kayak regularly will keep it looking fresh and ready for your next adventure.
Cleaning your kayak is not just about keeping it looking nice—it’s a necessary step in maintaining its performance, durability, and safety. By incorporating regular cleaning into your kayak care routine, you’ll be able to enjoy your time on the water without worry.
Frequently Asked Questions
1. How often should I clean my kayak?
The frequency of cleaning your kayak depends on how frequently you use it and the environment in which you paddle. Generally, it’s a good idea to give your kayak a thorough cleaning after every few outings. However, if you frequently paddle in salt water or muddy environments, you should clean your kayak more regularly to prevent long-term damage.
2. Can I use household cleaners to clean my kayak?
It’s best to use a mild detergent or soap specifically designed for boats or kayaks to avoid damaging the materials. If you decide to use a household cleaner, make sure it’s a gentle and non-abrasive one. Always test the cleaner on a small, inconspicuous area first to ensure it won’t cause damage.
3. How can I remove scratches or gouges from my kayak?
For small scratches, you can use fine-grained sandpaper to gently sand down the affected area. Afterward, clean the area with soap and water, and apply a UV protectant to the surface. For deeper gouges, you may need professional advice and repairs.
4. How do I prevent mildew from growing in my kayak?
To prevent mildew growth, make sure your kayak is completely dry before storing it away. Regular cleaning and proper ventilation can also help prevent mildew. If you do notice mildew starting to grow, use a solution of water and white vinegar to clean the affected areas.
5. Can I use a pressure washer to clean my kayak?
Although some may argue that using a pressure washer can damage the surface of your kayak, others find it helpful in removing dirt and grime. If you choose to pressure wash your kayak, use a low-pressure setting and maintain a safe distance, about 12 inches, to avoid causing damage.
6. Do I need to wax my kayak?
While waxing your kayak is not absolutely necessary, it can offer some benefits. Waxing can help protect the kayak’s surface from the elements, keep it looking shiny and new, and may make it more hydrodynamic during paddling. However, applying too much wax can leave residue in the water, which is not environmentally friendly.
7. Is it safe to use bleach to clean my kayak?
Using bleach is generally not recommended, as it can be too harsh for the kayak’s materials and can cause discoloration or damage. Instead, opt for milder cleaning agents like mild soaps or detergents, or consider using a vinegar solution for issues like mildew.
8. How do I clean my kayak’s rudder system?
To clean your kayak’s rudder system, start by rinsing the area with fresh water to remove dirt and grime. Use a toothbrush or small brush to clean any hard-to-reach areas, and a mild soap if necessary. Lubricate the moving parts of the rudder system, and check for wear and tear to ensure proper performance.
9. Are there any eco-friendly kayak cleaning products available?
Yes, there are eco-friendly kayak cleaning products on the market. To find them, look for cleaners that are biodegradable, phosphate-free, or labeled as environmentally friendly. You can also use natural cleaners such as vinegar solution or gentle dish soap. When cleaning your kayak, be sure to avoid letting cleaning products and water runoff harm plants or animals in the area.
Conclusion
Taking proper care of your kayak not only prolongs its lifespan but also assures smooth and safe kayaking experiences. By following the outlined steps and regularly inspecting your kayak and its accessories, you can enjoy your time on the water without worrying about damages or malfunctions.
Remember that choosing the right cleaning supplies and methods is essential to maintain your kayak in top-notch condition. Moreover, adopting an eco-friendly and responsible approach to cleaning your kayak aligns with the inherent connection to nature that the sport of kayaking embraces.
With adequate knowledge and a routine in place, you’ll ensure that your kayak remains ready for adventure, regardless of the environment and conditions. So, set aside some time, grab your cleaning supplies, and keep your kayak clean and well-maintained for years of enjoyable paddling adventures.