

A day spent kayaking can quickly turn from exciting to concerning if your vessel fills up with water. Navigating this common issue is a vital skill for every kayaker, from beginners to seasoned enthusiasts. That’s why understanding how to drain your kayak properly is essential to ensure your safety and enjoyment on the water. As a fellow paddling devotee, I am often asked about this important aspect of kayaking.
Today, I will share my knowledge and expertise with you, walking you through various techniques on how to drain sit-on-top, sit-in, and inflatable kayaks. Moreover, we’ll discuss why draining is crucial, preventative measures to keep your kayak dry, and solutions for draining water when you’re still inside. My goal is for this step-by-step guide to become your go-to resource for mastering the art of draining a kayak, ultimately allowing you to relish your aquatic escapades to the fullest.
Why Draining Your Kayak Is Important?
Draining your kayak might seem like a bothersome chore, but it’s an essential part of maintaining and ensuring optimal performance during your water adventures. Here are some of the main reasons why draining your kayak is crucial:
1. Safety

A kayak filled with water becomes more unstable, putting you at risk of capsizing. Draining your kayak will make it more stable, ensuring you have better control over your vessel, and minimizing your chances of tipping over.
2. Efficiency

When your kayak is full of water, it becomes much heavier, causing it to sink lower in the water and create more drag. This increased drag will make it more difficult to paddle and maneuver, ultimately affecting your efficiency and energy levels. Draining your kayak will lighten the load, helping you glide through the water with ease.
3. Preserving Your Gear
Your kayak is likely to be carrying personal items and gear, such as clothing, electronics, and essential kayaking equipment. Waterlogged gear not only adds more weight to your kayak but can also result in damaged or ruined items. Draining your kayak will protect your belongings and help them stay dry.
4. Comfort

Paddling in a waterlogged kayak can be quite uncomfortable, especially in cooler weather conditions where wet clothing can lead to hypothermia. Draining your kayak will ensure you stay dry and comfortable, letting you focus on enjoying the great outdoors.
Draining your kayak is absolutely essential for safety, efficiency, preserving your gear, and ensuring overall comfort during your kayaking adventures.
When To Drain Your Kayak?

1. After Capsizing Or Swamping

Kayaking can be an unpredictable sport, and sometimes you might find yourself capsized or swamped. If this occurs, it’s essential to drain your kayak as soon as you’ve safely recovered – primarily to prevent further accidents and ensure optimal performance.
2. Heavy Rainfall Or Waves

Experiencing heavy rainfall or large waves during your paddle? It’s then a good idea to drain your kayak at an appropriate time. Accumulated water can impact your stability and speed, so better to stay proactive and keep your kayak clear of excess water.
3. Discovering A Leak

If you spot a leak while you’re out on the water, it’s vital to address the issue immediately and drain your kayak. The longer a leak continues, the more water will enter your vessel and compromise your adventure.
4. Before And After Storage

It’s always advisable to drain your kayak before and after storing it. Draining any excess water will ensure your kayak’s longevity, prevent mold and mildew from forming, and maintain the integrity of the hull.
How To Drain A Sit-On-Top Kayak?

Draining a sit-on-top kayak is relatively easy, thanks to its open cockpit design and drain holes. Here’s a step-by-step guide on how to drain a sit-on-top kayak effectively:
Step 1: Tilt The Kayak On Its Side

By tilting your kayak on its side, you can quickly drain water from the cockpit and all accessible compartments. This position allows water to exit through the drain holes, also known as “scupper holes.” Focus on removing as much water as possible in this position. While doing this, check and remove any debris that might be blocking the scupper holes. You may also consider using scupper plugs to prevent water re-entry while draining.
Step 2: Turn The Kayak Upside Down
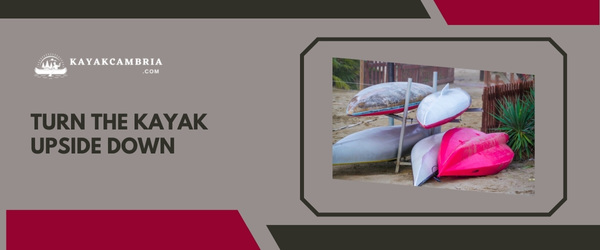
Once you’ve drained most of the water, it’s time to flip the kayak completely upside down. This allows any remaining water in hatches or harder-to-reach compartments to drain out. You can also gently rock the kayak from side to side, which helps dislodge trapped water.
Step 3: Dry The Kayak Thoroughly

After draining all the water from your sit-on-top kayak, use a towel, sponge, or chamois to dry off any remaining moisture. Pay special attention to the seat and footrest areas to ensure your comfort when you get back in. For storage, make sure the kayak is thoroughly dry to prevent the growth of mold or mildew.
By following these simple steps, you can efficiently drain your sit-on-top kayak and get back on the water in no time. And remember, regular inspection and maintenance will significantly reduce the chances of your kayak filling up with water in the first place.
How To Drain A Sit-In Kayak?
Draining a sit-in kayak can be a bit more challenging than a sit-on-top kayak, but with the right technique, it’s a breeze. Let’s walk through the process step-by-step.
Step 1: Flip The Kayak Upside Down

First, you’ll need to flip your sit-in kayak upside down to help get most of the water out. If you’re on land, find an area with ample space and gently tilt the kayak over. If you’re in shallow water, you can wade beside the kayak and carefully turn it over. Alternatively, you can ask a buddy to help you flip the kayak if the situation allows.
Step 2: Lift One End Of The Kayak

Next, lift one end of the upside-down kayak, allowing water to flow out through the cockpit. Hold the kayak at this angle for a few moments, letting gravity do the work. As you wait, swivel the kayak back and forth to ensure that water from all the nooks and crannies gets drained as well.
Step 3: Use A Bilge Pump Or Sponge

Though the previous steps will remove the majority of the water, some might still linger in the cockpit. That’s where a bilge pump or sponge comes in handy. With a bilge pump, insert the hose into the cockpit, and begin pumping the remaining water out. If you’re using a sponge, you’ll need to wipe down the interior surfaces of the cockpit, soaking up as much water as you can.
Step 4: Dry The Kayak Completely

Once you’ve drained the water out, it’s time to dry your kayak. Use a towel, chamois, or even a drying cloth to absorb any lingering moisture inside the kayak cockpit. A completely dry vessel ensures a comfortable and safe trip next time you venture out on the water.
Remember, practice makes perfect. As you familiarize yourself with this process of draining your sit-in kayak, it’ll become increasingly easier and quicker.
How To Drain An Inflatable Kayak?
When you’re dealing with an inflatable kayak, the process of draining water can be a bit different from a traditional hard shell. These lightweight and portable vessels are perfect for adventures on the go, but if water gets trapped inside, it’s essential to know how to drain it properly. So let’s dive into the steps you need to follow to drain an inflatable kayak.
Step 1: Deflate The Kayak Partially

Begin by partially deflating your inflatable kayak, making it easier to handle during the draining process. Don’t deflate it completely; just enough to make it more flexible and maneuverable.
Step 2: Tip The Kayak On Its Side Or Upside Down

After you’ve partially deflated the kayak, tip it on its side or turn it completely upside down. This will allow gravity to work its magic and help to get rid of the trapped water. Depending on the design of your inflatable kayak, you might need to gently shake it or manipulate it to encourage the water to flow out. Remember, patience is key!
Step 3: Inflate The Kayak Fully And Dry It

Once you’ve drained the water from the kayak, it’s time to inflate it fully once again. Be sure to keep an eye out for any remaining water on the surface or hidden in the seams or corners. You can use a cloth, towel, or sponge to absorb any excess water, ensuring the kayak is totally dry before your next adventure.
Draining an inflatable kayak involves partially deflating it, tipping it on its side or upside down to encourage water to flow out, and then fully inflating it again. Finally, don’t forget to dry the kayak thoroughly, as this helps prevent mildew and prolong the life of your gear.
Preventative Measures To Keep Your Kayak Dry
Keeping your kayak dry not only ensures your comfort and safety but also maintains the performance and longevity of your vessel. By taking a few preventative measures, you can significantly reduce the chances of water getting into your kayak. Follow these tips to keep your kayak as dry as possible:
1. Properly Seal Storage Hatches And Cockpit Covers

Making sure your storage hatches and cockpit covers are correctly sealed will help keep water out of your kayak. Regularly check the seals and gaskets for signs of wear or damage and replace them as needed. Additionally, confirm that all lids and covers are securely fastened before heading out on the water.
2. Inspect And Maintain Your Kayak

Regular kayak maintenance and inspections can help you identify and fix any potential water entry points, such as cracks or leaks before they become bigger issues. Routine inspections will also help ensure your kayak’s overall health and longevity. Make sure to:
- Check for signs of wear, tear, or damage periodically
- Apply necessary repairs or patches promptly
- Store your kayak properly when not in use (e.g., indoors or covered)
3. Use A Spray Skirt Or Splash Deck

For sit-in kayaks, wearing a spray skirt can help keep water out of the cockpit. A spray skirt is a waterproof fabric that attaches to the cockpit rim, covering your lower body and sealing around your waist. When paddling in choppy waters or encountering waves, a spray skirt will act as a barrier, minimizing the amount of water that enters the cockpit.
Alternatively, you can use a splash deck – a partial spray skirt that covers the front part of a sit-in kayak’s cockpit. Slash decks are generally used in calmer waters, providing protection against mild splashes while allowing increased air circulation.
4. Be Mindful Of Your Paddling Technique

Developing proper paddling techniques can help avoid excessive water splashes from entering your kayak. In particular, consider:
- Using a paddle with drip rings to catch water running down the paddle shaft
- Keeping your paddle low and parallel to the water’s surface when paddling
- Practicing proper body positioning and paddle strokes
5. Equip Your Kayak With Accessories

There are several kayak accessories available to help keep water out:
- Bilge pumps: These manual or electric devices can quickly remove water that has accumulated inside your kayak
- Scupper plugs: For sit-on-top kayaks, scupper plugs can be inserted into the self-bailing holes to temporarily prevent water from entering
- Cockpit covers: When storing or transporting your kayak, use a cockpit cover to keep debris and water out
By implementing these preventative measures, you can significantly reduce the chances of water accumulating in your kayak.
How To Drain Water From A Kayak When You’ve Tipped Over?
If you’ve accidentally tipped over and your kayak is filled with water, it’s crucial to act quickly and stay calm. Follow these steps to get the water out of your kayak and get back on track:
Step 1: Flip Your Kayak Back Upright

While still in the water, hold onto the cockpit’s rim and use your legs to flip the kayak back to its normal position. This can be done by pushing down on the edge closest to you and pulling the opposite edge towards you.
Step 2: Position Yourself Close To The Kayak

You’ll want to be close enough to the cockpit to reach it easily but far enough away to not impede the draining process. Maintain a firm grip on your paddle for added stability.
Step 3: Assess The Situation

Take a moment to survey the surrounding area and ensure you are in a safe spot to proceed. If you’re in deep water, it’s best to move to more shallow water or closer to the shoreline.
Step 4: Use The T-Rescue Technique
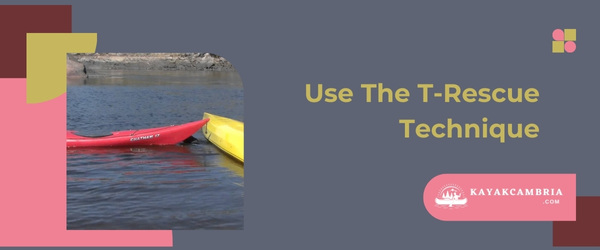
This technique is useful if you have a partner to help you out. One person steadies the waterlogged kayak by holding onto the side opposite the capsized paddler. The capsized paddler then holds onto the partner’s kayak and pushes themselves up, using their legs to slide and flip the kayak upright, allowing water to drain out of the cockpit.
Step 5: Use A Bilge Pump

If you have a bilge pump on hand, it can greatly help you in removing the remaining water from your kayak. Insert the pump’s hose into the kayak’s cockpit and begin pumping water out.
Step 6: Re-enter Your Kayak

When most of the water has been drained, carefully climb back into the kayak. Your partner can help stabilize the kayak during this process.
Step 7: Resume Paddling

Once you’re back in your kayak and it’s mostly drained, continue paddling to a safe location to inspect for any damages and make any additional repairs if necessary.
In situations like these, it’s always good to be prepared. Having essential tools, such as a bilge pump, and knowing how to efficiently execute recovery techniques, like the T-Rescue, can make all the difference when you’ve tipped over and need to drain water from your kayak.
How To Drain Water When You’re In The Kayak?
Sometimes, water can start filling up your kayak when you’re still out on the water, and it’s not practical or safe to get out of the kayak to drain it. In these situations, you’ll need to know how to drain water while you’re still inside the kayak. Here’s a step-by-step guide to help you do just that:
Step 1: Assess The Situation

Before attempting to drain water from your kayak while you’re in it, carefully assess the situation. Determine if it’s safe to continue paddling or if it’s best to head back to the shore. If the water level in your kayak is manageable and doesn’t pose a risk, you can proceed with the process.
Step 2: Use A Bilge Pump Or Sponge
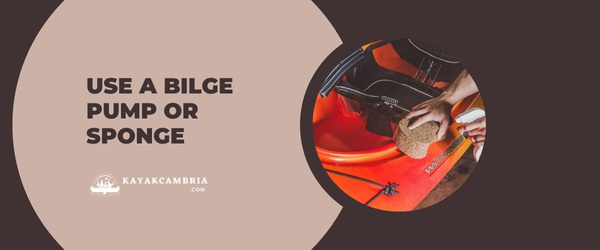
A bilge pump is a handy tool that can effectively remove water from your kayak while you’re still in it. Keep your balance while leaning slightly to one side, pumping out the water without tipping over. If you don’t have a bilge pump, you can use a sponge or a small container to scoop out water over the side of your kayak. Make sure to do this method with caution to avoid unbalancing your kayak.
Step 3: Invest In A Pump-Assisted Skeg System [Optional]
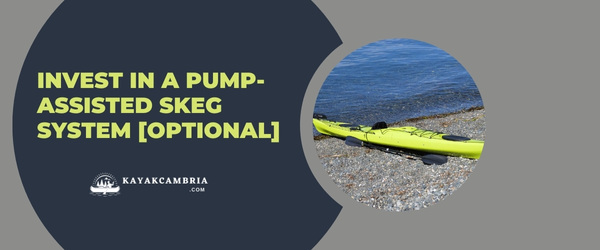
To make draining your kayak even more efficient, consider investing in a pump-assisted skeg system. These systems have a built-in pump that connects to the skeg and channels water out of your vessel as you paddle. This is particularly useful in sit-in kayaks, where water can accumulate with every paddle stroke.
Step 4: Maintain Balance And Paddle Carefully
While draining water when you’re in the kayak, it’s crucial to maintain your balance to avoid any accidents. Paddle smoothly and avoid sudden movements that could cause water to enter your cockpit again.
Step 5: Remember To Regularly Check And Drain Water

Lastly, remember to regularly check for water in your kayak and drain it when necessary. Don’t let water levels become too high, as this can affect the stability and performance of your kayak.
Draining water from your kayak when you’re still inside it can be challenging, but with the right tools and techniques, you can stay safe and dry on the water. Make sure to practice this skill and always keep a bilge pump or sponge within reach for emergencies.
Frequently Asked Questions
1. How often should I drain my kayak?
It depends on your paddling conditions and activity. Ideally, you should drain your kayak whenever it accumulates a significant amount of water inside. You should also drain it before and after storage, especially if it’s exposed to the elements.
2. Can water damage my kayak if I don’t drain it?
Yes, water can cause damage to certain types of kayaks and their components, especially if they are made of materials susceptible to water damage, such as wood or untreated aluminum. Over time, standing water inside your kayak can lead to mold, mildew, and fungal growth. Additionally, waterlogged kayaks can become heavy and challenging to navigate on the water, leading to reduced performance and stability.
3. What should I do if my kayak keeps filling with water, even after draining it?
If your kayak continues to accumulate water inside despite draining and drying it, you may have a leak or damage in the hull or other areas of the kayak. Check for any visible signs of damage and make the necessary repairs or replacements. You may need to consult a professional for serious repairs or consider purchasing a new kayak if the damage is beyond repair.
4. Can I drain my kayak while I’m still in it?
In some situations, you can drain your kayak without getting out of it. You can use a bilge pump or a sponge to scoop out water from the cockpit while you’re still seated in the kayak. However, this method may not be as effective in removing all the water as the mentioned draining techniques earlier in the article, so it is recommended to properly drain the kayak when possible.
5. How can I prevent my kayak from filling up with water in the first place?
To minimize the amount of water getting inside your kayak, you should consider the following preventative measures:
1. Seal storage hatches and cockpit covers properly to reduce water ingress.
2. Regularly check for and fix any leaks or damage to the kayak.
3. Use a spray skirt to minimize water entering the cockpit while paddling.
4. Learn proper paddling techniques and adopt safe practices to reduce the risk of capsizing.
Mastering these preventative measures, along with knowing how to drain your kayak expertly, will ensure you stay safe and dry on your paddling adventures.
Conclusion
The process of draining a kayak depends on the type of kayak you have – whether it’s a sit-on-top, sit-in or inflatable. Always remember the importance of draining your kayak for your safety and optimal performance on the water.
By following the steps provided and implementing preventative measures, you can ensure your paddling experience remains enjoyable and worry-free. Moreover, mastering these techniques will make you feel more confident when faced with the unexpected challenges the water may throw your way.
Happy and safe kayaking!