

Loading a kayak on a J rack by myself has always been an exciting challenge. It’s a test of my strength, skill, and ability to work efficiently with my gear. Let’s tackle the process of how to load a kayak on a J rack by yourself so you can do it easily and safely, while also taking care of your precious kayak and vehicle.
The first step in the process is to prepare your kayak and your vehicle. Position your J rack correctly and secure it to your vehicle’s roof rack. Make sure it’s sturdy and ready to hold the weight of your kayak. I always double-check my straps and make sure they’re in place before moving on to the next step – getting the kayak into position.
Now, to lift and position the kayak on the J rack all by myself, I start by placing the kayak on the ground, close to the side of my vehicle. I’ll grab it by the cockpit lip or handles and lean it against the vehicle at an angle, with the bottom facing the J rack. This way, I can raise the bow of the kayak, place it on one of the J rack’s arms, and slide it in place on both arms, adjusting the position as needed. Once it’s properly positioned, all that’s left is to strap it down and make sure it’s secure before hitting the road.
What is a J Rack for a Kayak?

As a kayak enthusiast, I know the importance of having a reliable and efficient way to transport my kayak when heading for water adventures. One of the best solutions I’ve found is using a J Rack to load and carry my kayak on my vehicle. But what exactly is a J Rack?
A J Rack, or J-Cradle, is a type of kayak transportation system that is designed to securely hold the kayak in an upright position on the roof of a vehicle. Essentially, it is shaped like the letter “J,” hence the name. The purpose of a J Rack is not only to safely transport your kayak but also to save space on the roof of your car, allowing for more room for other items or even additional kayaks.
Pros and Cons of using a J rack
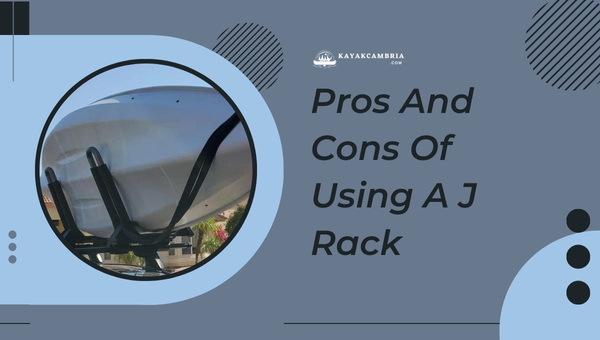
Like any kayak transportation method, there are pros and cons to using a J Rack. Here, I have listed my own observations and experiences with J Racks to help you decide if this method is right for you.
Pros
- Space-efficient: Because the kayaks are stored upright, J Racks make efficient use of the available roof space on your vehicle. This allows for the ability to carry multiple kayaks or to leave room for other gear or a roof-box.
- Stability and Security: The J Rack provides excellent support for the kayak, holding it firmly in place during transport. The secure mounting system and the use of straps ensure that your kayak remains in position, even on long trips or rough roads.
- Versatility: J Racks can accommodate various types and sizes of kayaks, including sea, recreational, and whitewater kayaks. As someone who enjoys different types of kayaking activities, this versatility has been very beneficial for me.
- Easy Loading and Unloading: Thanks to the design and angle of the J Rack, it is generally easier to load and unload your kayak in comparison to other types of carriers. With some practice, one can master the technique of loading and unloading the kayak single-handedly.
- Protection for your Kayak: J Racks often come with padding or rubberized contact points to protect the hull of your kayak from scratches or dents during transportation.
Cons
- Additional Height: Since the kayak is stored on its side, a J Rack will add extra height to your vehicle. This can be a concern when navigating through low clearance areas, such as parking garages, tunnels, or covered driveways.
- Wind Resistance: As the kayak is stored upright, it can catch more wind during transport, which can impact fuel efficiency and vehicle handling. However, the impact is usually not significant if the straps are tightened properly.
- Cost: In comparison to other kayak transportation solutions, such as foam blocks or simple crossbars, J Racks can be more expensive. Nonetheless, investing in a quality J Rack is worth the added cost for many due to its consistent performance and long-term durability.
- Compatibility Issues: Some J Racks may not be compatible with certain vehicle roof rack systems or bars. It is essential to research and ensure compatibility with your specific roof rack setup before purchasing a J Rack.
While there are some drawbacks to using a J Rack, I personally believe its advantages far outweigh its downsides. As long as you choose a compatible J Rack for your vehicle, it remains one of the most secure, versatile, and space-efficient ways to transport your beloved kayak to your favorite paddling destinations.
J Cradle Weight Limits

Before we dive into the process of loading a kayak onto a J Rack by yourself, it’s important to understand the weight limits associated with this type of kayak transportation system. In order to safely load and transport your kayak, you must ensure your J Cradle can handle the weight of your boat.
The recommended weight limits for J Cradles can vary depending on the specific make and model, as well as the vehicle it’s attached to. Generally, J Racks are capable of supporting kayaks weighing up to 75 to 100 pounds. It’s essential to consult the manufacturer’s guidelines to accurately determine the weight limit for your specific J Rack.
Additionally, don’t forget to evaluate your vehicle’s roof weight limit, which should be mentioned in your vehicle’s owner’s manual. It’s crucial to stay within your vehicle’s roof weight capacity to avoid damaging your roof, which can lead to costly repairs.
By understanding the weight limits of both your J Rack and vehicle, you’ll be better prepared to load and transport your kayak safely and securely.
Assessing Your Kayak and J-Rack
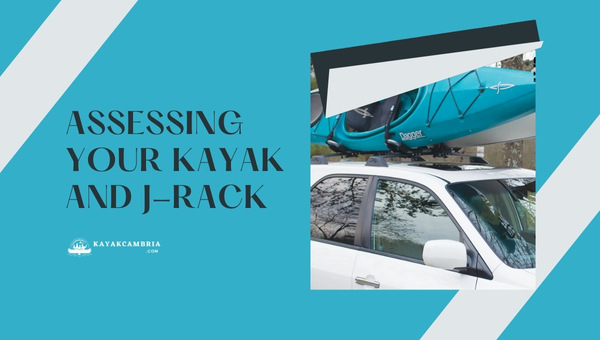
It’s crucial to assess both your kayak and the J-rack you’re planning to use. This step will help ensure a seamless loading experience as well as protect your kayak from any potential damage.
Let’s first evaluate your kayak. Here are the key factors to consider:
- Weight: Knowing the weight of your kayak is essential, as J-racks come with different weight capacities. Lighter kayaks are generally easier to load by yourself, while heavier ones may require a bit more effort or additional equipment.
- Size: Along with weight, the length and width of your kayak play a crucial role in ensuring it fits properly on the J-rack. Be sure to measure your kayak accurately and compare it with the specifications of your J-rack.
- Hull shape: The design of your kayak’s hull might affect how it sits on the J-rack. For instance, some kayaks have a flat hull, while others might be more rounded or V-shaped.
Now let’s examine the J-rack. Here’s what to keep in mind:
- Weight capacity: Check the manufacturer’s guidelines for the maximum weight your J-rack can handle. Ensure that it’s suitable for your kayak before purchasing or attempting to use it.
- Attachment system: J-racks come with various attachment systems, such as straps, ropes, or buckles. Familiarize yourself with the specific attachment system of your J-rack and verify that it’ll securely hold your kayak in place.
- Compatibility with your vehicle: Not all J-racks will be compatible with every type of vehicle. Check if your car’s roof rack system is suitable for your chosen J-rack before making a purchase or attempting installation.
With these factors in mind, you’ll be better prepared to tackle the task of loading your kayak on a J-rack all by yourself. So let’s get started!
Gathering the Necessary Equipment
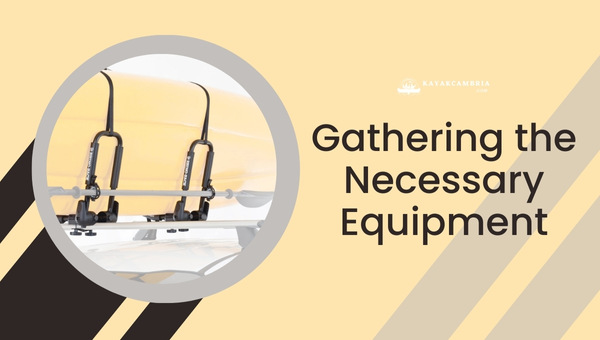
Having the right tools and supplies at your disposal will not only make the process easier but also ensure the safety of both you and your kayak during transportation. Let’s look at each required item and its purpose.
The first item you’ll need is a J Rack. J Racks are designed to hold kayaks securely on top of a vehicle during transportation. They’re typically made from metal or heavy-duty plastic and come in various sizes, making it easy to find one compatible with your vehicle’s roof and kayak dimensions.
Next up, you’ll want to have a roof rack installed on your car. This is the foundation on which the J Rack will be mounted. Make sure your roof rack is sturdy and compatible with the J Rack you’ve chosen.
When loading a kayak by yourself, it’s crucial to have a set of tie-down straps. These straps will secure your kayak to the J Rack and roof rack, ensuring it stays in place during transit. You may also want to consider using a bow and stern tie-down for added security – these attach to the front and rear of the kayak and secure it to your vehicle’s bumpers.
Using a kayak cart or trolley can be a game-changer if you need help moving your kayak from the storage area to the loading spot. They make it easier to maneuver the kayak without straining your back.
To protect your kayak from scratches and damages while loading, consider using kayak carrier pads or foam blocks. Positioning them between the J Rack and the kayak will give your kayak some cushioning.
Additionally, it’s always a good idea to keep an extension ladder at hand. Ladders can make it less challenging to reach up and secure your kayak to the J Rack, especially if you drive a taller vehicle.
Here’s a summary of the necessary equipment:
- J Rack
- Roof Rack
- Tie-down Straps
- Bow and Stern Tie-down (optional)
- Kayak Cart or Trolley (optional)
- Kayak Carrier Pads or Foam Blocks (optional)
- Extension Ladder (optional)
With this equipment gathered, you’ll be prepared to load a kayak on a J Rack by yourself safely and efficiently.
Positioning the Kayak for Easy Loading
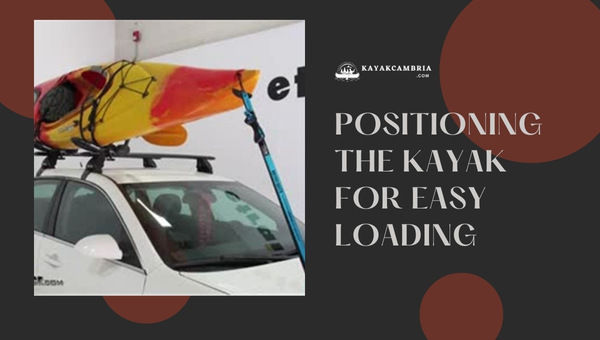
One essential aspect often overlooked is correctly positioning the kayak for easy loading. Here are some steps and tips to ensure a smooth kayak-loading experience.
Firstly, it’s important to inspect the J rack. Make sure it’s securely fastened to your vehicle’s roof rack system and that there are no signs of damage or excessive wear. Ensure the J cradles are facing outwards and have adequate padding to protect your kayak during transportation.
Once you’ve checked the J rack, let’s prepare the kayak for loading:
- Place the kayak on the ground, parallel to your vehicle, approximately 2-3 feet away from it. This will give you enough space to lift the kayak and maneuver it onto the J rack.
- Adjust the kayak so its stern (the back end) is closest to the J rack. Loading the kayak from the back can save a significant amount of effort.
- To make lifting easier, use a small step stool or any sturdy, elevated platform slightly taller than your vehicle’s side rail. This addition will provide extra support and leverage during the loading process.
Now that your kayak is in position, here are a few tips to ensure a successful load:
- Use proper lifting techniques: Bend your knees when lifting the kayak, rather than bending at the waist, to avoid unnecessary strain on your back.
- Load the kayak at an angle: When lifting the kayak onto the J rack, position it at a 45-degree angle to the rack. This angle helps the kayak slide into the cradle more easily.
- Use a loading assist accessory: Various devices can assist in loading a kayak onto J racks. Consider using a kayak loader, roller, or other loading aid to make the task easier and minimize the risk of injury or damage to your vehicle.
- Secure the kayak: Once the kayak is on the J rack, double-check that it’s resting securely in the cradle. Attach the straps provided and tighten them until snug but not overly tight, to avoid causing damage to your kayak.
By properly positioning your kayak for easy loading, you’ll be well on your way to mastering the process of loading a kayak on a J rack by yourself. With practice and patience, it’ll become second nature in no time.
Lifting and Sliding the Kayak onto the J-Rack

When it comes to how to load a kayak on a J rack by yourself, lifting and sliding the kayak onto the J-rack can be a bit challenging but completely doable with some practice. Here, I’ll provide you with some insider tips to make this process easier and secure your kayak right where it needs to be.
First, prepare your J-rack by adjusting it to the correct angle and ensuring that all straps are ready for use. This preparation will help you to avoid any awkward adjustments while you’re trying to hold the kayak. Also, make sure your vehicle is parked on a leveled surface for added safety.
Now, let’s discuss the actual lifting process. The general process is to lift the kayak from its side, hoist it onto your shoulder, and then slide it onto the J-rack. To make lifting easier, follow these steps:
- Stand on the side of the kayak, opposite the J-rack.
- Bend your knees and keep your back straight to avoid any injuries.
- Grab the closer edge of the kayak with both hands.
- Use your legs to lift the kayak up, keeping it close to your body.
- Allow the kayak to rest on your shoulder, and maintain a firm grip on it.
At this point, you’re ready to slide your kayak onto the J-rack. Here’s how:
- Approach your vehicle and align the kayak with the J-rack.
- Use one hand to maintain your grip on the kayak, while the other hand supports its weight.
- Carefully lift the kayak onto the J-rack, starting with the back end.
- Slowly slide the kayak onto the rack, ensuring that it is well-positioned and secure.
- Double-check the positioning of the kayak to make sure it is sitting properly on the J-rack.
Once your kayak is successfully placed on the J-rack, you’ll need to secure it with straps. Follow these steps for a safe and secure fit:
- Take the straps provided with the J-rack and throw them over the kayak.
- Loop the straps around the J-rack bars, making sure they are not twisted.
- Pull the straps tight and buckle them securely, ensuring the kayak is snugly fastened.
- Double-check the tightness of the straps, and readjust if necessary.
Securing the Kayak to the J-Rack

Once you’ve got your kayak on the J-rack, it’s crucial to secure it properly. I’ll walk you through the steps on how to secure the Kayak to the j rack and fasten it to ensure it doesn’t budge during transportation. Let’s begin.
First things first, it’s necessary to have quality straps or ropes to secure the kayak. You’ll need a minimum of two straps, though I recommend using four to provide extra stability. Ensure the straps are in good condition, free of any damages that would compromise their strength.
To start securing the kayak, drape the strap over the boat’s hull and make sure it sits evenly on both sides. Then, wrap the strap around the J-rack and kayak, passing it under the crossbar on your vehicle. Bring both ends of the strap together and pull them through the buckle, tightening the strap until the kayak is firmly in place. Repeat this process with the remaining straps on the other side of the kayak.
If you’re using additional straps or ropes, tie them to the kayak’s bow and stern for extra security. Bow and stern lines are helpful in preventing the kayak from shifting during transportation, ensuring a safe and stable journey.
Here’s a summary of the steps to follow:
- Check the straps for the good condition
- Drape the strap over the kayak’s hull
- Wrap the strap around the J-rack and kayak
- Pass the strap under the vehicle’s crossbar
- Tighten the strap in the buckle
- Add bow and stern lines if necessary
To help remember these steps, let’s list the essential gear:
- Quality straps or ropes: 2 to 4 straps
- Bow and stern lines: optional, but recommended
Finally, double-check that all straps are secure and that the kayak is firmly in place before hitting the road. Adjust the straps if needed to reduce any slack. After all, the goal is to eliminate the risk of your kayak falling off during transport, ensuring that it arrives safely at your destination.
How to Protect Your Back While Carrying a Kayak?
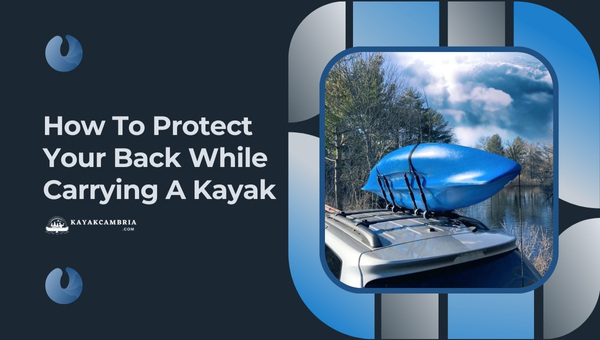
I absolutely love kayaking, but I have to admit, carrying a sizable kayak can be a bit of a strain on my back. Over time, I have learned some key techniques to protect my back while handling and carrying my kayak. Here are some tips that have worked well for me:
- Use a proper lifting technique: Lifting a heavy object with the wrong technique can put an unnecessary strain on your back, leading to long-term injury. To avoid this, always bend at your knees, not your waist, when lifting a kayak. Keep your back straight and core engaged throughout the process, while using your legs to provide the main lifting power.
- Invest in a kayak cart: A kayak cart is a fantastic way to save your back, making it much easier to transport your kayak over longer distances. Simply strap your kayak onto the cart and let the wheels do the work. You’ll save your back from carrying the full weight of the kayak.
- Carry with a partner: It’s true that this article is about loading your kayak on a J Rack by yourself; however, it’s worth mentioning that when possible, carrying a kayak with a partner can significantly reduce the strain on your back. Divide this task by placing one person at each end of the kayak, lifting together, and coordinating your movements.
- Use your shoulder: If you have to carry the kayak alone, there’s an alternative “shoulder-carry” technique that can save your back. This method involves placing the kayak on its side, lifting one end, and sliding it onto your shoulder. You will be carrying the weight on your shoulder instead of your back, which can offer some relief.
- Build up strength: Kayaking certainly requires some physical strength. It’s essential to build up core and back muscles through regular exercise and stretching. Focus on exercises that strengthen the back muscles, core, and legs to help support your body while carrying a kayak.
- Utilize lifting devices: There are many lifting devices, such as hoists and load-assist systems, that can ease the process of loading a kayak onto your vehicle, lessening the weight you need to carry. Some popular models include the Thule Hullavator Pro and the Malone SeaWing Kayak Loader.
Remember that it’s crucial to listen to your body and use proper techniques to prevent injury. With these tips in mind, you can focus on enjoying your time on the water, knowing that you’ve taken care of your back both on and off the kayak.
Other Kayak Rack Types (2023)
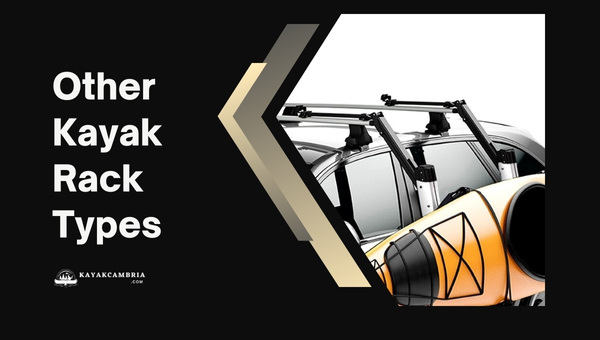
J Racks are very popular and efficient when it comes to transporting kayaks, but they’re not the only options available. Knowing about various kayak rack types allows you to make an informed choice that suits your specific needs and preferences. Here are some other kayak rack types to consider:
- Saddle Racks: Saddle racks consist of four padded supports that evenly distribute the weight of the kayak. The simplest version is a set of foam pads that you can strap to the roof crossbars. However, there are advanced models with more padding, flexibility, and better securing mechanisms. This type of rack lets you transport the kayak right-side up and provides great support, perfect for long-distance trips.
- Stackers: These vertical racks are great for those who transport multiple kayaks on a regular basis. Stackers allow you to stack the kayaks on their side, one next to the other. This helps free up roof space and simplifies the loading process. Stackers are more space-efficient when compared to J Racks, especially if you often carry more than one kayak.
- Roller Racks: Roller racks come with integrated rollers that make the loading process much more manageable. The kayak is first placed onto the rollers at the rear of the vehicle, and then easily pushed forward into its secured position on the roof. This is a great choice if you have a larger or heavier kayak, or simply want an easier loading process.
- Temporary Padding: For occasional kayakers or those on a budget, temporary padding can be an effective solution. Foam blocks or pool noodles can be placed on your vehicle’s roof, providing a cushion for the kayak. Then, just strap down the kayak using ratchet straps or cam straps, securing it tightly in place. While not the most elegant solution, this method can work if you don’t have the budget or space for more advanced rack systems.
- Hitch Mount: Some kayakers prefer a hitch-mounted rack that attaches to the rear of a vehicle, particularly if rooftop loading seems daunting or inaccessible. While this is mostly used for bikes, some designs can accommodate kayaks as well. However, be sure to check the weight limits and compatibility with your vehicle.
Ultimately, the best kayak rack for you depends on factors such as your vehicle, the size, and number of your kayaks, how often you transport them, and your personal preferences.
Conclusion: Loading Your Kayak with Confidence
I’ve covered the steps and techniques on how to load a kayak on a J rack by yourself, and I trust that this information will empower you to load your kayak with confidence. Here’s a quick recap of the main points:
- Preparing and positioning the kayak before loading
- Using helpful gear like straps and a car towel
- Executing proper lifting techniques to avoid injury
- Utilizing the J rack for secure placement of your kayak
- Adjusting and tightening straps to ensure safe transportation
By mastering the process of loading a kayak onto a J rack by yourself, you’ll gain the freedom to embark on solo adventures. Practice these steps, take the necessary precautions, and soon enough, you’ll find that handling your kayak is as enjoyable as the kayaking itself. Remember, the key to success lies in preparation, proper technique, and safety. Keep these tips in mind, and you’ll be well on your way to confidently loading your kayak on a J rack without needing any assistance. Safe and happy paddling!