

As a passionate kayak angler, I know firsthand how valuable technology can be in enhancing our success on the water. One such essential tool is the fish finder with its backbone, the transducer. The transducer serves as the heart of the fish finder, converting electrical energy into sound waves and providing crucial information about the underwater world, including fish location, structures, and water depth.
For those unfamiliar with the term, a transducer is a device that emits sonar waves that help us determine what lies beneath the surface of the water. Having accurate information at your fingertips can drastically improve your fishing experience and bring your kayak angling game to the next level.
However, making full use of this powerful tool requires proper installation. Mounting a transducer on a kayak may seem like a daunting task, but with the right guidance, it can be quite simple. An improperly mounted transducer can mean missing out on crucial details or getting unreliable readings, hindering your chances of a fruitful day on the water.
In this guide, I will walk you through the process of mounting a transducer on your kayak, step by step, from selecting the right transducer for your needs to finding the perfect spot for installation. With these tips and tricks, you’ll be well on your way to becoming one with your kayak and the underwater world beneath you. Let’s dive in and find out how to get the most out of your fish finder experience by mounting your transducer on a kayak effectively.
Best Ways To Mount A Kayak Transducer in 2026

In order to optimize the performance of your fish finder, it’s essential to select the best possible method for mounting the transducer on your kayak. In this section, I will discuss various mounting methods, as well as the main points you need to consider when making your decision.
1. Scupper Hole Mount

One of the most popular methods for mounting a transducer on a kayak is through the scupper holes. These are the openings in the bottom of the kayak that allow water to drain. You can use a specially designed mount or bracket that fits precisely into the scupper hole, providing a secure and stable platform for the transducer. An advantage of this method is that it enables the transducer to sit flush with the kayak’s bottom, ensuring direct contact with the water for accurate readings.
2. Inside The Hull Of The Kayak

Another common method is to attach the transducer inside the kayak’s hull. This setup protects the transducer from damage and keeps the transducer out of the way while paddling. However, this method does require some additional steps, like using a foam or silicone “bed” to couple the transducer to the hull. You also need to ensure that there are no air bubbles between the transducer and the hull, as these can interfere with the signal.
3. Magnetic Mount

For those who prefer not to drill any holes into their kayak, a magnetic mount is a viable option. This method involves attaching a strong magnet to the transducer, which can be easily positioned on the kayak’s outer hull. The strength of the magnet will keep the transducer securely in place while in use. To remove the transducer, simply slide it off the hull. This method is perfect for those who need a temporary or adjustable setup.
4. Trolling Motor Shaft Mount

If you have a trolling motor mounted on your kayak, you can attach the transducer to the motor shaft itself. This places the transducer close to the water and provides clear readings. However, this method is limited to specific models of trolling motors and transducers designed for this purpose.
5. Rudder Mount

Mounting the transducer on the kayak’s rudder is another option, particularly for those with skeg or rudder systems on their kayak. This provides a more discreet mounting location and keeps the transducer away from potential obstacles in the water. However, it may require some adjustments as the rudder moves while steering the kayak.
6. Outer Hull Of The Kayak

Lastly, you can mount the transducer directly onto the outer hull of the kayak using a mounting bracket. This method offers a permanent and easily accessible location for the transducer. However, be aware of potential interference from water turbulence or obstacles as the transducer is more exposed. In addition, drilling holes for mounting brackets can compromise the integrity of your kayak if not done properly.
Each of these methods offers its own unique advantages and disadvantages. Therefore, it’s crucial to consider factors like your kayak model, personal preferences, and the type of transducer being used when making your decision.
Selecting The Right Transducer For Your Kayak in 2026
Before you begin your quest to mount a transducer on your kayak, it’s essential to understand the different types of transducers. Doing so will help you identify the one that best fits your needs, and will make your fishing experience even more enjoyable.
Understanding Transducer Types: Thru-hull Vs. Transom
There are two main types of transducers that you need to familiarize yourself with:
- Thru-hull: These transducers are designed to be mounted through a hole in the hull, giving them direct contact with the water. They provide the most accurate readings but require drilling a hole in your kayak, which may not be ideal for everyone.
- Transom: These transducers are mounted on the transom of the kayak. They are simpler to install and do not require drilling a hole in the hull. However, they may have slightly less accurate readings due to potential air bubbles and obstructions along the hull.
Dedicated Kayak Transducers

Some transducers are specifically designed for kayaks, making them an excellent choice for kayak anglers. These transducers often come with mounting hardware designed to fit various kayak designs and can be relatively easy to install. It’s worth considering a dedicated kayak transducer if you are a frequent kayak angler who requires accurate readings and a hassle-free installation process.
Matching Transducer With Fish Finder Or GPS
When choosing the right transducer, it is important to ensure it is compatible with your fish finder or GPS system. Different brands and models may have specific transducer requirements, as they utilize varying frequencies and technologies. Be sure to check the specifications of your fish finder or GPS before purchasing a transducer to ensure compatibility.
Selecting the right transducer for your kayak is a crucial step in mounting a transducer on a kayak. Taking the time to research and understand the different types of transducers, considering a dedicated kayak transducer, and ensuring compatibility with your fish finder or GPS will help guarantee optimized performance and an enjoyable kayak angling experience.
Choosing The Perfect Mounting Location

When it comes to mounting your transducer on your kayak, the placement is crucial. In order to ensure the best signal transmission, you’ll need to consider a few factors when selecting the perfect mounting location. Remember, not all kayaks are the same, and your choice might depend on the design and structure of your vessel. Here’s a breakdown of how to make the right choice:
1. Accessibility

Consider mounting the transducer in a spot that provides easy access for maintenance or adjustments. This will save you time and effort down the road, especially if you need to troubleshoot any issues. A helpful hint is to make sure that you can easily reach the transducer while seated in your kayak. This will ensure you can adjust the device on the water for improved performance.
2. Cable Length
Usually, kayak transducer kits come with a specific cable length. You’ll want to make sure that the mounting location is within reach of the cable, allowing it to connect to your fish finder or GPS device without damage or excessive slack. Understanding the cable length will also dictate how you route the cable through your kayak’s hull for a cleaner look.
3. Interference And Stability

You’ll want to avoid mounting your transducer close to other electronics or devices that may cause signal interference or create turbulence in the water. Make sure there is sufficient space between your transducer and any other devices you may have onboard. In addition, a stable location is crucial for maintaining a consistent signal and accurate readings.
4. Structure Of The Kayak’s Hull

Take into account the curvature and depth of your kayak’s hull. A good mounting location should have minimal hull curvature, ensuring that the transducer can make direct contact with the water without being obstructed. Similarly, mounting the transducer on a deeper section of the hull will limit exposure to potential damage from impact or debris.
Pro Tip: Avoid mounting your transducer on the scupper holes of sit-on-top kayaks, as this presents the risk of damaging your transducer or causing water leakage into your kayak.
Taking the time to meticulously scout out and choose the perfect mounting location for your transducer will pay off in the long run, as you’ll be treated with accurate and consistent readings on your kayak fishing adventures.
Gathering The Necessary Tools And Materials
Before you begin the installation process, it’s essential to gather all the necessary tools and materials required to mount the transducer on your kayak. This will make the process run more smoothly and ensure you have everything you need on hand. Here is a list of common tools and materials you’ll need for this project:
Tools:
- Drill: To make holes for screws, if required in the mounting process.
- Sandpaper: For smoothing the surface of your kayak before attaching the mount.
- Measuring Tape: To precisely measure and mark the mounting location.
- Marking Pencil: For marking the required spots on your kayak.
- Waterproof Tape: To protect and secure the transducer cable along the kayak’s hull.
- Gloves, goggles, and mask: For personal protection during the installation process.
Materials:
- Plastic Mounting Bracket or Foam Block: Depending on your kayak and transducer type, you will need an appropriate mounting kit suitable for your needs. These kits usually include a plastic mounting bracket or a high-density foam block for mounting the transducer.
- Marine Sealant: This is essential for sealing any holes made during the installation process and securing the mounting bracket. Ensure that the marine sealant you choose is compatible with your kayak’s hull material.
- Zip Ties or Velcro Straps: To help organize and secure the transducer cable alongside your kayak during routing.
By having all these tools and materials ready, your transducer installation will undoubtedly be smoother and easier. Prepare yourself for the exciting world of kayak fishing with a fish finder that is properly installed and ready to guide you to the best fishing spots!
Preparing The Kayak For Transducer Installation
Before you begin installing the transducer on your kayak, it’s important to properly prepare the mounting location. Ensuring the area is clean and ready for mounting will create a solid foundation for a successful transducer installation.
Cleaning The Mounting Area

First and foremost, ensure the chosen mounting area is clean and free of any dirt or debris. Use a mild detergent and a soft cloth to gently scrub away any buildup. Be sure to rinse the area thoroughly with fresh water and let it dry completely.
Drilling Holes (if Necessary)

If your chosen mounting method requires drilling holes in your kayak, measure and mark the exact location of these holes using a measuring tape and a marking pencil. Double-check your measurements and alignment to avoid any errors. With protective gear on (such as gloves, goggles, and a mask), use a drill with a suitable bit size to create the necessary holes. Make sure to take your time and be cautious while drilling.
Marking The Exact Location

After preparing the area by cleaning and creating any required holes, mark the exact location where the transducer will be mounted. This will help to ensure a precise installation when securing the mount in place. Use a marking pencil or tape to create a clear visual guide for the installation process. If necessary, double-check and adjust your markings for accuracy.
Installing The Transducer Mount
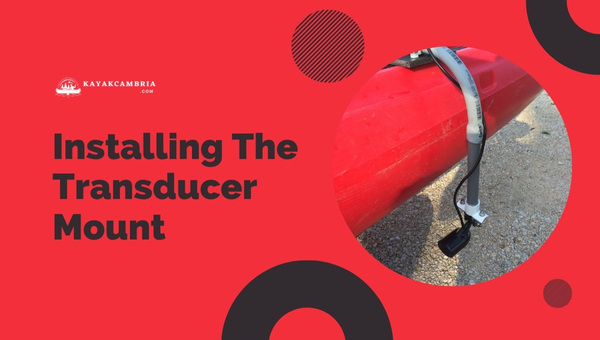
Before getting started with the installation process, it’s important to gather all your essential tools. You’ll need a drill, sandpaper, marine sealant, waterproof tape, measuring tape, and a marking pencil.
Once you have all your tools ready, follow the step-by-step instructions below to properly set up the transducer mount.
Step 1: Align The Mounting Bracket

Hold the transducer mounting bracket or foam block against the chosen mounting location. In case you’re using a scupper hole mount, make sure to check its stability and alignment. Ensure that the transducer will have adequate space and won’t be obstructed when in use.
Step 2: Mark Drill Holes
With the mounting bracket in position, use your marking pencil to mark the spots where you’ll need to drill holes for securing the mount. If drilling holes is not required, use the marine sealant to attach the foam block to the hull.
Step 3: Drill The Holes

Drill the holes that you marked in step 2. Make sure to use a drill bit that matches the size of the screws or bolts you’ll be using to secure the mount. It’s essential to wear safety goggles and gloves during this step.
Step 4: Apply Marine Sealant
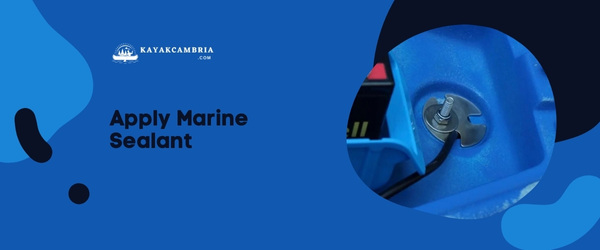
To prevent water leakage, apply a generous amount of marine sealant to the base of the mounting bracket or the foam block before attaching it to the hull. The marine sealant will also help in securing the mount firmly in place.
Step 5: Attach The Mount And Secure
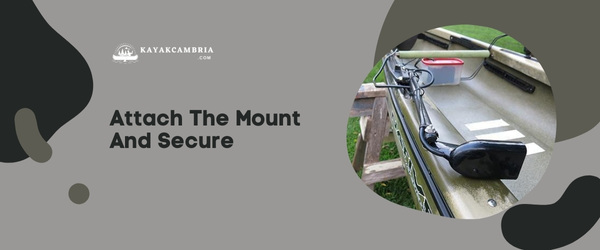
Press the mounting bracket or foam block onto the hull so that the drill holes align. Screw the mounting bracket to the hull using waterproof screws or bolts, ensuring the mount is tight and stable. For foam blocks, the marine sealant should hold it securely in place.
Step 6: Allow Sealant To Cure

Let the marine sealant cure according to the manufacturer’s instructions before moving on to the next step. This will ensure a proper seal and prevent water leakage in your kayak.
With the transducer mount now installed, you are ready to attach your transducer and route the cable to the fish finder. Patience and attention to detail will pay off when you finally hit the water, armed with the knowledge and tools to locate those prized catches efficiently.
Attaching The Transducer To The Mount
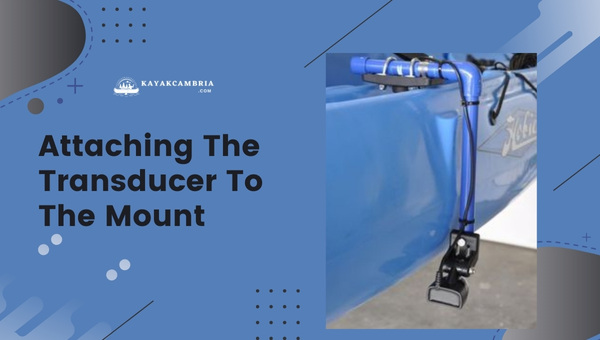
Once you have successfully installed the transducer mount, it’s time to move on to the next step – attaching the transducer itself. This process might differ slightly depending on the type of mount and transducer used. However, the basic principles remain the same. Follow these simple steps to ensure proper alignment and attachment of the transducer to the mount:
Step 1: Align The Transducer With The Mount

Begin by aligning the bottom of the transducer with the mount. Make sure it sits evenly and securely on the bracket or foam provided. Ensure the connection point between the transducer and mount is tight enough to prevent any unwanted movement or wobbling.
It is essential that the transducer sits flush against the mounting surface. An improperly seated transducer may result in inaccurate or incomplete readings.
Step 2: Connect The Transducer Cable To The Mount (if applicable)
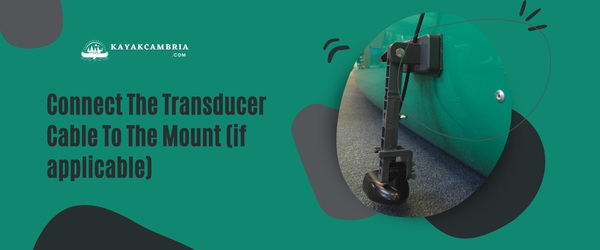
Some mounting brackets include designated areas or clamps for a more secure cable attachment. Carefully route the transducer cable through these sections and ensure it is firmly seated. This step helps reduce cable stress and eliminate any potential snags while you’re out on the water.
Step 3: Secure The Transducer In Place

Now that the transducer is properly aligned with the mount, the last step is securing it in place. Tighten any screws, bolts, or clamps associated with your mounting system. Make sure they’re tight enough to hold the transducer steady, but not so tight that it causes damage or strain to the components.
Before moving to the next step, give the transducer a gentle shake to ensure it is firmly attached to the mount and won’t move during your kayaking adventures. Once done, you’re ready to route the transducer cable to your fish finder.
By following these steps, you’ll ensure your transducer gets properly attached to the mount and yields accurate results when you’re out kayak fishing. With the transducer securely in place, you’re one step closer to optimizing your fish finder setup and enjoying the many benefits it can offer.
Routing The Transducer Cable To The Fish Finder
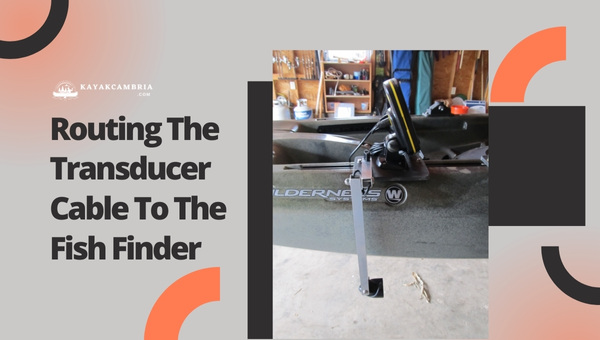
Now that you’ve successfully mounted your transducer, it’s time to route the transducer cable to connect it to your fish finder. Proper wire management is crucial for a clean and secure installation, as well as for ensuring the longevity of your equipment.
Step 1: Secure The Cable Along The Kayak’s Hull

Begin by organizing the transducer cable along the hull of the kayak. You’ll want to make sure there are no tangles or loops in the wire. Use cable clamps or zip ties to keep the cable secure and close to the hull, reducing any risk of getting caught on anything while you are on the water. Be sure to leave some slack near the transducer for easy adjustment if needed.
Step 2: Plan The Route Through The Kayak

To protect the cable, it’s essential to run it through the inside of the kayak. Determine the best entry point, typically a pre-existing hole in the hull, or drill one yourself if necessary. You’ll want to make sure this hole is above the waterline and not too close to the transducer mount. For added protection against water intrusion, use a rubber grommet or marine sealant around the entry point.
Step 3: Feed The Cable Through The Kayak

With your cable route planned, gently feed the transducer cable through the entry point. It can be helpful to use fish tape or a straightened coat hanger to guide the cable inside the kayak hull. Be mindful not to bend or crimp the cable too much in the process.
Step 4: Connect The Transducer Cable To The Fish Finder
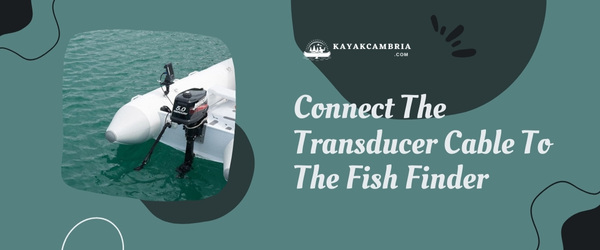
Now that your transducer cable is routed through the kayak, it’s time to connect it to your fish finder. Before plugging it in, make sure the fish finder is securely mounted to your kayak and that the cable can comfortably reach it without excessive slack. This is a great time to double-check your cable organization, making sure it’s clean and free from obstructions.
Step 5: Test Your Connection

With everything in place, go ahead and turn on your fish finder to ensure that it’s receiving a proper signal from the transducer. If you’re experiencing any issues, verify that the cable connections are secure and that the transducer is correctly mounted. Don’t be discouraged if you encounter any problems; fine-tuning your transducer setup is often a trial-and-error process.
By following these steps and carefully routing your transducer cable to the fish finder, you’ll have a tidy and functional setup that will enable you to get the most out of your kayak angling adventures.
Testing And Fine-Tuning The Transducer Setup

Once you have successfully installed your transducer on your kayak, it’s important to test and fine-tune the setup to achieve the most accurate readings possible.
Ensuring Accurate Readings

To get the best performance out of your fish finder and transducer, you’ll need to calibrate them properly. This usually involves:
- Initializing the fish finder and selecting the correct transducer type in the settings
- Ensuring that the fish finder is receiving a clear signal from the transducer
- Adjusting the sensitivity and other settings according to the manufacturer’s recommendations
Troubleshooting Common Issues

As with any electronics setup, there can be some issues that arise during this process. Some common problems faced by kayak anglers include:
- Signal interference: If you are experiencing interference in your readings, try adjusting the angle or location of your transducer. Make sure it is not too close to other electronics, or try switching off other devices temporarily to identify the cause.
- Angle adjustments: To get the most accurate readings, ensure that the transducer is properly aligned with the water’s surface. Depending on the transducer type and location, you may need to fine-tune the angle while in the water.
- Poor location: If you’re still experiencing issues after calibrating and adjusting the angle, it could be that the transducer location on the kayak is not ideal. In that case, you may need to consider relocating the transducer to a different area of the kayak, as previously mentioned in the mounting location section.
Fine-Tuning The Setup For Optimal Performance

Once you’ve addressed any issues, spend some time on the water to get a feel for your new transducer setup. Take note of the performance of your fish finder and transducer, and make any necessary adjustments to improve their function. You may need to:
- Experiment with different sensitivity settings and filters
- Update the software on your fish finder, if applicable
- Re-calibrate your transducer after making changes or adjustments
Having a well-tuned transducer setup is crucial for a successful kayak fishing experience, so taking the time to perfect your setup is well worth the effort.
Frequently Asked Questions
1. Do I need a special transducer for my kayak?
While there are kayak-specific transducers available, many standard through-hull or transom transducers will work just fine on kayaks. The key is to ensure compatibility with your fish finder or GPS system and check whether you need additional mounting accessories.
2. Can I use a transducer with any fish finder brand?
It’s essential to make sure your transducer is compatible with your fish finder or GPS system. Some fish finder brands have proprietary connectors and may require an adapter to work with specific transducers. Always consult the manufacturer’s documentation for compatibility information.
3. Can I install the transducer myself, or should I hire an expert?
Installing a transducer is generally a simple process, and many anglers choose to do it themselves. This guide provides the necessary steps for proper installation. However, if you are uncomfortable with any part of the process or unsure about your abilities, you can always seek help from a fellow angler or an experienced professional.
4. Will drilling holes in my kayak cause any damage or compromise its integrity?
Drilling holes may be necessary to mount the transducer, but it should not significantly weaken the kayak’s structure or compromise its integrity. Ensure you use the appropriate size drill bit, avoid critical points like scupper holes, and seal the penetrations with marine sealant to maintain waterproofing.
5. How important is selecting the right mounting location?
Selecting the ideal mounting location is crucial for optimal transducer performance. If mounted in the wrong location, you may experience signal interference, inaccurate readings, or unstable readings due to the kayak’s movement in the water. It’s best to test different locations and fine-tune the setup to achieve the best possible results.
6. How should I maintain my transducer to ensure its efficiency?
Maintenance of your transducer is relatively straightforward. Regularly check the attachment points, make sure cables are secure and not kinked, and clean the transducer face from any debris or growth. Additionally, storing the kayak and the fish finder properly when not in use can prolong the life of your transducer.
7. Is it safe to mount the transducer near other electronic devices on my kayak?
It’s best to avoid mounting the transducer too close to other electronic devices on your kayak to prevent potentially disruptive interference. Consult the respective manuals of your equipment for the recommended minimum distances between the transducer and other devices.
8. Can I use a transducer without a fish finder?
A transducer, on its own, does not transmit data directly to the angler. It requires a fish finder or a compatible GPS system to interpret and display the information. Most anglers use transducers in conjunction with a fish finder, as they work together to provide critical depth, temperature, and fish location data during your fishing trips.
Conclusion
A well-executed transducer installation can significantly enhance your kayak angling experience. By investing time and effort in mounting your transducer correctly, you can significantly improve the effectiveness and efficiency of your fish finder. This will ultimately lead to a more enjoyable and successful time on the water.
Keep in mind that every kayak and angler is unique, and it’s important to experiment and personalize your transducer setup to match your preferences and your kayak’s design. This may involve trying out different mounting locations or techniques until you find the perfect fit. Don’t hesitate to seek advice from fellow kayak anglers, as their experiences may provide valuable insights for your installation process.
Finally, it’s essential to remember that even the most sophisticated fish finder setup cannot replace patience, skill, and a love for the sport of kayak fishing. The main goal of using a transducer is to enhance your experience and make every trip more rewarding.
So, go ahead and set up your transducer with confidence and embark on countless fishing adventures with a reliable and efficient fish finder by your side. Remember to always refine your setup for optimal performance, and most importantly, enjoy every moment spent on the water!